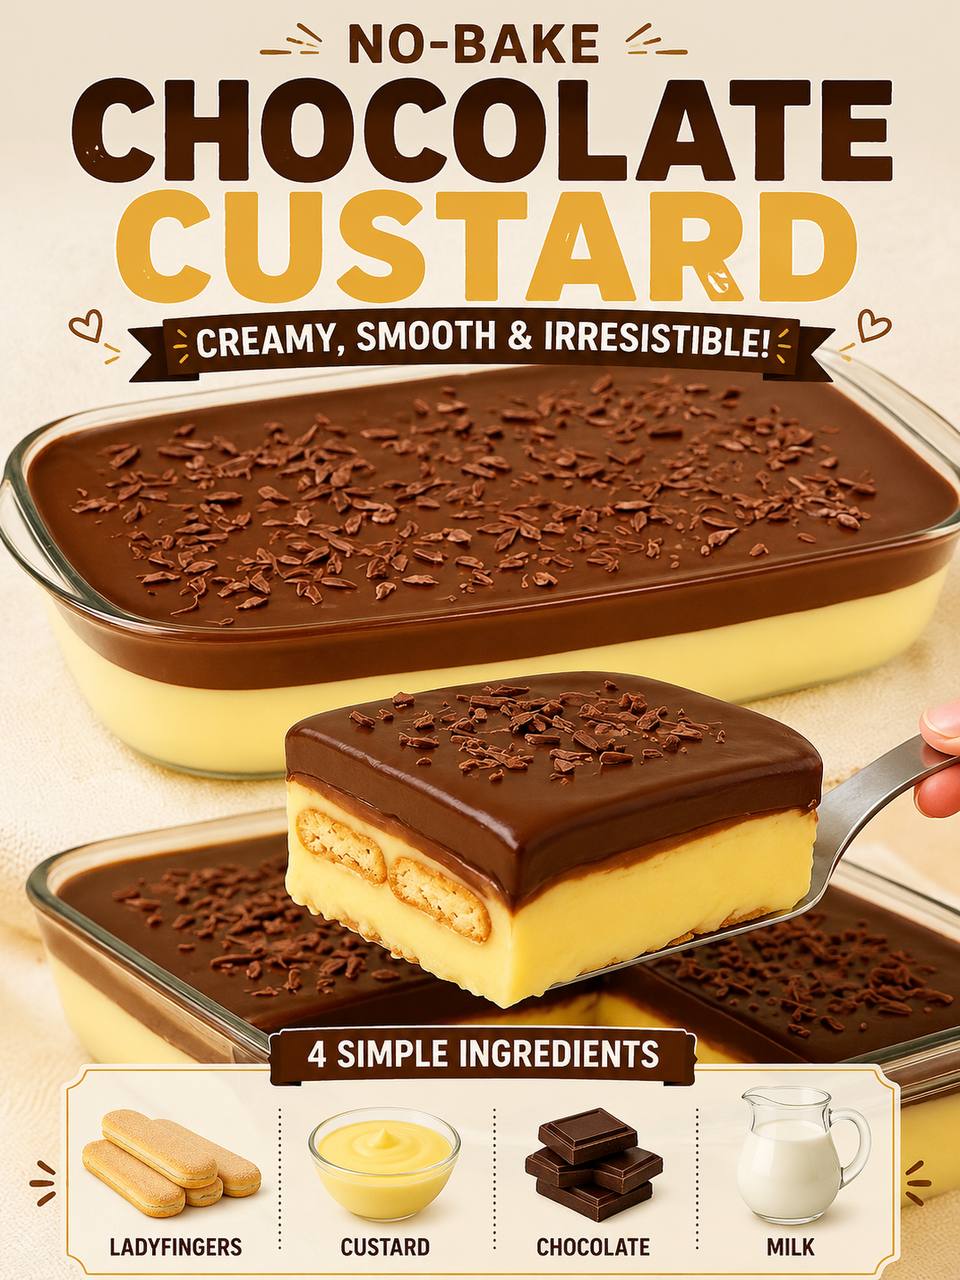
Instructions
-
Prepare the Custard Base: In a medium saucepan, whisk together 1 3/4 cups (approx. 420ml) of the whole milk, granulated sugar, and cornstarch (or custard powder) until smooth and no lumps remain. Ensure the cornstarch is fully dissolved before heating.
-
Place the saucepan over medium heat, stirring constantly with a whisk. Continue to cook, stirring, until the mixture thickens considerably and comes to a gentle boil. It should be thick enough to coat the back of a spoon. This process usually takes about 5-8 minutes.
-
Remove the custard from the heat and stir in the vanilla extract. Pour the custard into a shallow dish or bowl, cover the surface directly with plastic wrap to prevent a skin from forming, and allow it to cool slightly at room temperature while you prepare the ladyfingers.
-
Arrange the Ladyfingers: Choose your serving dish – a square 8×8 inch (20×20 cm) dish, a round pie dish, or individual ramekins work well. Arrange a single layer of ladyfingers at the bottom of the dish. You may need to break some ladyfingers to fit snugly and cover the entire base. There’s no need to dip them in anything; they will absorb moisture from the custard.
-
Assemble the First Custard Layer: Once the custard has cooled slightly (it should still be warm but not piping hot), remove the plastic wrap and give it a quick whisk to ensure it’s smooth. Carefully pour half of the warm custard over the layer of ladyfingers, ensuring they are fully covered. Gently tap the dish on the counter a few times to level the custard and release any air bubbles.
-
Chill to Set: Place the dish in the refrigerator for at least 30 minutes to allow the first custard layer to set slightly. This step is crucial for creating distinct layers and preventing the chocolate layer from sinking.
-
Prepare the Chocolate Topping: While the first layer is chilling, prepare your chocolate topping. In a heatproof bowl, combine the chopped dark chocolate, the remaining 1/4 cup (approx. 80ml) of whole milk, unsalted butter, and a pinch of salt.
-
You can melt this mixture using a double boiler method (placing the bowl over a saucepan of simmering water, ensuring the bottom of the bowl doesn’t touch the water) or carefully in the microwave. If using a microwave, heat in 30-second intervals, stirring well after each, until smooth and fully melted. Be careful not to overheat the chocolate.
-
Add the Second Custard Layer (Optional, for more custard): If you prefer a thicker custard experience, you can add another layer of ladyfingers and the remaining custard, chilling again briefly before the chocolate. However, for the classic “4 ingredient” look, proceed to the chocolate topping.
-
Pour the Chocolate Layer: Once the first custard layer is firm to the touch, remove the dish from the refrigerator. Pour the warm, melted chocolate mixture evenly over the set custard layer. Use an offset spatula or the back of a spoon to gently spread the chocolate to the edges, creating a smooth, glossy top.
-
Finishing Touches & Final Chilling: If desired, sprinkle some chocolate shavings or cocoa powder over the chocolate layer for garnish. This adds both visual appeal and an extra touch of chocolatey goodness.
-
Return the dessert to the refrigerator and chill for a minimum of 3-4 hours, or preferably overnight. This extended chilling time is essential for the custard and chocolate layers to fully set and for the ladyfingers to soften and absorb the flavors, resulting in a perfectly firm, sliceable, and delicious dessert.
-
Serve: Once fully chilled and set, slice and serve your irresistible No-Bake Chocolate Custard. Enjoy the creamy, smooth textures and rich chocolate flavor!
Cooking Tips and Variations
For the creamiest custard, always use full-fat milk. If you prefer a lighter version, you can certainly use low-fat milk, but the texture might be slightly less rich. When preparing the custard from powder, ensure you whisk continuously to prevent lumps and scorching the bottom of the pan. A silicone whisk is excellent for this. Don’t rush the thickening process; it needs to reach a gentle boil to activate the cornstarch and achieve the desired consistency.
To ensure distinct layers, the first custard layer must be adequately chilled until it is firm to the touch before adding the chocolate topping. If the custard is too warm or not set enough, the chocolate layer might sink or mix with the custard, resulting in a less defined appearance. When melting the chocolate for the topping, be gentle. Overheating chocolate can cause it to seize and become grainy. If using a microwave, stir frequently. For a truly glossy chocolate top, you can temper the chocolate, but for a simple no-bake recipe, careful melting is usually sufficient.
Ingredient Substitutions: Ladyfingers can be substituted with other crisp biscuits like digestive biscuits, shortbread, or even graham crackers. Crush them and mix with a little melted butter for a pressed crust if you prefer. You can also use different types of chocolate for the topping – milk chocolate for a sweeter, milder flavor, or a blend of dark and milk chocolate. For a more intense chocolate flavor, opt for a higher percentage dark chocolate. If you don’t have cornstarch, all-purpose flour can be used as a thickener, but cornstarch generally provides a smoother, more translucent finish.
Flavor Variations: Elevate your custard by adding other flavorings. A pinch of cinnamon or a dash of orange zest can complement the chocolate beautifully. For an adult version, a tablespoon of coffee liqueur or rum can be added to the chocolate topping. You can also infuse the milk for the custard with a vanilla bean pod or a few cardamom pods for a more complex aroma. A layer of fresh raspberries or sliced strawberries between the custard and chocolate can add a delightful tartness and freshness.
Presentation Ideas: This dessert looks fantastic in a large glass serving dish, showcasing the beautiful layers. For individual portions, assemble the custard in small ramekins, parfait glasses, or even small Mason jars. This makes serving easier and creates a charming presentation. Garnish with fresh berries, a dusting of cocoa powder through a stencil, or even a dollop of whipped cream just before serving. For a festive touch, add some edible gold flakes or colorful sprinkles.
Troubleshooting: If your custard turns out too thin, return it to the heat and cook, stirring, for a few more minutes until it thickens. If it becomes lumpy, you can pass it through a fine-mesh sieve or use an immersion blender to smooth it out. If your chocolate topping appears oily or separated, it might have been overheated. Try stirring in a teaspoon of hot milk or cream, one at a time, until it comes back together. The key to a successful no-bake dessert is patience, especially during the chilling stages.
Storage and Reheating
This No-Bake Chocolate Custard is best enjoyed chilled and fresh, ideally within 3-4 days of preparation. To store, cover the serving dish tightly with plastic wrap or aluminum foil to prevent the custard from absorbing odors from the refrigerator and to keep it from drying out. If you’ve made individual portions in ramekins or jars, cover each one individually. Proper sealing is key to maintaining its creamy texture and rich flavor.
It’s important to note that this dessert is not suitable for freezing. Freezing and then thawing custard can alter its smooth texture, causing it to become watery or grainy. The ladyfingers may also become soggy and lose their pleasant consistency. Therefore, it’s best to consume this dessert within the recommended refrigeration period.
As this is a chilled dessert, reheating is not recommended or necessary. The beauty of a no-bake custard lies in its cool, refreshing nature. Simply remove it from the refrigerator about 10-15 minutes before serving to allow the flavors to mellow slightly, though it’s perfectly delicious served straight from the fridge.
If you’ve made a large batch and anticipate not finishing it within the recommended timeframe, consider assembling smaller individual portions. This allows you to serve only what’s needed and keeps the remaining dessert perfectly fresh and untouched.
Frequently Asked Questions
Can I make this dessert ahead of time for a party?
Absolutely! This No-Bake Chocolate Custard is an excellent make-ahead dessert. In fact, it requires a minimum of 3-4 hours of chilling, but it’s even better when made the day before and allowed to chill overnight. This gives all the layers ample time to set properly and for the flavors to meld beautifully, resulting in a much more cohesive and delicious dessert for your guests.
What if my custard doesn’t thicken?
If your custard isn’t thickening, it’s likely due to insufficient cooking time or not enough heat. Return the saucepan to medium heat and continue whisking constantly. Ensure the mixture comes to a gentle boil and thickens enough to coat the back of a spoon. Cornstarch needs to reach a boiling temperature to activate its thickening properties. If after several minutes it’s still too thin, you can dissolve an additional teaspoon of cornstarch in a tablespoon of cold milk, then whisk this slurry into the warm custard and continue cooking until thickened.
Can I use instant pudding mix instead of making custard from scratch?
Yes, you can certainly use instant chocolate pudding mix as a shortcut for the custard layer. Simply prepare the instant pudding according to the package directions, typically using cold milk. Once prepared, you can layer it with the ladyfingers and then add your homemade chocolate topping. While it will still be delicious and convenient, keep in mind that the texture and flavor might differ slightly from a custard made from scratch with cornstarch or custard powder.