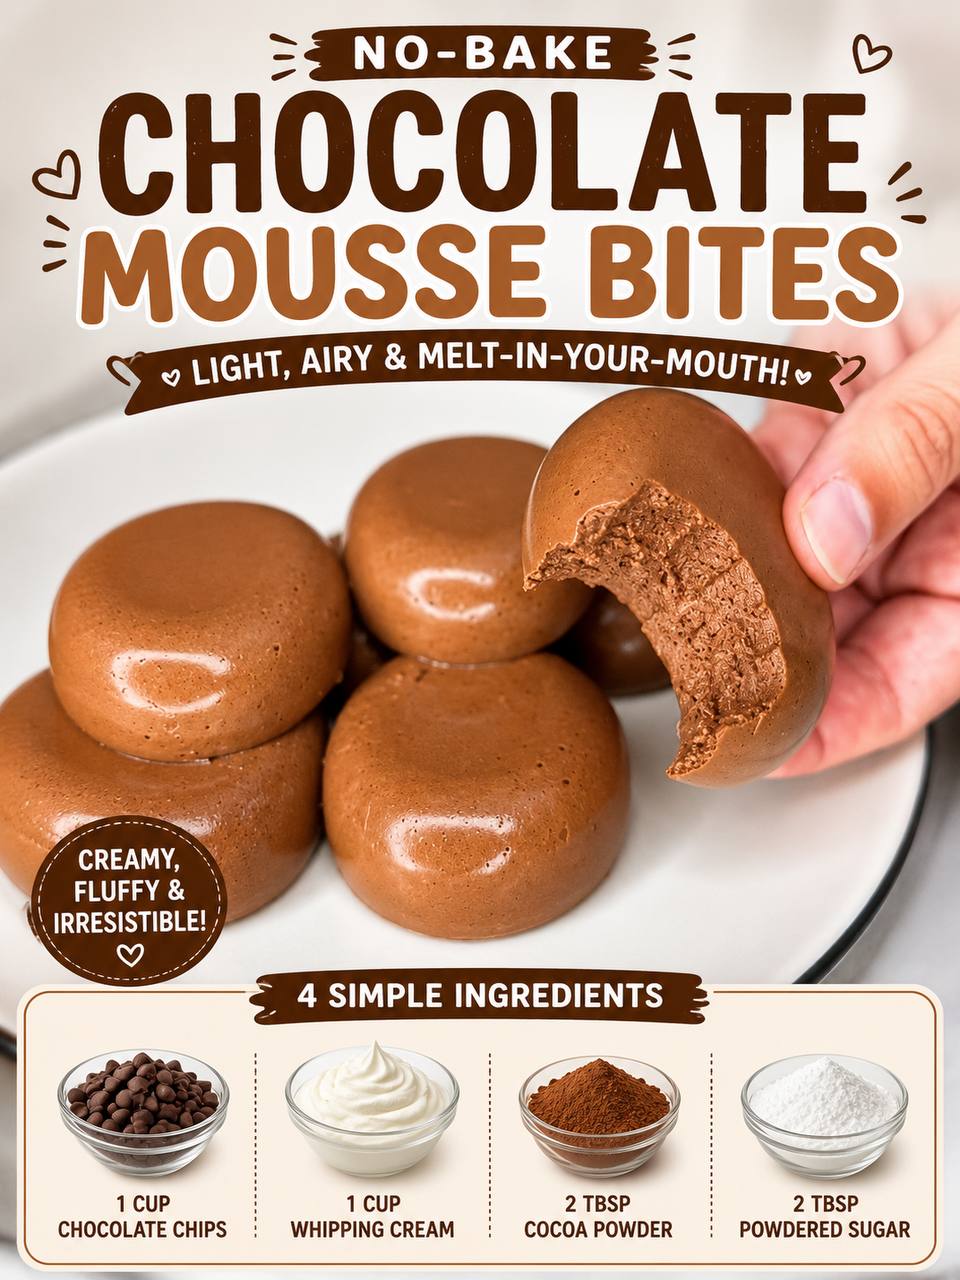
Instructions
- Begin by melting the chocolate chips. You can do this using a double boiler method: Place chocolate chips in a heatproof bowl set over a saucepan of simmering water, ensuring the bottom of the bowl does not touch the water. Stir occasionally until completely smooth and melted. Alternatively, use a microwave: Place chocolate chips in a microwave-safe bowl and microwave on high for 30-second intervals, stirring well after each interval, until fully melted and smooth. Be careful not to overheat. Set aside to cool slightly, but ensure it remains liquid.
- In a separate, very cold bowl (metal or glass bowls work best, and chilling them in the freezer for 10-15 minutes beforehand is ideal), pour the very cold heavy whipping cream. Using an electric mixer (handheld or stand mixer with a whisk attachment), beat the cream on medium-high speed until soft peaks form.
- Add the cocoa powder and powdered sugar to the whipped cream. Continue beating on medium-high speed until stiff peaks form. The cream should be thick and hold its shape. Be careful not to overbeat, or it will become grainy.
- Pour the slightly cooled, melted chocolate into the whipped cream mixture. Using a rubber spatula, gently fold the chocolate into the cream until just combined. The key here is to be gentle to maintain the airiness of the whipped cream, which gives the mousse its light texture. Do not overmix; a few streaks of chocolate are fine.
- Prepare your molds. Silicone molds are highly recommended for easy unmolding. You can use mini muffin molds, individual bite-sized molds, or even small shot glasses. If using silicone molds, there’s no need to grease them. If using other molds, a light spray of non-stick spray or a dusting of cocoa powder can help.
- Carefully spoon or pipe the mousse mixture into your chosen molds. If piping, use a pastry bag with a round tip for a neater finish. Fill each cavity evenly.
- Gently tap the molds on the counter a few times to release any air bubbles and help settle the mousse.
- Place the filled molds into the refrigerator and chill for at least 2-4 hours, or preferably overnight, until the mousse is completely set and firm. Adequate chilling time is crucial for the mousse bites to hold their shape and achieve the perfect texture.
- Once thoroughly chilled, carefully unmold the Chocolate Mousse Bites. For silicone molds, gently push from the bottom to pop them out.
- Serve immediately, perhaps with a dusting of extra cocoa powder, powdered sugar, or your favorite toppings. Enjoy your delightful, homemade Chocolate Mousse Bites!
Cooking Tips and Variations
For the absolute best Chocolate Mousse Bites, quality ingredients make a significant difference. Using a good brand of semi-sweet or dark chocolate chips will elevate the flavor profile considerably. Remember that the better the chocolate, the richer and more satisfying your mousse will be.
Achieving perfectly whipped cream is fundamental to the airy texture of your mousse. Always start with very cold heavy whipping cream and a very cold bowl and whisk attachment. Chilling your bowl in the freezer for 10-15 minutes before whipping can make a huge difference. Beat the cream until stiff peaks form, but be vigilant not to overbeat, as this can turn your cream grainy and cause it to separate. When folding the melted chocolate into the whipped cream, gentleness is key. Use a rubber spatula and fold in broad, circular motions from the bottom up, ensuring you don’t deflate the air you’ve worked so hard to incorporate. Overmixing will result in a denser, less airy mousse.
Chilling time is not just a suggestion; it’s essential! Allow your mousse bites to chill for at least 2-4 hours, or ideally overnight, to ensure they are fully set and firm. This allows the chocolate to properly solidify within the cream, giving the mousse its perfect, melt-in-your-mouth consistency. If you’re in a hurry, you can place them in the freezer for about an hour to speed up the setting process, but be careful not to completely freeze them.
Don’t have silicone molds? No problem! You can get creative with your shaping. Mini muffin liners are a great alternative; simply spoon the mousse into them and chill. You can also pipe the mousse directly into small decorative glasses, ramekins, or even espresso cups for an elegant individual serving that doesn’t require unmolding. For a rustic look, simply spoon the mousse into small bowls and chill.
Elevate your Chocolate Mousse Bites with a variety of toppings and flavor boosts. A simple dusting of extra cocoa powder or powdered sugar adds a professional touch. For a more decadent finish, sprinkle with chocolate shavings, a dollop of freshly whipped cream, or a few fresh berries like raspberries or strawberries. A tiny pinch of flaky sea salt sprinkled on top can enhance the chocolate flavor beautifully. For an extra layer of flavor, consider adding a splash of vanilla extract (1/2 teaspoon) or a pinch of espresso powder (1/4 teaspoon) to the melted chocolate before folding it in – these additions deepen the chocolate notes without overpowering them. You can also experiment with different types of chocolate, such as milk chocolate for a sweeter profile or a higher percentage dark chocolate for a more intense, bittersweet experience.
Storage and Reheating
These Chocolate Mousse Bites are best enjoyed fresh, but they store beautifully for a few days. To store, place the unmolded mousse bites in an airtight container. Arrange them in a single layer if possible, or separate layers with parchment paper to prevent them from sticking together. Store them in the refrigerator for up to 3-4 days. While they will remain delicious, the texture is at its peak within the first day or two. Freezing is not recommended as it can alter the delicate mousse texture upon thawing, making it grainy or watery.
These are a no-bake dessert, so reheating is not applicable. They are designed to be served chilled, directly from the refrigerator. If they have been out at room temperature for an extended period, it’s best to pop them back into the fridge for 15-20 minutes before serving to ensure they are perfectly firm and cool.
Frequently Asked Questions
Can I use a different type of chocolate?
Absolutely! While semi-sweet chocolate chips are a popular choice, you can experiment with dark chocolate (60-70% cocoa for a richer, less sweet bite) or even milk chocolate for a milder, sweeter flavor. White chocolate can also be used, but you might want to add a touch more cocoa powder for color or use white chocolate with a higher cocoa butter content for better setting.
My mousse didn’t set properly. What went wrong?
There are a few common culprits. The most likely reason is insufficient chilling time; ensure you’ve given it at least 2-4 hours, or preferably overnight, in the refrigerator. Another possibility is that the chocolate wasn’t completely melted or was too hot when folded into the whipped cream, causing the cream to deflate. Lastly, overmixing the mousse after folding in the chocolate can also lead to a less firm texture as it deflates the air from the whipped cream.
Can I make these ahead of time for a party?
Yes, these Chocolate Mousse Bites are an excellent make-ahead dessert! You can prepare them up to 2-3 days in advance and keep them stored in an airtight container in the refrigerator. This makes them perfect for entertaining, as you can have a delicious and elegant dessert ready to go without any last-minute stress.
How can I make these even more decadent?
To really amp up the decadence, consider adding a layer of raspberry coulis or a thin crust of crushed chocolate cookies to the bottom of your molds before adding the mousse. You could also drizzle a rich chocolate ganache over the top just before serving, or serve them with a side of boozy whipped cream (spiked with a touch of Kahlua or rum) for an adult twist.