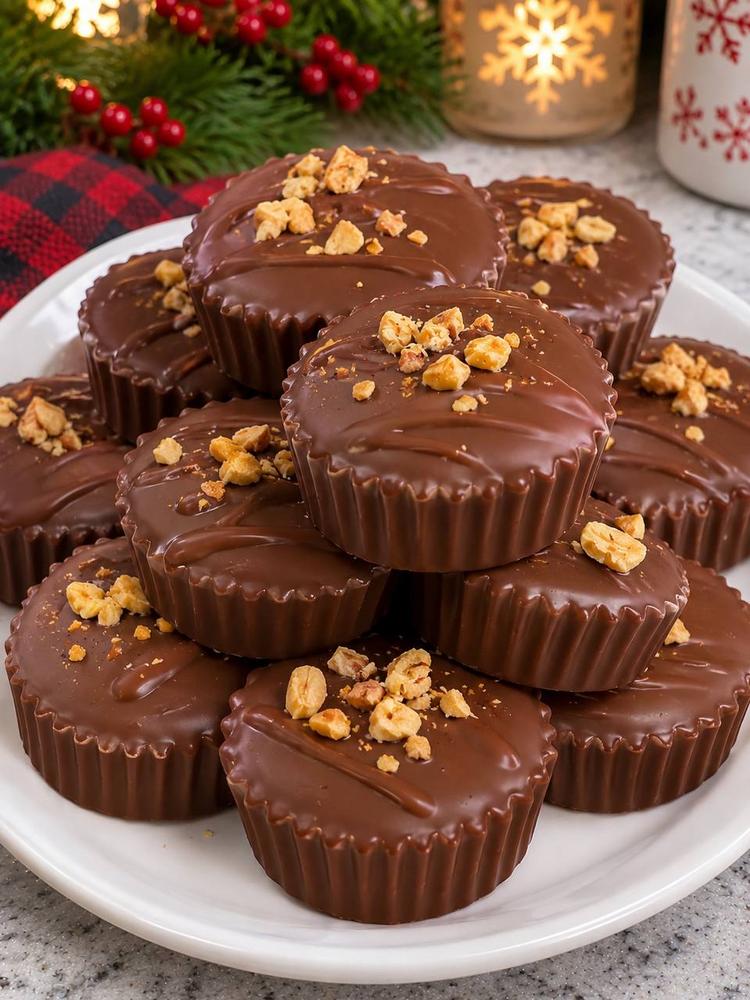
Introduction
There are some flavor combinations in the culinary world that are simply iconic, and perhaps none more beloved than the timeless pairing of chocolate and peanut butter. It’s a duo that evokes childhood nostalgia, satisfies the deepest cravings, and consistently delivers pure, unadulterated joy with every bite. But what if we told you that this classic could get even better? Prepare yourselves, sweet-toothed friends, because today we’re diving into the utterly irresistible world of Chocolate Peanut Butter Crunch Cups – a no-bake wonder that takes everything you love about this dynamic duo and adds an exciting, satisfying textural twist.
Imagine a rich, glossy chocolate shell that gives way to a creamy, dreamy peanut butter filling, studded with a delightful crunch that surprises and delights your palate. These aren’t just any peanut butter cups; they’re an elevated experience, perfect for gifting during the holidays, bringing to a potluck, or simply indulging in a moment of pure bliss after a long day. The best part? They’re incredibly easy to make, requiring no oven and just a handful of readily available ingredients. Whether you’re a seasoned baker or a kitchen novice, you’ll find joy in crafting these decadent, bite-sized treats.
Our Chocolate Peanut Butter Crunch Cups are designed to be your new go-to recipe for satisfying that sweet craving with minimal effort and maximum reward. The contrast between the smooth chocolate, the velvety peanut butter, and the unexpected crunch creates a symphony of textures and flavors that will have everyone reaching for just one more. Get ready to transform simple ingredients into a show-stopping dessert that’s as fun to make as it is to eat!
Nutritional Information
Per serving (approximate values, based on 24 small cups):
- Calories: 220-250
- Protein: 5-7g
- Carbohydrates: 20-25g
- Fat: 15-18g
- Fiber: 2-3g
- Sodium: 100-150mg
Ingredients
- 1 ½ cups creamy peanut butter (natural, stir-free works best)
- ¾ cup powdered sugar
- 1 cup crispy rice cereal (such as Rice Krispies)
- ½ teaspoon salt (fine sea salt recommended)
- 1 teaspoon vanilla extract
- 18 ounces good quality chocolate chips (dark, semi-sweet, or milk chocolate)
- 2 tablespoons coconut oil or vegetable shortening (optional, for smoother coating)
- ½ cup chopped roasted peanuts (for topping, optional)
Instructions
- Prepare Your Molds: Line a mini muffin pan with 24 mini paper liners, or use silicone mini cupcake molds. This recipe makes approximately 24-30 cups, depending on size.
- Make the Peanut Butter Crunch Filling: In a large mixing bowl, combine the creamy peanut butter, powdered sugar, crispy rice cereal, salt, and vanilla extract. Mix thoroughly with a sturdy spoon or your hands until all ingredients are well combined and form a thick, cohesive dough. The mixture should be firm enough to roll.
- Form the Peanut Butter Discs: Take small portions of the peanut butter mixture (about 1 rounded teaspoon per cup) and roll them into small balls. Then, gently flatten each ball into a disc, slightly smaller than the base of your mini cupcake liners. Set these discs aside on a parchment-lined plate or tray.
- Melt the Chocolate: In a microwave-safe bowl, combine the chocolate chips and coconut oil (if using). Microwave on medium power in 30-second intervals, stirring well after each interval, until the chocolate is completely melted and smooth. Alternatively, use a double boiler: place the chocolate and coconut oil in a heatproof bowl set over a saucepan of simmering water (ensure the bowl doesn’t touch the water), stirring until melted and smooth. The coconut oil helps create a smoother, glossier coating that is easier to work with and prevents blooming.
- Assemble the First Chocolate Layer: Spoon about 1 teaspoon of melted chocolate into the bottom of each prepared mini liner or mold. Gently tap the pan on the counter a few times to spread the chocolate evenly and release any air bubbles.
- Add the Peanut Butter Filling: Carefully place one of the flattened peanut butter crunch discs on top of the chocolate layer in each liner. Press down very gently to ensure it’s nestled in the chocolate but don’t submerge it completely.
- Top with More Chocolate: Spoon another 1-2 teaspoons of melted chocolate over each peanut butter disc, ensuring the disc is completely covered. Gently tap the pan again to settle the chocolate and create a smooth top.
- Add Toppings (Optional): Immediately sprinkle the tops of the cups with chopped roasted peanuts, if desired, while the chocolate is still wet. You can also drizzle a contrasting chocolate (like white chocolate) for extra decoration at this stage.
- Chill to Set: Transfer the mini muffin pan to the refrigerator and chill for at least 30-60 minutes, or until the chocolate is completely set and firm.
- Serve and Store: Once firm, carefully remove the cups from the liners or molds. Serve immediately or store them in an airtight container.
Cooking Tips and Variations
Achieving perfect Chocolate Peanut Butter Crunch Cups is all about a few key techniques and a willingness to experiment with flavors. Here are some tips and variations to help you master this delightful treat.
For the Smoothest Chocolate Coating:
- Quality Chocolate Matters: Using good quality chocolate chips or baking chocolate (like Ghirardelli, Guittard, or Callebaut) will make a noticeable difference in the taste and texture of your cups. Better chocolate melts more smoothly and has a richer flavor.
- The Coconut Oil Trick: Don’t skip the optional coconut oil or vegetable shortening. Even a small amount (1-2 tablespoons per 18 ounces of chocolate) helps thin the chocolate slightly, making it easier to pour and spread. It also contributes to a glossier finish and helps prevent the chocolate from “blooming” (developing white streaks) when stored.
- Gentle Melting: Whether you’re using a microwave or a double boiler, melt your chocolate slowly and gently. Overheating chocolate can cause it to seize and become grainy. If microwaving, use 30-second bursts and stir thoroughly between each.
- Tempering (for the Ambitious): For a truly professional, snap-able chocolate shell, you can temper your chocolate. This involves heating and cooling the chocolate to specific temperatures to stabilize the cocoa butter crystals. It’s more advanced but results in a superior texture and shine. If you’re new to tempering, stick with the coconut oil method for great results with less fuss.
Perfecting the Peanut Butter Filling:
- Peanut Butter Choice: For the creamiest filling, opt for a creamy, stir-free peanut butter. Natural peanut butter (the kind that separates) can work, but you’ll need to stir it very well before measuring and it might yield a slightly drier filling. Avoid “no-stir” natural peanut butter that contains palm oil if you prefer fewer additives.
- Adjusting Consistency: If your peanut butter mixture feels too sticky to roll, add a little more powdered sugar, a tablespoon at a time, until it’s manageable. If it’s too dry and crumbly, add a tiny bit more peanut butter or even a few drops of milk or cream.
- The Crunch Factor: Crispy rice cereal is classic, but you can get creative! Try crushed pretzels for a sweet and salty twist, crushed graham crackers for a s’mores vibe, or even finely chopped shortbread cookies for a buttery crunch.
Exciting Variations:
- Chocolate Type Swap: Experiment with different types of chocolate for the coating. Dark chocolate offers a sophisticated, less sweet profile, while milk chocolate provides a creamier, classic candy taste. White chocolate can also be used, perhaps with a touch of food coloring for festive occasions.
- Nut-Free Option: For those with peanut allergies, sunflower seed butter (SunButter) is an excellent substitute for peanut butter. Ensure all other ingredients are also nut-free.
- Different Toppings: Beyond chopped peanuts, consider flaky sea salt for a gourmet touch, mini chocolate chips, sprinkles for a festive look, shredded coconut, or even a contrasting chocolate drizzle (e.g., dark chocolate cups with white chocolate drizzle).
- Spice It Up: Add a pinch of cinnamon or a tiny dash of cayenne pepper to the peanut butter filling for a warming, unique flavor twist.
- Cookie Dough Crunch: Mix in edible cookie dough bits (store-bought or homemade, ensuring no raw eggs or flour) into the peanut butter filling for an extra indulgent layer.
- Holiday Themed: Use holiday-themed sprinkles, red and green candy melts for the drizzle, or even mini candy canes crushed over the top for Christmas.
- Larger Cups: You can easily make larger cups using standard-sized cupcake liners. Just adjust the amount of filling and chocolate accordingly, and increase chilling time.
By keeping these tips in mind and not being afraid to try new combinations, you’ll be making batches of perfect Chocolate Peanut Butter Crunch Cups that are tailored to your taste!
Storage and Reheating
Proper storage is key to keeping your Chocolate Peanut Butter Crunch Cups fresh, firm, and delicious. Since they contain chocolate and a peanut butter filling, they have specific needs to maintain their texture and prevent melting.
Storage:
- At Room Temperature (Short Term): If your home is cool (below 70°F or 21°C) and not humid, you can store the crunch cups in an airtight container at room temperature for up to 2-3 days. However, the chocolate may soften slightly, especially if your kitchen gets warmer. For best quality and to prevent melting, refrigeration is usually preferred.
- In the Refrigerator (Recommended): For optimal freshness and to keep the chocolate firm and snappy, store your Chocolate Peanut Butter Crunch Cups in an airtight container in the refrigerator. This will prevent the chocolate from melting and the peanut butter filling from becoming too soft. They will last wonderfully for up to 1-2 weeks when stored this way. Layer them with parchment paper if stacking to prevent sticking.
- In the Freezer (Long Term): For extended storage, these crunch cups freeze beautifully. Place the fully set cups in a single layer on a parchment-lined baking sheet and freeze until solid (about 1-2 hours). Once frozen, transfer them to a freezer-safe airtight container or freezer bag. They can be stored in the freezer for up to 2-3 months. Freezing is an excellent option if you’re making a big batch for future enjoyment or holiday gifts.
Reheating (or Thawing):
- From the Refrigerator: There’s no “reheating” necessary for these no-bake treats! They are best enjoyed chilled or at cool room temperature. If you prefer them a little softer, simply let them sit out at room temperature for 10-15 minutes before serving.
- From the Freezer: If you’ve frozen your crunch cups, transfer them from the freezer to the refrigerator the night before you plan to serve them, or let them thaw at room temperature for about 30-60 minutes. They will thaw quickly due to their small size. Avoid microwaving them, as this will melt the chocolate.
Tips for Best Results:
- Airtight is Key: Always use an airtight container to prevent the cups from absorbing odors from the refrigerator or freezer, and to protect them from moisture and drying out.
- Prevent Sticking: If stacking cups in a container, place a piece of parchment paper or wax paper between layers to prevent them from sticking together.
- Avoid Direct Sunlight/Heat: Always keep the crunch cups away from direct sunlight, warm kitchen counters, or any heat sources, as the chocolate will melt quickly.
By following these simple storage guidelines, your Chocolate Peanut Butter Crunch Cups will remain a delightful and satisfying treat for days or even months to come!
Frequently Asked Questions
Can I use natural peanut butter for the filling?
Yes, you can use natural peanut butter, but there are a few considerations. Natural peanut butter that requires stirring can be a bit trickier to work with as it tends to be oilier and less firm. If using, make sure to stir it very thoroughly to incorporate the oil before measuring. You might also need to add a little extra powdered sugar to the filling mixture to achieve the desired firm, rollable consistency. “No-stir” natural peanut butter varieties that contain palm oil usually work quite well, similar to conventional creamy peanut butter.
My chocolate seized when melting. What went wrong and how can I fix it?
Chocolate seizes when it comes into contact with even a tiny amount of water or steam, or if it gets overheated. When this happens, it becomes thick, grainy, and unusable for coating. To prevent it, ensure all your bowls and utensils are completely dry, and if using a double boiler, make sure the bottom of your bowl doesn’t touch the simmering water and no steam escapes into the chocolate. Unfortunately, once chocolate has seized, it’s very difficult to fully recover it for a smooth coating. Your best bet is to start with a fresh batch of chocolate. Adding a teaspoon of coconut oil or shortening to your chocolate from the start can also help prevent seizing by providing a bit more fat and making it more forgiving.
How can I make these crunch cups healthier or with less sugar?
While these are definitely a treat, you can make a few adjustments to lighten them up. For less sugar, you can reduce the amount of powdered sugar in the peanut butter filling by about 1/4 to 1/2 cup, though this will affect the firmness and sweetness. You can also use dark chocolate (70% cocoa or higher) for the coating, which naturally contains less sugar than milk or semi-sweet chocolate. For a healthier fat profile, ensure you’re using a good quality natural peanut butter with minimal additives. You can also swap crispy rice cereal for a whole-grain puffed cereal if desired, though the sugar content difference will be minimal.
Can I make these ahead of time for a party or holiday gifts?
Absolutely! These Chocolate Peanut Butter Crunch Cups are perfect for making ahead. In fact, making them ahead allows them ample time to chill and set properly, which improves their texture and stability. You can prepare them up to 1-2 weeks in advance and store them in an airtight container in the refrigerator. If you’re planning even further ahead, they freeze beautifully for up to 2-3 months. Just thaw them in the refrigerator or at room temperature before serving. They make excellent edible gifts, especially when placed in decorative mini cupcake liners or small candy boxes.