Instructions
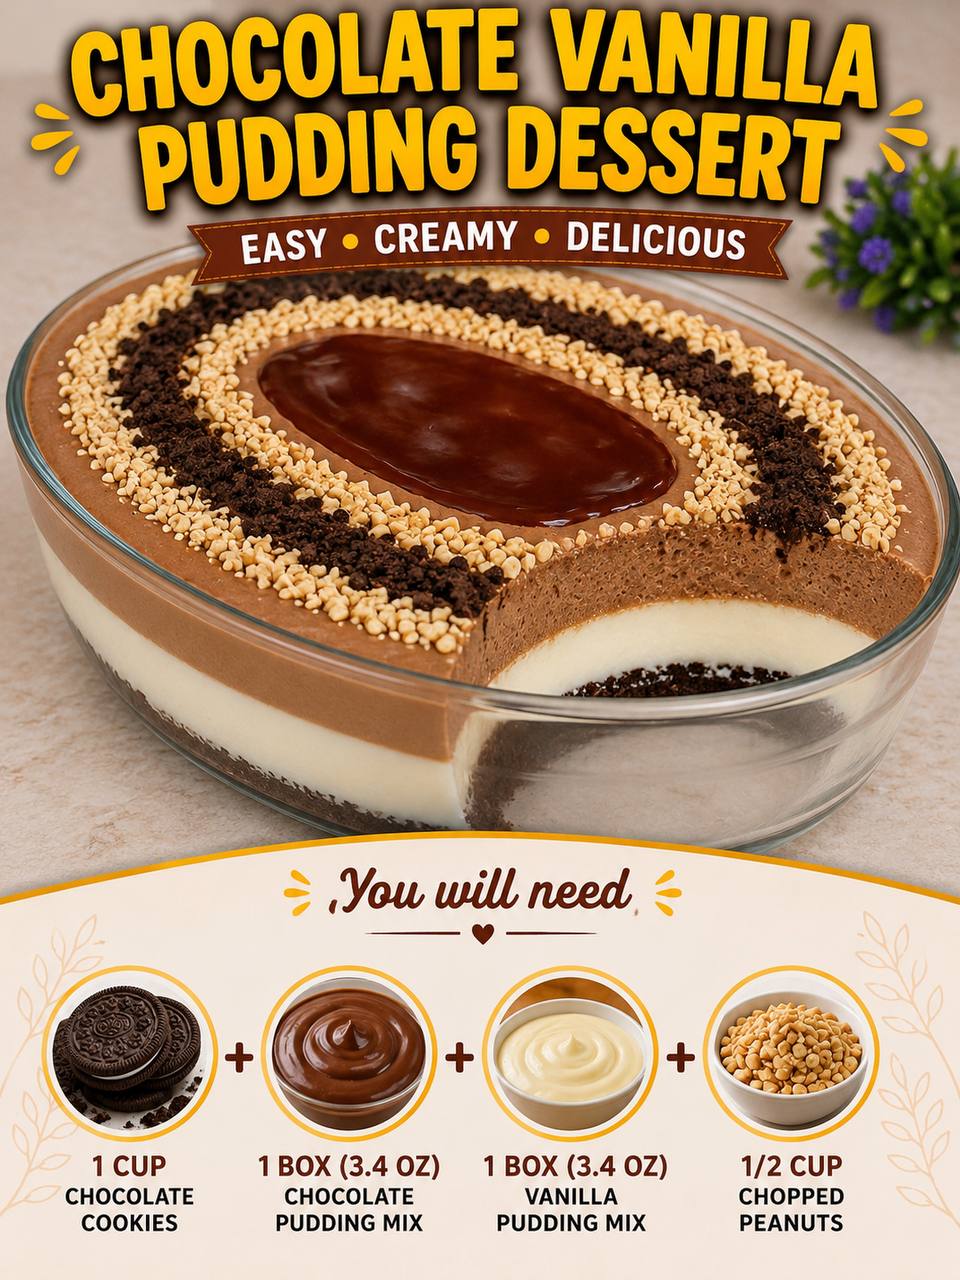
- Prepare the Cookie Base: In a medium bowl, combine the 1 cup of crushed chocolate sandwich cookies with the 4 tablespoons of melted butter. Mix until the crumbs are evenly moistened. Press this mixture firmly into the bottom of an 8×8 inch square dish or a similar clear glass serving dish. Place the dish in the refrigerator to chill while you prepare the puddings.
- Make the Vanilla Pudding: In a separate medium bowl, whisk together the instant vanilla pudding mix and 2 cups of cold milk for 2 minutes, or until the mixture is smooth and slightly thickened. Make sure to scrape the bottom and sides of the bowl to incorporate all the powder. Let it sit for 2-3 minutes to thicken further.
- Layer the Vanilla Pudding: Carefully spoon the vanilla pudding mixture over the chilled cookie crust in the serving dish. Use an offset spatula or the back of a spoon to gently spread it into an even layer, being careful not to disturb the cookie base. Return the dish to the refrigerator for about 10-15 minutes to allow the vanilla layer to set slightly.
- Make the Chocolate Pudding: While the vanilla layer is chilling, prepare the chocolate pudding. In another medium bowl, whisk together the instant chocolate pudding mix and 2 cups of cold milk for 2 minutes, or until smooth and slightly thickened. Let it sit for 2-3 minutes to thicken.
- Layer the Chocolate Pudding: Once the vanilla layer has set slightly, carefully spoon the chocolate pudding mixture over the vanilla layer. Gently spread it evenly across the dish, again taking care not to mix the layers.
- Chill the Dessert: Cover the dish loosely with plastic wrap and refrigerate for at least 2-4 hours, or preferably overnight. This chilling time is crucial for the puddings to fully set and for the flavors to meld beautifully.
- Add the Toppings: Just before serving, remove the dessert from the refrigerator. Sprinkle the 1/2 cup of chopped roasted peanuts evenly over the top of the chocolate pudding layer. Then, sprinkle the 1/4 cup of chocolate sandwich cookie crumbs around the edges or in a decorative pattern. Finally, drizzle the 2 tablespoons of chocolate syrup or melted chocolate over the center of the dessert for a final flourish.
- Serve: Slice and serve your delicious Chocolate Vanilla Pudding Dessert. Enjoy the delightful layers and textures!
Cooking Tips and Variations
Achieving a perfectly layered dessert is all about a few key techniques. First and foremost, ensure your puddings are properly set. Instant pudding relies on cold milk and sufficient whisking time. If your pudding seems too thin after the initial two minutes, let it rest for an extra minute or two; it will continue to thicken. For beautifully distinct layers, it’s helpful to chill the dessert briefly (10-15 minutes) after adding each pudding layer. This allows the layer to firm up just enough so the next layer doesn’t sink into it, giving you those clean lines that make this dessert so appealing. When spreading the pudding, use an offset spatula or the back of a spoon and work gently from the center outwards to avoid disturbing the layer beneath.
Chilling is not just a suggestion; it’s absolutely essential for this dessert. A minimum of 2-4 hours allows the puddings to set completely, ensuring a firm, sliceable texture. However, for the best results and deepest flavor development, an overnight chill is highly recommended. This extra time allows all the components to fully meld, creating a truly harmonious taste experience. When serving, for extra clean slices, you can dip your knife in hot water and wipe it clean between cuts. This helps prevent the pudding from sticking and creates neat, impressive portions.
This recipe is wonderfully versatile and open to numerous variations. Don’t feel limited to chocolate sandwich cookies for the base; graham cracker crumbs mixed with butter or even crushed shortbread cookies would make an excellent alternative. For the pudding layers, consider swapping out one or both flavors. Butterscotch, lemon, or even a caramel pudding would introduce exciting new dimensions. The toppings are where you can really get creative: instead of peanuts, try toasted pecans, walnuts, or almonds. Add a layer of fresh whipped cream before the final toppings for an extra touch of richness. Chocolate shavings, colorful sprinkles, or mini chocolate chips can also replace or complement the cookie crumbs and chocolate drizzle. For a fruity twist, consider adding a layer of sliced bananas or fresh berries between the pudding layers, which pairs wonderfully with chocolate and vanilla. You can also make individual servings by layering the dessert in clear glasses or mason jars, perfect for parties or portion control.
Storage and Reheating
This Chocolate Vanilla Pudding Dessert is best enjoyed chilled. Store any leftovers tightly covered with plastic wrap in the refrigerator. It will maintain its freshness and texture for up to 3-4 days. Ensure the plastic wrap is pressed directly onto the surface of the dessert if possible, or at least creates a tight seal around the dish, to prevent the pudding from absorbing refrigerator odors or developing a film on top. Due to its pudding base and cookie crust, this dessert does not freeze well. Freezing would alter the creamy texture of the pudding and make the cookie crust soggy upon thawing.
Since this is a no-bake, chilled dessert, there is no reheating involved. Simply remove it from the refrigerator, uncover, and serve. If you’ve added fresh fruit as a variation, it’s best to add those just before serving to prevent them from becoming too soft or watery during storage. If the dessert has been sitting out at room temperature for an extended period (more than 2 hours), it’s best to discard any leftovers for food safety reasons, especially due to the dairy in the pudding.
Frequently Asked Questions
Can I use homemade pudding instead of instant mix?
Yes, you absolutely can! Using homemade chocolate and vanilla puddings will elevate the flavor and texture even further. Just ensure the homemade puddings are fully cooled and thickened before layering to prevent them from running into each other. The quantities might need slight adjustment, but the layering process remains the same.
My pudding layers aren’t distinct; they’re mixing together. What went wrong?
This usually happens if the previous layer wasn’t sufficiently chilled and set before the next layer was added. Make sure to give each pudding layer a brief chill (10-15 minutes) in the refrigerator after spreading it. Also, ensure your instant puddings are mixed with cold milk and allowed to thicken for the recommended time before layering. When spreading, be gentle and use an offset spatula to ease the pudding over the surface rather than digging into the layer below.
Can I make this dessert ahead of time for a party?
Absolutely! This is an excellent make-ahead dessert. In fact, it tastes even better when it has had ample time to chill and for the flavors to meld. You can prepare the entire dessert, including the pudding layers, up to 24 hours in advance. Just hold off on adding the final toppings (peanuts, cookie crumbs, and chocolate drizzle) until just before serving to keep them fresh and crunchy. Store it covered in the refrigerator until ready to serve.