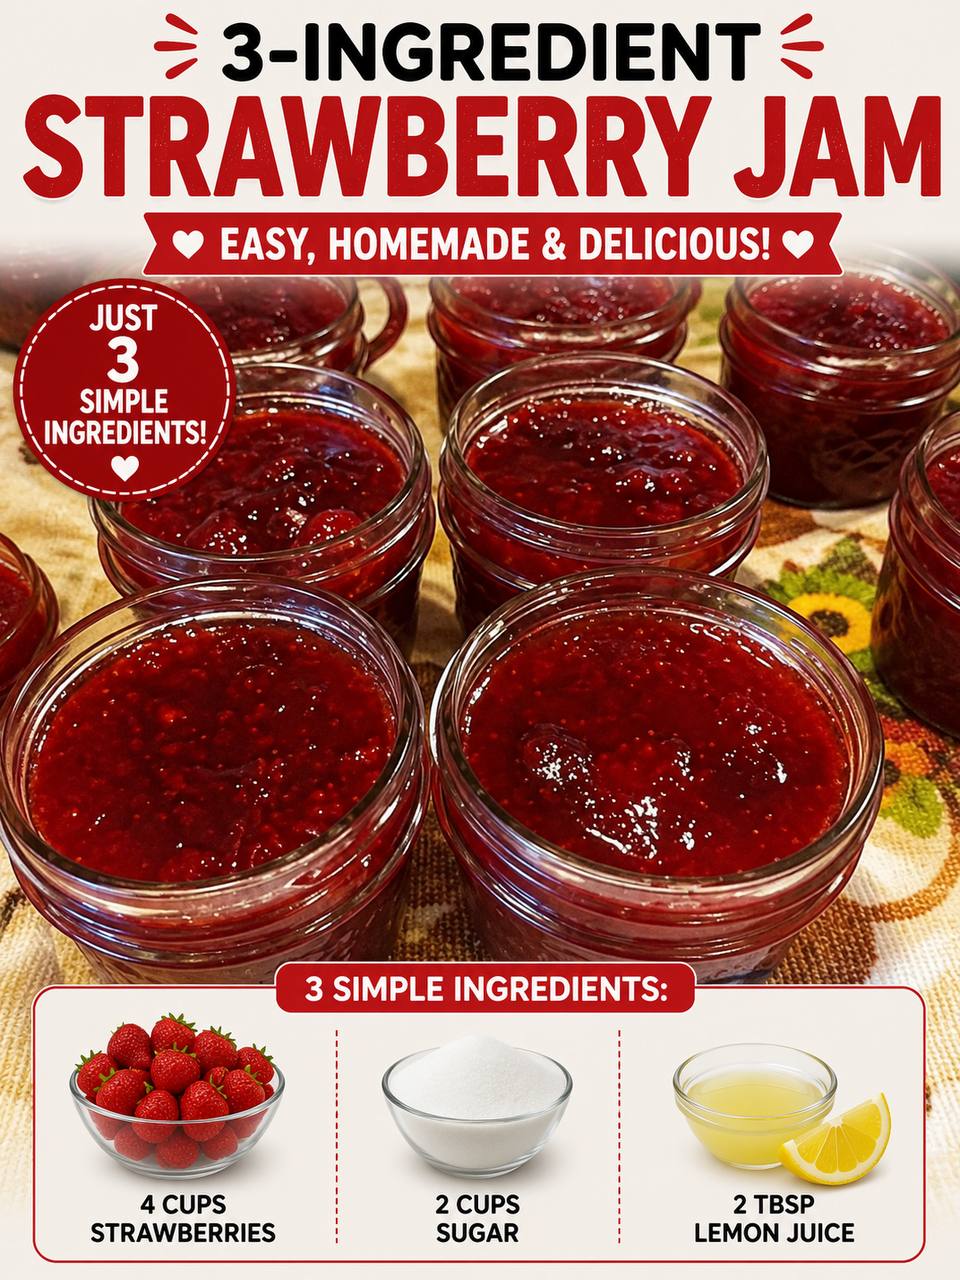
Instructions
- Prepare the Strawberries: Wash the strawberries thoroughly under cold running water. Hull them by carefully removing the green tops and any white core. For a chunkier jam, quarter the strawberries. For a smoother consistency, you can chop them finer or lightly mash them with a potato masher. Place the prepared strawberries in a large, heavy-bottomed pot or Dutch oven.
- Combine Ingredients: Add the granulated sugar and fresh lemon juice to the pot with the strawberries. Stir gently to combine, ensuring the sugar is evenly distributed. The lemon juice is crucial not just for flavor balance, but also because its acidity helps activate the natural pectin in the strawberries, which is essential for the jam to set properly.
- Macerate (Optional but Recommended): For best results and to help draw out the juices, cover the pot and let the mixture sit at room temperature for at least 30 minutes, or even a few hours. You can also refrigerate it overnight. This step helps the sugar dissolve and prevents the strawberries from toughening during cooking.
- Start Cooking: Place the pot over medium heat. Stir occasionally until the sugar has completely dissolved and the strawberries begin to release their juices. Once the sugar is dissolved, increase the heat to medium-high.
- Bring to a Boil: Bring the mixture to a rolling boil, stirring frequently to prevent scorching at the bottom of the pot. A rolling boil is when the mixture continues to boil vigorously even when stirred.
- Simmer and Thicken: Reduce the heat to medium-low to maintain a strong simmer. Continue to cook, stirring frequently, especially as the jam thickens. This process can take anywhere from 15 to 30 minutes, depending on the ripeness of your strawberries and your desired consistency. As it cooks, skim off any foam that rises to the surface with a spoon; this will result in a clearer, more attractive jam.
- Test for Set: There are a few ways to test if your jam has reached the setting point:
- Cold Plate Test: Before you start cooking, place a small ceramic plate in the freezer. When you think the jam is ready, spoon a small amount onto the cold plate. Return it to the freezer for 1-2 minutes. Push the jam with your finger; if it wrinkles, it’s ready.
- Temperature Test: Use a candy thermometer. The jam is likely set when it reaches 220°F (104°C) at sea level.
- Spoon Test: Dip a cold metal spoon into the jam, then lift it and tilt it sideways. If the jam forms a “sheet” or a few large drops that cling together before falling off, it’s ready.
Once the jam reaches the desired set, remove it immediately from the heat.
- Prepare Jars (if canning): While the jam is cooking, sterilize your canning jars and lids. You can do this by washing them in hot, soapy water, rinsing well, and then placing the jars in a boiling water canner for at least 10 minutes. Keep them hot until ready to fill. Lids can be simmered in hot (not boiling) water according to manufacturer instructions.
- Fill Jars: Carefully ladle the hot jam into the hot, sterilized jars, leaving about 1/4 inch of headspace from the rim. Wipe the rims clean with a damp cloth to ensure a good seal. Place the lids on top and secure them with the screw bands until fingertip tight.
- Process in Water Bath (for shelf stability): If you plan to store the jam at room temperature, process the filled jars in a boiling water canner for 10 minutes (adjusting for altitude if necessary). After processing, turn off the heat, remove the canner lid, and let the jars sit in the hot water for 5 minutes before carefully removing them to a wire rack to cool completely.
- Cool and Store: As the jars cool, you should hear a “pop” as the lids seal. Check for seals by pressing the center of the lid; if it doesn’t flex, it’s sealed. Unsealed jars should be refrigerated and consumed within 3-4 weeks. Sealed jars can be stored in a cool, dark place for up to 1 year. If you are not canning, simply let the jars cool to room temperature, then refrigerate.
Cooking Tips and Variations
To achieve the best possible “Christmas Red Jam,” here are some essential tips and festive variations:
- Choose the Best Strawberries: The quality of your jam directly correlates with the quality of your fruit. Select ripe, fragrant, and blemish-free strawberries. Overripe berries can lead to a mushy texture, while underripe ones lack flavor and natural pectin.
- Don’t Skip the Lemon Juice: While it might seem like a small amount, lemon juice is a powerhouse. It brightens the flavor, cuts through the sweetness, and most importantly, provides the acidity needed to activate the natural pectin in the strawberries, helping your jam set without added commercial pectin.
- Patience is Key: Jam making isn’t a race. Don’t rush the simmering process. Let the jam cook down slowly over medium-low heat, stirring frequently. This allows the flavors to concentrate and the jam to thicken naturally.
- Skim the Foam: As the jam cooks, a layer of foam often forms on the surface. Skimming this off with a spoon isn’t just for aesthetics; it also helps prevent air pockets in your jars and improves the jam’s texture.
- Use a Heavy-Bottomed Pot: This prevents scorching and ensures even heat distribution, which is crucial for successful jam making.
- Adjust Sweetness: The amount of sugar can be slightly adjusted based on the sweetness of your strawberries and your personal preference. However, reducing sugar too much can affect the jam’s setting ability and shelf life if canning.
- Christmas Twist – Spices: To infuse a festive “Christmas” flavor, consider adding a pinch of ground cinnamon, a tiny grating of fresh nutmeg, or a star anise pod (removed before jarring) during the last 5-10 minutes of cooking. Start with a very small amount and taste, as spices can quickly overpower the delicate strawberry flavor. A dash of vanilla extract added at the very end also works beautifully.
- Christmas Twist – Other Red Fruits: For added complexity and a deeper “Christmas red,” experiment with adding a small handful of other red fruits. A quarter cup of fresh or frozen cranberries (which are high in pectin) or raspberries cooked along with the strawberries can create a delightful blend of tart and sweet.
- Chunky vs. Smooth: If you prefer a smoother jam, you can mash the strawberries more thoroughly before cooking or use an immersion blender briefly at the end of the cooking process (before jarring) to break down any larger pieces.
- Small Batch Advantage: This recipe is perfect for small batches, which tend to set more easily than very large ones. If you want to make more, it’s often better to cook two smaller batches rather than one giant one.
Storage and Reheating
Proper storage is essential to enjoy your homemade “Christmas Red Jam” for as long as possible.
Storage:
- Refrigeration (for non-canned jam): If you do not process your jam in a boiling water bath, it must be stored in the refrigerator. Once cooled, place the jars in the fridge. It will keep well for 3-4 weeks.
- Shelf Storage (for properly canned jam): Jars that have been correctly processed in a boiling water bath and have formed a proper seal can be stored in a cool, dark place (like a pantry or cupboard) for up to 1 year. Once a jar is opened, it must be refrigerated and consumed within 3-4 weeks.
- Freezing: You can also freeze jam! Fill freezer-safe containers or jars (leaving plenty of headspace, as jam expands when frozen) and freeze for up to 6 months. Thaw in the refrigerator before use.
Reheating:
Jam is typically enjoyed at room temperature or slightly chilled, straight from the jar, and doesn’t usually require reheating. However, if you’re using it in a recipe that calls for warm jam (like a glaze or a filling), you can gently warm it:
- Microwave: Spoon the desired amount of jam into a microwave-safe bowl. Heat on low power in 15-second intervals, stirring between each, until warmed through. Be careful not to overheat, as it can bubble aggressively.
- Stovetop: Place the jam in a small saucepan over very low heat. Stir continuously until it reaches your desired temperature. This method is best for larger quantities or if you want to thin out the jam slightly.
Always ensure that any container or utensil used for reheating is clean to maintain the jam’s freshness.
Frequently Asked Questions
Why did my jam not set?
There are several common reasons why jam might not set. The most frequent culprits are not cooking the jam long enough to reach the setting point (220°F or the wrinkle test), using underripe fruit that lacks natural pectin, or not adding enough lemon juice to activate the pectin. Sometimes, too much moisture from the fruit can also prevent it from thickening. Don’t despair! You can often re-cook unset jam by adding a bit more lemon juice and boiling it again until it reaches the setting point.
Can I use frozen strawberries for this recipe?
Yes, you can absolutely use frozen strawberries! Thaw them completely before starting the recipe, and drain off any excess liquid to avoid adding too much water to your jam. Keep in mind that frozen strawberries might release more liquid than fresh ones, so the cooking time might be slightly longer to achieve the desired consistency. The flavor will still be delicious.
How can I make this jam less sweet?
While the sugar content in jam is important for preservation and texture, you can slightly reduce it if your strawberries are very sweet or if you prefer a tarter jam. However, be cautious not to reduce it too much, especially if you plan to can the jam for shelf stability, as sugar plays a role in preventing spoilage. A good rule of thumb is not to go below a 1:1 ratio of sugar to fruit in terms of volume if you’re a beginner, or at least 50-60% sugar by weight for safety in canning. For a less sweet taste, ensure your strawberries are perfectly ripe, as their natural sweetness will balance the added sugar.
Do I really need to sterilize the jars?
Yes, if you plan to store your jam at room temperature (i.e., “can” it), sterilizing the jars is absolutely crucial for food safety. It kills any bacteria, yeasts, or molds that could cause spoilage or illness. If you’re only making a small batch to keep in the refrigerator and consume within a few weeks, washing the jars thoroughly with hot, soapy water and rinsing well is generally sufficient, but sterilization is always the safest practice for any preserved food.