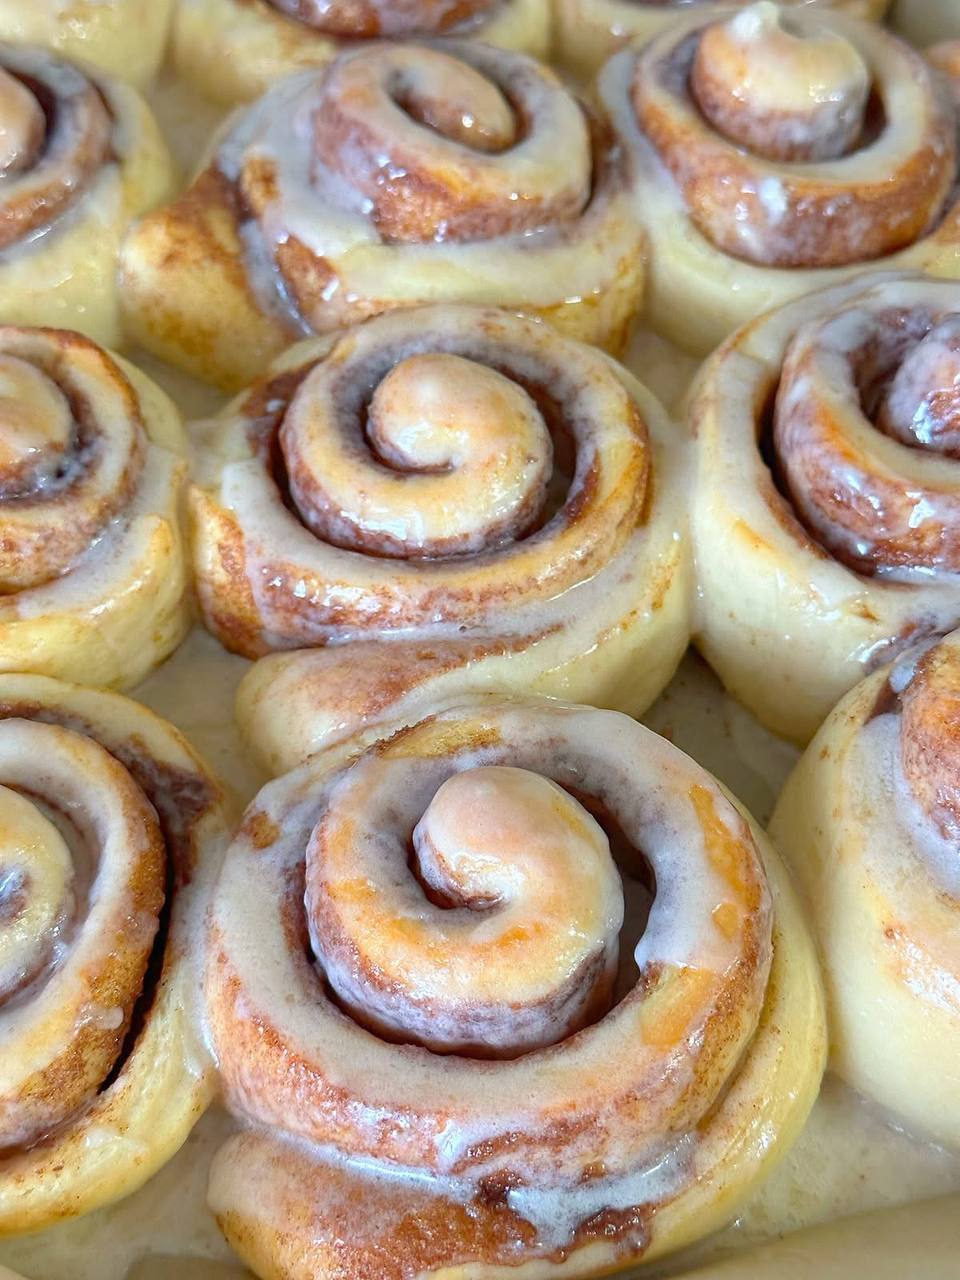
Instructions
- Prepare the Dough: In a large bowl, combine the warm milk, active dry yeast, and 1 tablespoon of the granulated sugar. Stir gently and let it sit for 5-10 minutes, or until the mixture is foamy. This indicates the yeast is active.
- Add the remaining granulated sugar, egg, melted butter, and salt to the yeast mixture. Whisk well to combine.
- Gradually add 3 cups of flour, one cup at a time, mixing with a wooden spoon or dough hook until a shaggy dough forms.
- Turn the dough out onto a lightly floured surface. Knead for 5-8 minutes, adding more flour a tablespoon at a time if the dough is too sticky, until it is smooth, elastic, and no longer sticky to the touch. It should spring back when lightly poked.
- Lightly grease a large bowl with cooking spray or a little butter. Place the dough in the bowl, turning it once to coat. Cover the bowl with plastic wrap or a clean kitchen towel.
- First Rise: Let the dough rise in a warm place for 1-1.5 hours, or until it has doubled in size. This could be a slightly warm oven (turned off!), near a sunny window, or just at room temperature.
- Prepare the Cinnamon Filling: While the dough is rising, prepare the filling. In a medium bowl, cream together the softened butter, brown sugar, and ground cinnamon until well combined and spreadable.
- Assemble the Rolls: Once the dough has doubled, gently punch it down to release the air. Turn the dough out onto a lightly floured surface.
- Using a rolling pin, roll the dough into a large rectangle, approximately 18×12 inches (45×30 cm) and about ¼ inch thick. Try to keep the edges as straight as possible.
- Evenly spread the cinnamon filling over the entire surface of the dough, leaving a small border (about ½ inch) along one of the longer edges.
- Starting from the opposite long edge, tightly roll the dough into a log. Pinch the seam gently to seal it.
- Using a sharp knife or unflavored dental floss, cut the log into 12 equal slices, each about 1.5 inches thick.
- Second Rise: Lightly grease a 9×13 inch baking dish. Arrange the cinnamon rolls in the prepared dish, leaving a little space between each roll as they will expand.
- Cover the baking dish loosely with plastic wrap or a clean kitchen towel. Let the rolls rise again in a warm place for another 30-45 minutes, or until they are puffy and nearly doubled in size.
- Bake the Rolls: Preheat your oven to 375°F (190°C) about 15 minutes before the second rise is complete.
- Uncover the rolls and bake for 20-25 minutes, or until they are golden brown on top and cooked through. If they start to brown too quickly, you can loosely tent them with aluminum foil.
- Remove from the oven and let them cool in the pan for about 5-10 minutes before glazing.
- Make and Apply the Glaze: While the rolls are cooling slightly, prepare the vanilla glaze. In a medium bowl, whisk together the powdered sugar, melted butter, vanilla extract, and a pinch of salt.
- Gradually add 2 tablespoons of warm milk or cream, whisking until smooth. Add more milk/cream, one teaspoon at a time, until you reach a pourable, yet thick and creamy consistency.
- Generously drizzle or spread the warm vanilla glaze over the warm cinnamon rolls. The glaze will melt slightly into the rolls, creating an irresistible finish.
- Serve warm and enjoy!
Cooking Tips and Variations
Achieving bakery-quality cinnamon rolls at home is totally within reach with a few key tips. First off, don’t rush the yeast! Ensuring your milk is the right temperature (105-115°F is critical for yeast activation) and giving it enough time to foam up in step 1 is essential for a light, fluffy dough. If your yeast doesn’t get foamy, it’s likely dead, and your dough won’t rise. Start over with fresh yeast. Another common pitfall is over-flouring the dough. Add flour gradually and stop when the dough is soft, pliable, and no longer excessively sticky, even if you haven’t used the full amount listed. An overly stiff dough will result in dry, dense rolls. Proper kneading is also vital; it develops the gluten, which gives the rolls their structure and chewiness. Knead until the dough passes the “windowpane test” – you should be able to stretch a small piece of dough thin enough to see light through it without it tearing.
For the filling, make sure your butter is truly softened, not melted, for the best spreadability and to prevent it from oozing out during baking. A good trick for perfectly even rolls is to use unflavored dental floss to cut them. Simply slide a piece of floss under the rolled log, cross the ends over the top, and pull to slice cleanly through the dough without squishing it. When arranging the rolls in the pan, don’t pack them too tightly; they need room to expand during the second rise and baking. If your kitchen is cool, you can create a warm proofing environment by preheating your oven to its lowest setting for a few minutes, then turning it off and placing the covered dough inside. Just be sure it’s not too hot! For an extra rich flavor, you can swap out some of the milk in the dough for buttermilk or heavy cream.
Want to get creative? Try some delicious variations! For a classic twist, substitute the vanilla glaze with a tangy Cream Cheese Frosting. To do this, beat 4 oz (113g) softened cream cheese with ¼ cup (56g) softened butter until creamy. Gradually beat in 2 cups (240g) powdered sugar, 1 teaspoon vanilla extract, and 1-2 tablespoons milk or cream until smooth and spreadable. For a nutty crunch, add ½ cup of finely chopped pecans or walnuts to the cinnamon filling. You can also experiment with different spices in the filling, such as a pinch of cardamom or nutmeg, to add an extra layer of warmth. For a fall-inspired treat, add ¼ cup of canned pumpkin puree to the dough and a pinch of pumpkin pie spice to the filling. The possibilities are endless once you master this classic base recipe!
Storage and Reheating
Cinnamon rolls are always best enjoyed fresh and warm from the oven, especially when the glaze is still slightly melted. However, if you find yourself with leftovers (a rare but wonderful occurrence!), proper storage will help keep them delicious for another day. Once completely cooled, place any unglazed cinnamon rolls in an airtight container at room temperature for up to 2 days. If they are already glazed, they will keep well in an airtight container at room temperature for about 1 day, though the glaze may become a bit sticky. For longer storage, you can refrigerate glazed or unglazed rolls in an airtight container for up to 3-4 days. For optimal freshness and to prevent them from drying out, it’s often best to store the baked rolls unglazed and then prepare and apply the glaze just before serving.
To reheat, the microwave is your quickest option. Place an individual roll on a microwave-safe plate and heat for 15-30 seconds, or until warmed through. Be careful not to overheat, as this can make them tough. For a crispier exterior and softer interior, you can reheat them in a preheated oven or toaster oven at 300°F (150°C) for 5-10 minutes, or until warmed. If reheating unglazed rolls, you can then quickly prepare and drizzle fresh glaze over them for that “just baked” experience. You can also freeze baked, unglazed cinnamon rolls for up to 1 month. Wrap individual rolls tightly in plastic wrap, then place them in a freezer-safe bag or container. Thaw overnight in the refrigerator, then warm and glaze as desired. You can even freeze the unbaked rolls after the second rise! Simply place the pan of risen rolls in the freezer until solid, then transfer the frozen rolls to an airtight container or freezer bag. When ready to bake, transfer to a baking dish, let them thaw and rise at room temperature for several hours (or overnight in the fridge), then bake as directed.
Frequently Asked Questions
What makes my cinnamon rolls dry or tough?
Several factors can contribute to dry or tough cinnamon rolls. The most common culprits are adding too much flour to the dough, which makes it stiff and dense, or over-baking them in the oven. Ensure you measure flour accurately, preferably by weight, and only add enough to make the dough manageable. Also, keep a close eye on your baking time and temperature; remove them from the oven as soon as the tops are golden brown and they are cooked through, even if it’s a few minutes less than the recipe states. Over-kneading can also lead to tough rolls, as it overdevelops the gluten, so knead until just elastic and smooth.
Why didn’t my dough rise?
If your dough didn’t rise, the most likely reason is inactive yeast. Yeast needs to be alive and active to produce carbon dioxide, which makes the dough rise. Ensure your milk is at the correct temperature (105-115°F / 40-46°C); milk that is too cold won’t activate the yeast, and milk that is too hot will kill it. Always check for foaminess after mixing the yeast with warm milk and a pinch of sugar; if it doesn’t foam, your yeast is likely dead, and you should start over with a fresh packet. Other factors could be an expired yeast package or placing the dough in too cold or too hot an environment for proofing.
Can I make cinnamon rolls ahead of time?
Absolutely! Cinnamon rolls are a fantastic make-ahead treat. You have a couple of options. You can prepare the dough and assemble the rolls up to the second rise. After placing them in the baking dish, cover tightly with plastic wrap and refrigerate overnight (up to 12-18 hours). The next morning, take them out of the fridge and let them sit at room temperature for 1-2 hours to come to temperature and finish their final rise before baking as directed. Alternatively, you can bake the rolls completely, let them cool, and then store them unglazed. Prepare the glaze and warm the rolls just before serving for the freshest taste.
My glaze is too thin/thick. How do I fix it?
Adjusting the consistency of your glaze is easy! If your glaze is too thin, gradually whisk in more powdered sugar, one tablespoon at a time, until you reach your desired thickness. If your glaze is too thick, add a very small amount (half a teaspoon at a time) of warm milk or heavy cream, whisking well after each addition, until it becomes pourable and smooth. Remember, the glaze will thicken slightly as it cools, so aim for a consistency that’s slightly thinner than you think you need if you’re applying it to warm rolls.