Instructions
- Preheat your oven to 350°F (175°C). Grease and flour a 10-cup Bundt pan or two 8-inch round cake pans. If using round pans, line the bottoms with parchment paper as well.
- In a medium bowl, whisk together the sifted flour, baking powder, baking soda, and salt. Set aside.
- In a separate small bowl, whisk together the cocoa powder, hot water, and the 2 tablespoons of granulated sugar until smooth and no lumps remain. This creates a rich chocolate paste. Set aside to cool slightly.
- In a large bowl, using an electric mixer on medium speed, cream together the softened butter and 1 ¾ cups of granulated sugar until light and fluffy, about 3-5 minutes. Scrape down the sides of the bowl as needed.
- Add the eggs one at a time, beating well after each addition until fully incorporated. Beat in the vanilla extract.
- With the mixer on low speed, gradually add the dry ingredients to the wet ingredients in three additions, alternating with the buttermilk in two additions. Begin and end with the dry ingredients. Mix until just combined, being careful not to overmix. Overmixing can lead to a tough cake.
- Divide the batter evenly into two separate bowls.
- To one bowl, add the prepared chocolate paste. Fold gently until the chocolate is fully incorporated and the batter is a uniform brown color.
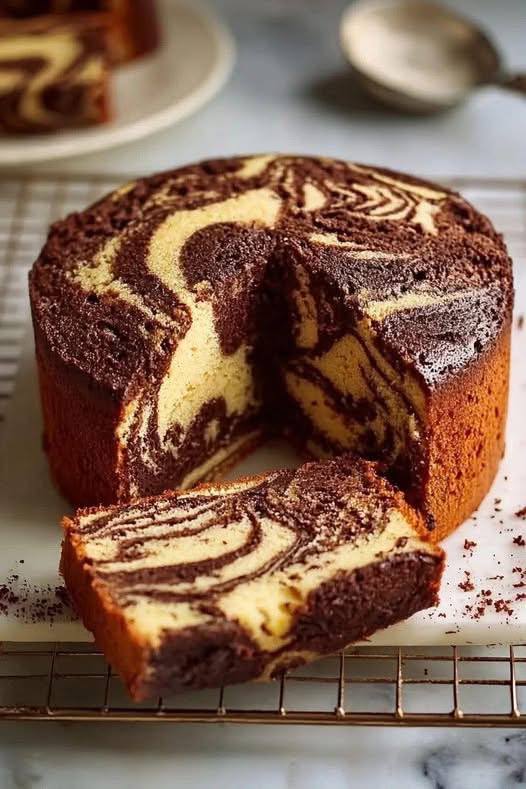
- Now you have your vanilla batter and your chocolate batter. To create the marble effect, drop alternating spoonfuls of vanilla and chocolate batter into your prepared pan. Start with a dollop of vanilla, then chocolate, then vanilla, and so on, covering the bottom of the pan. Continue layering the batters until all of it is used.
- Once all the batter is in the pan, take a butter knife or a skewer and gently swirl through the batters 2-3 times. Do not over-swirl, as this will blend the colors too much and you’ll lose the distinct marble pattern. The goal is to create swirls, not a solid brown or light color.
- Place the pan in the preheated oven and bake for 45-55 minutes for a Bundt pan, or 30-35 minutes for two 8-inch round pans. The cake is done when a wooden skewer or toothpick inserted into the center comes out clean or with a few moist crumbs attached.
- Remove the cake from the oven and let it cool in the pan for 10-15 minutes before inverting it onto a wire rack to cool completely. If using round pans, remove them from the oven, let cool for 5 minutes, then invert onto a wire rack, carefully peel off the parchment paper, and cool completely.
- Once completely cooled, you can dust with powdered sugar, or frost as desired.
Cooking Tips and Variations
Achieving a truly classic marble cake involves a few key techniques and considerations. First and foremost, ensure all your cold ingredients, especially the butter, eggs, and buttermilk, are at room temperature. This allows them to emulsify properly, creating a smoother, more uniform batter and ultimately a lighter, more tender cake. Cold ingredients can cause the batter to curdle or become lumpy. When creaming the butter and sugar, take your time; this step incorporates air, which is crucial for the cake’s light texture. Beat until the mixture is visibly lighter in color and fluffy, typically 3-5 minutes, scraping down the bowl frequently.
For the iconic marble swirl, resist the urge to over-swirl the batters. After dropping alternating spoonfuls of vanilla and chocolate batter into the pan, a simple zig-zag motion with a butter knife or skewer, perhaps 2-3 passes through the batter, is sufficient. Too much swirling will cause the colors to blend completely, resulting in a muddy brown cake rather than distinct, beautiful swirls. Trust the process; less is often more when it comes to marbling. Another important tip is to avoid opening the oven door frequently while baking, especially in the first 2/3 of the baking time, as this can cause the cake to sink.
There are several delightful variations you can explore to personalize your marble cake. For a citrusy twist, add 1-2 tablespoons of lemon or orange zest to the vanilla batter. Coffee lovers might enjoy adding 1-2 teaspoons of instant espresso powder (dissolved in a tablespoon of hot water) to the chocolate batter to deepen its flavor. You could also experiment with different extracts; a touch of almond extract in the vanilla batter or a hint of mint extract in the chocolate batter can offer an interesting flavor profile. For a richer, more decadent chocolate, consider using melted dark chocolate instead of cocoa powder for the chocolate portion (adjusting liquid slightly as needed). Finally, consider adding a handful of mini chocolate chips or chopped nuts (like pecans or walnuts) to the vanilla batter for added texture and flavor.
Storage and Reheating
Proper storage is key to keeping your Classic Marble Cake fresh and delicious. Once the cake has cooled completely, it can be stored at room temperature in an airtight container for up to 3-4 days. If your cake is frosted with a cream cheese frosting or a perishable topping, it should be stored in the refrigerator. In the refrigerator, the cake will stay fresh for up to a week. To prevent the cake from drying out, ensure the container is truly airtight. You can also cover individual slices with plastic wrap before placing them in the container for extra protection.
For longer storage, marble cake freezes beautifully. Wrap individual slices or the entire unfrosted cake tightly in plastic wrap, then an additional layer of aluminum foil. This double layer helps prevent freezer burn. Frozen cake can be stored for up to 2-3 months. To thaw, simply remove the cake from the freezer and let it come to room temperature on the counter for several hours (for a whole cake) or about an hour (for individual slices). Do not attempt to thaw in the microwave, as this can alter the texture and make the cake gummy.
Reheating is generally not necessary for marble cake, as it is typically served at room temperature. However, if you prefer a slightly warm slice, especially if it’s plain or lightly glazed, you can warm it gently in the microwave for 10-15 seconds. Be careful not to overheat, as this can dry out the cake. If the cake has been refrigerated, allowing it to sit at room temperature for 15-30 minutes before serving will help restore its tender texture and optimal flavor.
Frequently Asked Questions
Why did my marble cake turn out brown instead of swirled?
This is a common issue and usually happens due to over-swirling the batters. When you mix the vanilla and chocolate batters too much, the distinct colors blend together, resulting in a uniform brown color rather than defined swirls. For best results, after layering the batters, gently run a knife or skewer through them only 2-3 times. Less is more to achieve that beautiful marbled effect.
Can I use milk instead of buttermilk?
Yes, you can substitute milk for buttermilk, but you’ll want to “sour” it first to mimic buttermilk’s acidity, which reacts with the baking soda to create a tender crumb. To do this, add 1 tablespoon of lemon juice or white vinegar to a measuring cup, then fill the rest of the cup with regular milk (any fat percentage will work) until it reaches the 1-cup mark. Let it sit for 5-10 minutes until it slightly curdles. This homemade buttermilk substitute will work perfectly in the recipe.
How do I know when the cake is fully baked?
The best way to tell if your marble cake is done is to insert a wooden skewer or toothpick into the very center of the cake. If it comes out clean, or with just a few moist crumbs attached, your cake is ready. If it comes out with wet batter, continue baking for a few more minutes and test again. Also, the top of the cake should spring back slightly when lightly touched, and the edges will begin to pull away from the pan.