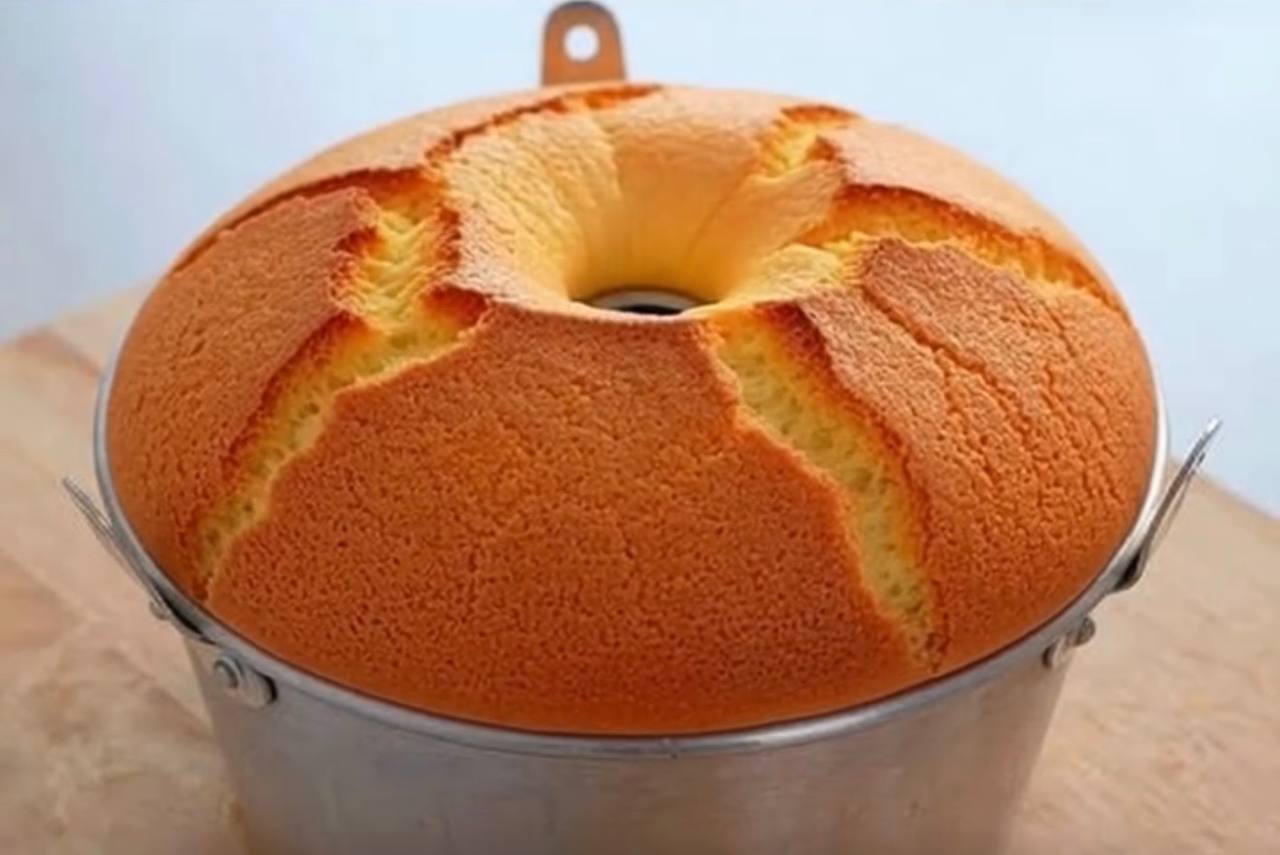
Instructions
- Preheat your oven to 325°F (160°C). Do NOT grease a 10-inch tube pan (angel food cake pan). The batter needs to cling to the sides of the pan to climb high.
- Separate your eggs while they are cold for easier separation, then allow the whites and yolks to come to room temperature. This is crucial for optimal whipping volume of the whites and better emulsification of the yolks.
- In a large bowl, whisk together the sifted cake flour, baking powder, and salt. Set aside.
- In a separate medium bowl, whisk together the egg yolks, milk, neutral oil, and vanilla extract until well combined and smooth.
- Pour the egg yolk mixture into the dry flour mixture. Whisk gently until just combined and no lumps of flour remain. Be careful not to overmix at this stage; overmixing can develop the gluten and lead to a tough cake.
- In a very clean, large bowl (preferably a stand mixer bowl), add the room temperature egg whites. Add the cream of tartar if using. Begin whipping the egg whites on medium speed until foamy.
- Gradually add 1 cup (200g) of the granulated sugar, about a tablespoon at a time, while continuing to whip. Increase the speed to medium-high.
- Continue whipping until the egg whites form stiff, glossy peaks. When you lift the whisk, the peak should hold its shape firmly but still look moist and supple, not dry or crumbly. Be careful not to over-whip, as this can make the meringue unstable and difficult to fold.
- Add about one-third of the whipped egg whites to the egg yolk and flour mixture. Gently fold them in using a rubber spatula until mostly incorporated. This lightens the batter and makes it easier to fold in the remaining whites.
- Add the remaining whipped egg whites to the batter in two additions. Carefully fold them in using a gentle, circular motion, scraping the bottom of the bowl and turning the batter over itself. The goal is to incorporate the whites without deflating them, preserving as much air as possible. Stop folding as soon as no streaks of white remain.
- Gently pour the batter into the ungreased tube pan. Smooth the top with your spatula.
- Bake for 50-60 minutes, or until the cake is golden brown, springs back when lightly touched, and a wooden skewer inserted into the center comes out clean. Avoid opening the oven door during the first 3/4 of the baking time, as this can cause the cake to collapse.
- Immediately upon removing the cake from the oven, invert the tube pan onto its “feet” (if it has them) or over the neck of a bottle. This crucial step prevents the cake from collapsing and compressing its delicate structure as it cools.
- Allow the cake to cool completely upside down for at least 1.5 to 2 hours, or until it is completely cool to the touch.
- Once completely cool, run a thin knife or offset spatula around the edges of the pan and around the center tube to loosen the cake. Invert the cake onto a serving plate.
- Serve plain, dusted with powdered sugar, or with your favorite toppings.
Cooking Tips and Variations
Achieving sponge cake perfection is a delightful journey, and a few key tips can ensure your success. Firstly, always use room temperature eggs. While separating them cold is easier, allowing both whites and yolks to warm up before combining them with other ingredients ensures better emulsification and maximum volume when whipping the whites. When whipping egg whites, ensure your bowl and whisk are impeccably clean and free of any grease, as even a tiny speck of fat can prevent the whites from whipping properly. Whip them to stiff, glossy peaks – they should hold their shape when the whisk is lifted, but still look moist. Over-whipping can make them dry and difficult to fold, leading to a crumbly cake. The most critical step is the folding: be incredibly gentle. Use a rubber spatula, cutting through the center of the batter, scraping the bottom, and folding it over. This incorporates the air without deflating the delicate meringue. Stop folding as soon as no streaks of white remain; over-folding will lose precious air.
Do NOT grease your tube pan! This is a common mistake. Sponge cake batter needs to cling to the sides of the pan to climb high and achieve its characteristic rise. If the pan is greased, the batter will slip down, resulting in a shorter, denser cake. Similarly, avoid opening the oven door during the first three-quarters of the baking time. Sudden changes in temperature can cause the cake to deflate. When testing for doneness, a gentle touch should make the top spring back, and a skewer inserted into the center should come out clean. Immediately inverting the cake upon removal from the oven is non-negotiable. This prevents the cake from collapsing under its own weight as it cools, maintaining its impressive height and airy structure. Allow it to cool completely upside down before attempting to remove it from the pan.
For variations, the classic vanilla sponge is wonderfully adaptable. To make a Lemon Sponge Cake, add 2 tablespoons of lemon zest to the dry ingredients and replace ½ teaspoon of the vanilla extract with ½ teaspoon of lemon extract or 1 tablespoon of fresh lemon juice added to the wet ingredients. For a Coffee Sponge Cake, dissolve 2 tablespoons of instant espresso powder in the warm milk before adding it to the yolk mixture, and consider adding a teaspoon of coffee liqueur to the batter for a deeper flavor. A Chocolate Marble Sponge can be created by dividing the batter, adding 2-3 tablespoons of melted dark chocolate to one half, and then gently swirling the two batters together in the pan. You can also experiment with different extracts, such as almond or orange blossom, to create entirely new flavor profiles. The beauty of this cake is its versatility, allowing you to customize it to your liking.
Storage and Reheating
Proper storage is key to maintaining the delicate texture of your classic vanilla sponge cake. Once completely cooled, the cake is best stored at room temperature, loosely covered in plastic wrap or placed in an airtight cake dome. This prevents it from drying out while allowing some air circulation. Stored this way, it will remain fresh and delicious for 2-3 days. If your cake is frosted or filled with perishable ingredients like fresh cream or fruit, it should be stored in the refrigerator. In the fridge, it will last for up to 4-5 days, but be aware that refrigeration can slightly alter the texture of sponge cake, making it a little firmer. To mitigate this, allow refrigerated cake to come to room temperature for about 30 minutes before serving for the best flavor and texture.
For longer storage, sponge cake freezes beautifully. Once completely cooled, wrap the unfrosted cake tightly in several layers of plastic wrap, then an additional layer of aluminum foil. This double-layer protection helps prevent freezer burn. Store in the freezer for up to 2-3 months. To thaw, simply unwrap the frozen cake and let it sit at room temperature for several hours or overnight until fully defrosted. Avoid thawing in the microwave, as this can make the cake rubbery. Once thawed, it can be frosted and served as usual. Reheating a sponge cake is generally not recommended, as its delicate structure is designed to be enjoyed at room temperature. Heating it in a microwave or oven can dry it out and alter its signature airy crumb. If you wish to warm it slightly, a very brief, gentle warm-up in a low oven for a few minutes (e.g., 200°F/95°C for 5-10 minutes) might work, but it’s often best enjoyed as is.
Frequently Asked Questions
Why did my sponge cake collapse after I took it out of the oven?
The most common reason for a sponge cake collapsing is not inverting the pan immediately after baking. Sponge cakes rely on the air whipped into the eggs for their structure. While cooling, the cake is still delicate, and if it’s left upright, its own weight will cause it to compress and collapse. Inverting the pan allows gravity to pull the cake downwards, stretching its structure and preventing shrinkage until it has fully set and cooled. Another reason could be underbaking, which leaves the internal structure too weak to support itself.
Can I use all-purpose flour instead of cake flour?
While you can technically use all-purpose flour, it’s highly recommended to use cake flour for a classic sponge. Cake flour has a lower protein content than all-purpose flour, which results in a much more tender, delicate, and fine crumb. All-purpose flour will yield a slightly tougher, denser cake due to its higher gluten development. If you absolutely must use all-purpose flour, you can approximate cake flour by measuring 1 cup of all-purpose flour, removing 2 tablespoons, and then replacing those 2 tablespoons with 2 tablespoons of cornstarch, sifting it together thoroughly.
My egg whites didn’t whip up to stiff peaks. What went wrong?
There are a few common culprits when egg whites fail to whip properly. The most critical factor is the presence of any fat or grease. Even a tiny speck of egg yolk, oil, or residue on your bowl or whisk can prevent the whites from aerating. Ensure your equipment is impeccably clean and dry. Another reason could be cold egg whites; they whip best at room temperature. Lastly, overbeating can cause them to become dry and crumbly, while underbeating won’t provide enough structure. Aim for stiff, glossy peaks that hold their shape but still look moist.
How do I prevent my sponge cake from sticking to the pan?
For a classic sponge cake baked in a tube pan (like an angel food cake pan), you actually DO NOT want to grease the pan. The batter needs to cling to the ungreased sides of the pan to climb high and achieve its characteristic tall rise. If the cake sticks after cooling, it’s usually because it wasn’t cooled completely upside down before attempting to remove it, or you didn’t run a thin, sharp knife around the edges and center tube to loosen it gently. Ensure the cake is fully cool, and use a flexible, thin knife or offset spatula to carefully separate it from the pan.