Instructions
- Preheat your oven to 350°F (175°C). Grease and flour a 9×13 inch sheet pan, or line with parchment paper, leaving an overhang on the sides for easy removal.
- In a medium bowl, whisk together the sifted all-purpose flour, baking powder, and salt. Set aside.
- In a large bowl, using an electric mixer with the paddle attachment (or a hand mixer), cream together the softened unsalted butter and granulated sugar on medium-high speed until light, fluffy, and pale in color, about 3-5 minutes. Scrape down the sides of the bowl as needed.
- Add the eggs one at a time, beating well after each addition until fully incorporated. The mixture may look slightly curdled at first, but continue beating until smooth. Beat in the pure vanilla extract.
- With the mixer on low speed, gradually add about one-third of the dry ingredients to the wet ingredients, mixing until just combined.
- Pour in half of the whole milk and mix until just incorporated.
- Repeat with another third of the dry ingredients, followed by the remaining milk, and finally the last third of the dry ingredients. Mix on low speed until just combined and no streaks of flour remain. Be careful not to overmix; overmixing can lead to a dense, tough cake.
- Pour the batter evenly into the prepared sheet pan. Gently tap the pan on the counter a few times to release any large air bubbles.
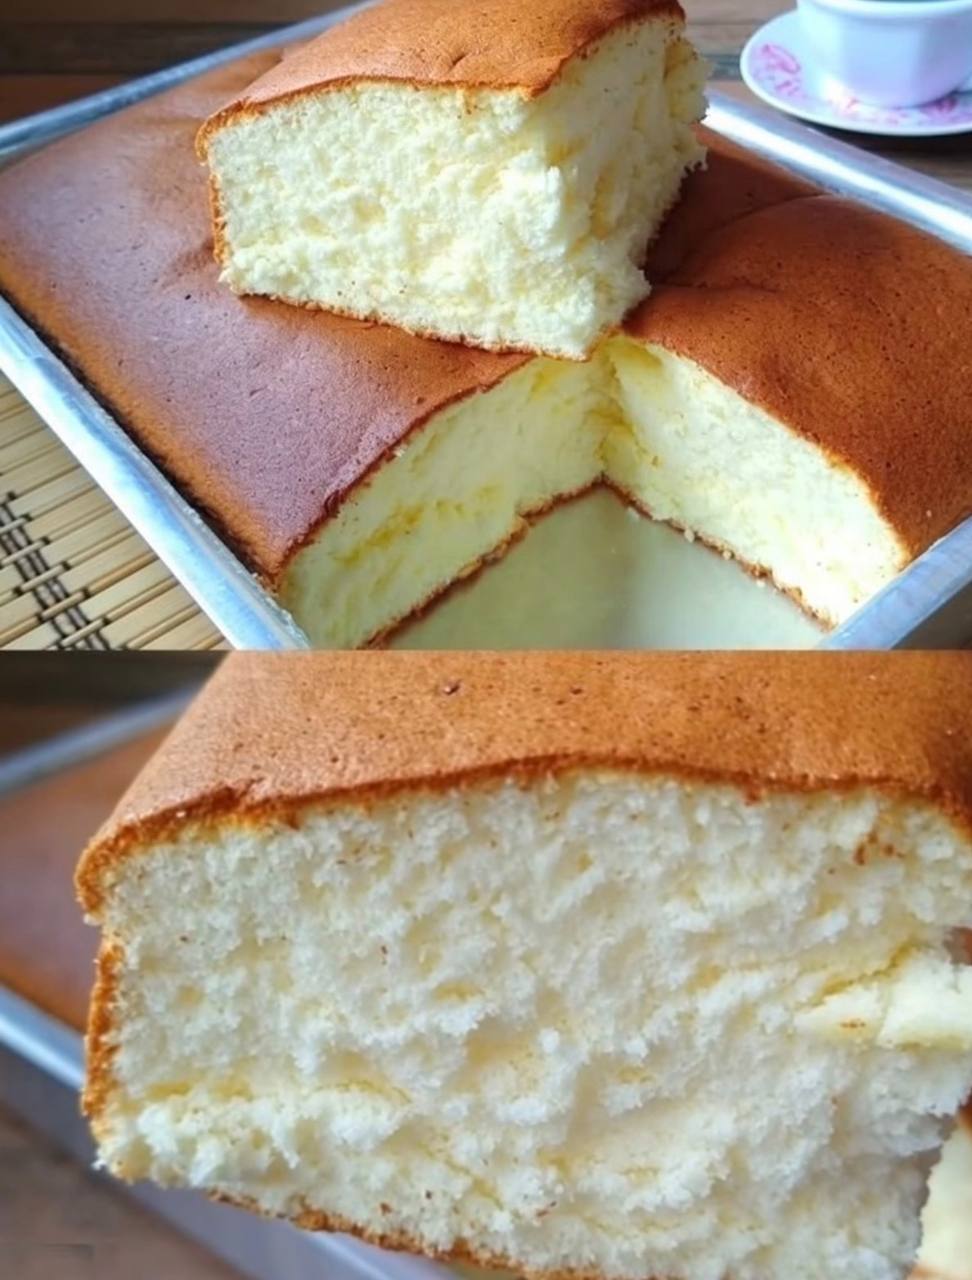
- Bake for 30-35 minutes, or until a wooden skewer or toothpick inserted into the center of the cake comes out clean. The top should be golden brown and spring back when lightly touched.
- Remove the cake from the oven and place it on a wire rack to cool in the pan for 15-20 minutes.
- After cooling slightly, carefully run a knife around the edges of the pan (if not using parchment overhang). Using the parchment paper, lift the cake out of the pan and transfer it to the wire rack to cool completely before slicing or frosting.
Cooking Tips and Variations
Achieving that signature light and fluffy texture in a classic sponge cake hinges on a few crucial details. First and foremost, ensure all your ingredients, especially the eggs, butter, and milk, are at room temperature. This isn’t just a suggestion; it’s a fundamental step that allows ingredients to emulsify properly, creating a smooth, cohesive batter that traps air efficiently, leading to a higher, more even rise. Cold ingredients can result in a lumpy batter and a denser cake. When creaming the butter and sugar, take your time – this step is where most of the initial aeration happens, forming tiny air pockets that expand during baking. Beat until the mixture is truly light, pale, and fluffy, which can take a good 3-5 minutes with an electric mixer.
The gentle art of mixing is equally vital. Once you start adding the dry ingredients and milk, switch to the lowest speed on your mixer or even fold by hand. Overmixing at this stage develops the gluten in the flour too much, leading to a tough, chewy cake instead of a tender, delicate one. Mix just until the ingredients are combined and no streaks of flour are visible. Sifting your dry ingredients is another small but impactful step; it prevents lumps and ensures the leavening agents are evenly distributed throughout the flour, contributing to a consistent rise and crumb. Proper pan preparation is also non-negotiable. Whether you grease and flour or use parchment, ensuring the cake doesn’t stick makes for a clean release and a beautiful finished product. Remember to never open the oven door during the first two-thirds of the baking time, as the sudden drop in temperature can cause the cake to sink.
For variations, the classic vanilla sponge is a dream canvas. For a simple and elegant finish, a dusting of powdered sugar is perfect, letting the cake’s pure flavor shine. Pair it with fresh berries and a dollop of homemade whipped cream for a summery treat. You can also elevate it with a light lemon glaze (powdered sugar, lemon juice, and a touch of zest) or a simple vanilla buttercream. To create a layered cake, simply double the recipe and bake in two 9-inch round pans, adjusting baking time as needed. Flavor variations are endless: add lemon zest to the batter for a bright citrus note, a teaspoon of almond extract for a subtle nutty depth, or swap out some of the milk for buttermilk for a tangier, even more tender crumb. You could also fold in chocolate chips, sprinkles, or even a swirl of fruit puree for added complexity. The beauty of this classic lies in its adaptability, inviting you to experiment and make it your own.
Storage and Reheating
Proper storage is key to keeping your Classic Vanilla Sponge Sheet Cake fresh and delicious. Once the cake has cooled completely, which is crucial to prevent condensation and sogginess, you can store it at room temperature for up to 2-3 days. If the cake is unfrosted, wrap it tightly in plastic wrap or aluminum foil, or place it in an airtight container. If it’s frosted, it’s best to store it in an airtight cake carrier or container to protect the frosting. Placing a slice of bread next to an unfrosted cake in an airtight container can help keep it moist by transferring its moisture to the cake.
For longer storage, the unfrosted cake freezes beautifully. Wrap individual slices or the entire cake (if unfrosted) very tightly in plastic wrap, then an additional layer of aluminum foil. This double layer protects against freezer burn. Frozen sponge cake can last for up to 2-3 months. To thaw, simply remove it from the freezer and let it sit at room temperature, still wrapped, for several hours or overnight until fully defrosted. Once thawed, you can frost or serve as desired. Frosted cakes can also be frozen, though the texture of some frostings (especially those with high water content) might change slightly upon thawing.
Sponge cake is generally best enjoyed at room temperature, so reheating is usually not necessary or recommended, as it can dry out the delicate crumb. If you have refrigerated the cake (which is often necessary for cakes with cream cheese frosting, fresh fruit, or whipped cream), allow it to come to room temperature for about 30-60 minutes before serving. This allows the butter in the cake and frosting to soften, restoring its optimal flavor and texture. Never microwave sponge cake to “reheat” it, as this will quickly make it tough and rubbery.
Frequently Asked Questions
Why is my sponge cake dense and not light and fluffy?
A dense sponge cake is often the result of overmixing the batter after the dry ingredients have been added. Overmixing develops the gluten in the flour, leading to a tough, heavy texture. It can also be caused by insufficient aeration during the creaming of butter and sugar, or by not having your eggs at room temperature, which prevents them from incorporating enough air. Ensure you cream the butter and sugar thoroughly until light and fluffy, and fold in the dry ingredients just until combined.
My sponge cake sank in the middle after baking. What went wrong?
Several factors can cause a sponge cake to sink. The most common reasons are opening the oven door too early during baking, which causes a sudden temperature drop; undercooking the cake, meaning the structure hasn’t fully set; or too much leavening agent, causing it to rise too quickly and then collapse. Ensure your oven temperature is accurate (an oven thermometer can help), and resist the urge to open the oven door until at least two-thirds of the way through the baking time. Always test for doneness with a skewer.
How can I prevent my sponge cake from being dry?
A dry sponge cake is typically a sign of overbaking. Every oven is different, so it’s essential to start checking for doneness a few minutes before the recipe’s suggested minimum baking time. The cake should be golden brown, spring back when lightly touched, and a skewer inserted into the center should come out clean. Also, ensure you’re using the correct amount of fat and liquid in the recipe, as these contribute significantly to moisture. Room temperature ingredients also help create a more tender, moist crumb.
Can I substitute ingredients in this recipe, such as dairy-free milk or gluten-free flour?
While this recipe is designed for classic ingredients, some substitutions can be made with care. For dairy-free milk, you can often substitute with unsweetened almond milk or soy milk, keeping in mind that the flavor profile might subtly change. However, for a sponge cake, the fat content of whole milk contributes to moisture and tenderness, so a full-fat dairy-free alternative might yield better results. For gluten-free flour, you would need to use a 1:1 gluten-free baking blend that contains xanthan gum, and you might need to adjust the liquid slightly as gluten-free flours absorb moisture differently. Experimentation is often required for successful gluten-free baking, so be prepared for potential texture variations.