Instructions
- Choose the right pot: Select a heavy-bottomed saucepan or pot with high sides. A heavy bottom helps distribute heat evenly and prevents scorching, while high sides help contain the milk as it simmers and reduces, preventing boil-overs.
- Combine ingredients: Pour the whole milk into the saucepan. Add the granulated sugar to the milk. If using, add the tablespoon of unsalted butter to the mixture.
- Dissolve the sugar: Place the saucepan over medium-low heat. Stir constantly with a whisk or wooden spoon until the sugar is completely dissolved. This usually takes about 3-5 minutes. Ensure no sugar crystals remain at the bottom of the pot, as they can cause scorching later.
- Bring to a gentle simmer: Increase the heat to medium. Bring the mixture to a gentle simmer. Do not allow it to come to a rolling boil, as this can cause it to boil over quickly and create a mess. Look for small bubbles forming around the edges of the pot.
- Reduce and thicken: Once simmering, reduce the heat to low. The goal is to maintain a very gentle simmer. This is the most crucial step. You will need to simmer the milk for approximately 45-60 minutes, or even up to 90 minutes, depending on your stove and the desired thickness.
- Stir frequently: Stir the mixture frequently, every 5-10 minutes, especially during the initial stages. As the milk thickens, you will need to stir almost continuously to prevent it from sticking to the bottom of the pot and scorching. Pay extra attention to the bottom and corners.
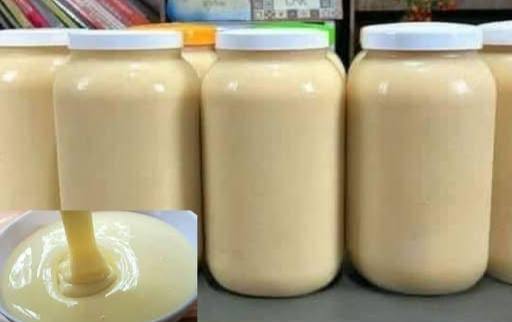
- Monitor consistency and color: As the milk reduces, it will gradually thicken and take on a pale off-white to light caramel color. The volume will significantly decrease, often by half or more. A good indication that it’s nearing completion is when it coats the back of a spoon thickly and leaves a clear path when you run your finger across the spoon.
- Perform the cold plate test (optional but recommended): To check for proper thickness, place a small plate in the freezer for a few minutes. Drop a small spoonful of the condensed milk onto the cold plate. Let it sit for 30 seconds, then push it with your finger. If it wrinkles and holds its shape, it’s ready. If it’s too runny, continue simmering for another 5-10 minutes and retest. Remember, it will thicken considerably more as it cools.
- Remove from heat: Once the desired consistency is reached, remove the saucepan from the heat immediately.
- Cool completely: Carefully pour the hot condensed milk into a clean, heat-proof jar or container. Allow it to cool completely at room temperature. This cooling process is essential as the condensed milk will continue to thicken significantly as it cools. Do not cover it while it’s still hot, as this can create condensation.
- Refrigerate: Once completely cool, cover the jar tightly and store in the refrigerator.
Cooking Tips and Variations
For the absolute best results with your homemade condensed milk, always start with whole milk. Its higher fat content contributes to a creamier, richer texture and helps prevent the milk from curdling during the long simmering process. While skim or low-fat milk can technically be used, the end product will be thinner and less luxurious, lacking the signature richness of traditional condensed milk. A heavy-bottomed pot is your best friend when making condensed milk. It distributes heat more evenly, significantly reducing the risk of scorching the milk at the bottom. Scorched milk will impart an unpleasant burnt taste that cannot be remedied, so invest in a good quality pot if you plan to make this regularly. Patience is paramount; this isn’t a quick recipe. The slow, gentle simmer is what allows the water to evaporate gradually, concentrating the milk’s natural sugars and leading to that perfect thick consistency. Rushing the process by increasing the heat too much will likely result in scorching or a grainy texture. Finally, continuous stirring, especially as the mixture thickens, is crucial. This prevents the milk solids and sugars from settling and burning at the bottom of the pot, ensuring a smooth, uniform product.
To enhance the flavor of your condensed milk, consider adding a teaspoon of pure vanilla extract after you’ve removed it from the heat and it has cooled slightly. Stir it in thoroughly for a fragrant, aromatic variation that will elevate any dessert. For a subtle nutty flavor, you could add a pinch of almond extract. If you’re feeling adventurous, a tiny pinch of salt (about 1/8 teaspoon) can actually balance the sweetness and bring out the other flavors, creating a more complex profile. For those who prefer a less sweet condensed milk, you can reduce the amount of granulated sugar by about a quarter cup. However, be aware that this might slightly affect the final thickness and preservation qualities, as sugar acts as a preservative. If you’re looking to experiment with dairy-free options, coconut milk (full-fat canned) or oat milk can be used, though the cooking time and final consistency may vary. Keep in mind that these alternatives will impart their own distinct flavors, creating a unique product that might not be a direct substitute for traditional condensed milk in all recipes. For a richer, almost caramel-like condensed milk, you can allow it to simmer for a slightly longer period, until it reaches a deeper golden-brown color and a thicker consistency. This creates a dulce de leche-like product that is fantastic for drizzling over ice cream or filling pastries.
Storage and Reheating
Proper storage is key to enjoying your homemade condensed milk for an extended period. Once your condensed milk has cooled completely to room temperature, transfer it to a clean, airtight glass jar or container. Ensure the lid is sealed tightly to prevent air exposure, which can lead to oxidation and spoilage. Store the jar in the refrigerator. When stored correctly, homemade condensed milk will last for up to 2-3 weeks. Always use a clean spoon each time you retrieve some to avoid introducing bacteria. If you notice any unusual odors, discoloration, or mold, it’s best to discard the batch. Freezing homemade condensed milk is also an option for longer storage, extending its shelf life to several months. You can freeze it in small, airtight containers or even in ice cube trays for convenient portioning. Thaw frozen condensed milk in the refrigerator overnight before use. It may separate slightly after thawing, but a good stir will usually bring it back to its smooth consistency.
Reheating homemade condensed milk is rarely necessary, as it’s typically used cold or at room temperature in recipes. However, if you find it has become too thick in the refrigerator and you need a more pourable consistency for a specific application, you can gently warm it. The best way to do this is to place the jar or container of condensed milk in a bowl of warm water (a bain-marie or water bath). Allow it to sit for 10-15 minutes, stirring occasionally, until it reaches your desired consistency. Alternatively, you can gently warm a small amount in a saucepan over very low heat, stirring constantly, until it loosens up. Be extremely careful not to overheat it, as this can cause it to scorch or become even thicker. Avoid microwaving, as it can heat unevenly and lead to a rubbery texture. Remember that condensed milk thickens as it cools, so if you’re using it in a recipe that requires a specific consistency, it’s always best to work with it at room temperature or slightly warmed if needed.
Frequently Asked Questions
Why did my condensed milk turn out grainy?
Graininess usually occurs if the sugar didn’t fully dissolve before the milk started reducing, or if the heat was too high during the simmering process, causing the sugars to crystallize. Ensure you stir well at the beginning to dissolve all sugar and maintain a very low, gentle simmer throughout.
Can I use a sugar substitute or honey instead of granulated sugar?
While you can experiment, it’s generally not recommended for a direct substitute. Sugar plays a crucial role not only in sweetness but also in the texture and preservation of condensed milk. Sugar substitutes may not provide the same thickening properties, and honey can alter the flavor significantly and may burn more easily.
My condensed milk is too thin, what went wrong?
If your condensed milk is too thin, it means it hasn’t reduced enough. The most common reason is not simmering it for long enough. Simply return it to the stove over low heat and continue to simmer and stir until it reaches the desired thickness. Remember, it will thicken considerably more as it cools.
Can I make a larger batch?
Yes, you can double or even triple the recipe. However, be aware that increasing the quantity will significantly increase the cooking time. You will need a much larger pot to accommodate the volume and allow for evaporation, and you’ll need to stir even more diligently to prevent scorching.