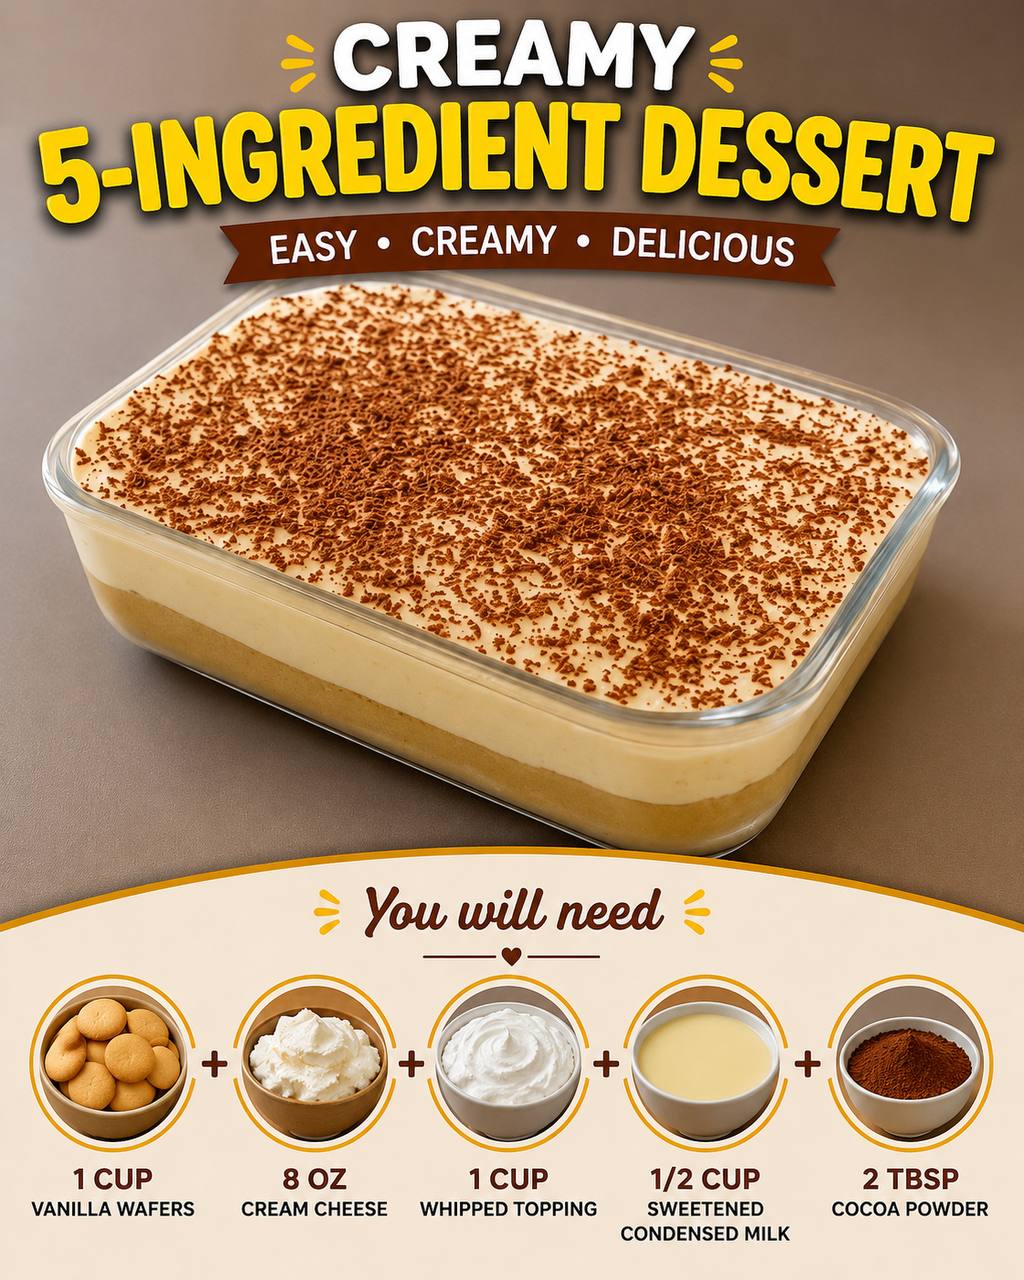
Instructions
- Prepare the Base: Place the vanilla wafers into a food processor and pulse until finely crushed into crumbs. Alternatively, place the wafers in a large Ziploc bag, seal it, and crush them using a rolling pin or the bottom of a heavy pan until fine crumbs are formed.
- Form the Crust: Lightly press the crushed vanilla wafer crumbs evenly into the bottom of an 8×8 inch square dish or a 9-inch pie plate. You can use the bottom of a glass or your fingers to help compact the crumbs.
- Mix the Creamy Filling: In a large mixing bowl, add the softened cream cheese and sweetened condensed milk. Using an electric mixer on medium speed, beat until the mixture is smooth and well combined, with no lumps of cream cheese remaining. Scrape down the sides of the bowl as needed.
- Fold in Whipped Topping: Gently fold the thawed whipped topping into the cream cheese mixture using a spatula. Be careful not to overmix; you want to maintain the light and airy texture of the whipped topping. Continue folding until no streaks of whipped topping are visible and the mixture is uniformly combined and fluffy.
- Assemble the Dessert: Carefully spoon the creamy filling over the prepared vanilla wafer crust. Use an offset spatula or the back of a spoon to spread the filling evenly across the entire surface, creating a smooth top layer.
- Dust with Cocoa Powder: Using a fine-mesh sieve, generously dust the top of the creamy filling with unsweetened cocoa powder. Ensure an even layer for both visual appeal and a delightful hint of chocolate flavor.
- Chill to Set: Cover the dish loosely with plastic wrap and refrigerate for at least 2-4 hours, or preferably overnight. Chilling is crucial for the dessert to set properly, firm up, and allow the flavors to meld beautifully.
- Serve and Enjoy: Once thoroughly chilled, slice the dessert into squares or wedges and serve cold.
Cooking Tips and Variations
To ensure your Creamy 5-Ingredient Dessert turns out perfectly every time, here are a few essential tips. First and foremost, make sure your cream cheese is properly softened. This is perhaps the most crucial step for achieving a smooth, lump-free creamy filling. If your cream cheese is too cold, it will be difficult to beat and will result in a clumpy texture. To soften it quickly, you can unwrap it and microwave it on low power for 10-15 seconds, checking frequently, or simply leave it out on the counter for about 30-60 minutes before you start. When folding in the whipped topping, be gentle. Overmixing can deflate the air from the whipped topping, leading to a denser, less airy filling. Use a spatula and fold it in slowly until just combined. Lastly, don’t skimp on the chilling time. While 2 hours might seem sufficient, an overnight chill truly allows the dessert to set completely, making it easier to slice and ensuring all the flavors have a chance to meld together beautifully.
The beauty of this simple recipe lies in its versatility, allowing for numerous delicious variations to suit any taste or occasion. For the base, while vanilla wafers provide a classic flavor, feel free to experiment. Graham cracker crumbs offer a slightly more rustic, buttery taste, while crushed chocolate wafers or Oreos can transform this into a chocolate lover’s dream. If you’re feeling adventurous, try using shortbread cookies for a richer, buttery crust. You can also mix in 1-2 tablespoons of melted butter with your crushed crumbs before pressing them into the dish for an even firmer and richer crust.
The creamy filling itself can also be customized. For an extra boost of flavor, a splash of vanilla extract (about ½ teaspoon) or almond extract can be added when beating the cream cheese and condensed milk. If you enjoy a hint of coffee, a teaspoon of instant espresso powder dissolved in a tiny bit of hot water and added to the filling can create a mocha-like twist. For an adult-friendly version, a tablespoon of coffee liqueur, rum, or even a citrus liqueur could be folded into the cream cheese mixture. Remember to adjust the sweetness slightly if adding additional liquid flavorings.
The topping possibilities are endless! Instead of just cocoa powder, consider dusting with finely grated chocolate for a more intense chocolate flavor and elegant appearance. Fresh berries like raspberries, strawberries, or blueberries make a vibrant and refreshing addition, especially when served during warmer months. A drizzle of caramel sauce or chocolate syrup just before serving can add another layer of indulgence. For a nutty crunch, sprinkle with chopped pecans, walnuts, or toasted almonds. You could even create individual servings by pressing the crust into the bottom of small ramekins, parfait glasses, or mason jars, layering the creamy filling, and topping with your chosen garnishes. This makes for a charming presentation and perfect portion control, ideal for entertaining or meal prepping your desserts for the week.
Storage and Reheating
Storing your Creamy 5-Ingredient Dessert properly is key to maintaining its freshness and delicious texture. Since this is a no-bake, dairy-based dessert, it must be kept refrigerated at all times. Once assembled and chilled, cover the dish tightly with plastic wrap or aluminum foil. This prevents the dessert from absorbing any odors from the refrigerator and keeps the surface from drying out. Stored in this manner, the dessert will remain fresh and delightful for up to 3-4 days in the refrigerator. Beyond that, the crust may start to soften significantly, and the creamy filling might lose some of its optimal texture.
This dessert is best enjoyed cold, straight from the refrigerator. It is not suitable for freezing, as the texture of the cream cheese and whipped topping will likely change significantly upon thawing, becoming watery or grainy. Similarly, this dessert does not require or benefit from reheating. Its appeal lies in its cool, creamy, and refreshing qualities. Always serve it chilled for the best experience. If you are preparing it for an event, it’s ideal to assemble it the day before or at least 4-6 hours in advance to ensure it has ample time to set up perfectly. When transporting, keep it in an insulated carrier with ice packs if the journey is long or if the weather is warm, to maintain its chilled state.
Frequently Asked Questions
Can I use homemade whipped cream instead of store-bought whipped topping?
Yes, you absolutely can! If you prefer to use homemade whipped cream, make sure it is whipped to firm peaks. However, be aware that homemade whipped cream tends to be less stable than store-bought whipped topping, which often contains stabilizers. This means your dessert might not hold its shape quite as firmly and should be consumed within 1-2 days for the best texture. Store-bought whipped topping provides a more consistent and stable result for this particular recipe.
What if I don’t have a food processor to crush the wafers?
No problem at all! You can easily crush the vanilla wafers by placing them in a sturdy Ziploc bag. Seal the bag, removing as much air as possible, then use a rolling pin, the bottom of a heavy pan, or even your hands to crush the wafers into fine crumbs. This method works perfectly well and requires no special equipment.
Can I make this dessert ahead of time for a party?
This dessert is perfect for making ahead! In fact, it benefits greatly from an extended chilling time. You can prepare the entire dessert up to 24 hours in advance. Just make sure it’s covered tightly with plastic wrap and stored in the refrigerator. This allows all the flavors to meld and the dessert to set beautifully, making it easier to slice and serve when your guests arrive.