Instructions
- Prepare Your Workspace and Dish: Gather all your ingredients and have them ready. If you plan to serve the custard in individual ramekins or a larger serving dish, ensure it’s clean and ready. There’s no need to grease the dish for this recipe.
- Create the Custard Base: In a medium-sized mixing bowl, crack the three large eggs. Use a whisk to beat the eggs thoroughly until the yolks and whites are completely combined and slightly frothy. This step is crucial for achieving a smooth custard texture.
- Incorporate the Sweetened Condensed Milk: Pour the entire can of sweetened condensed milk into the bowl with the beaten eggs. Continue to whisk vigorously until the mixture is uniform, smooth, and no streaks of egg or condensed milk remain. The mixture should be a pale, creamy yellow color.
- Prepare for Cooking (Stovetop Method – Recommended for Simplicity): Pour the egg and condensed milk mixture into a heavy-bottomed saucepan. Place the saucepan over medium-low heat.
- Gently Cook the Custard: Stir the mixture continuously with a whisk or a heat-resistant spatula. It’s important to keep the heat low and stir constantly to prevent the eggs from scrambling and to ensure even cooking. The custard will gradually thicken. This process usually takes about 10-15 minutes. You’ll know it’s ready when it coats the back of a spoon and leaves a clear path when you run your finger across it. It should be thick enough to hold its shape slightly but still pourable. Do not bring it to a boil.
- Pour into Serving Dish(es): Once the custard has reached the desired consistency, immediately remove it from the heat. Carefully pour the hot custard into your chosen serving dish(es). If you prefer a perfectly smooth custard without any tiny bits of cooked egg, you can strain the mixture through a fine-mesh sieve as you pour it into the dish.
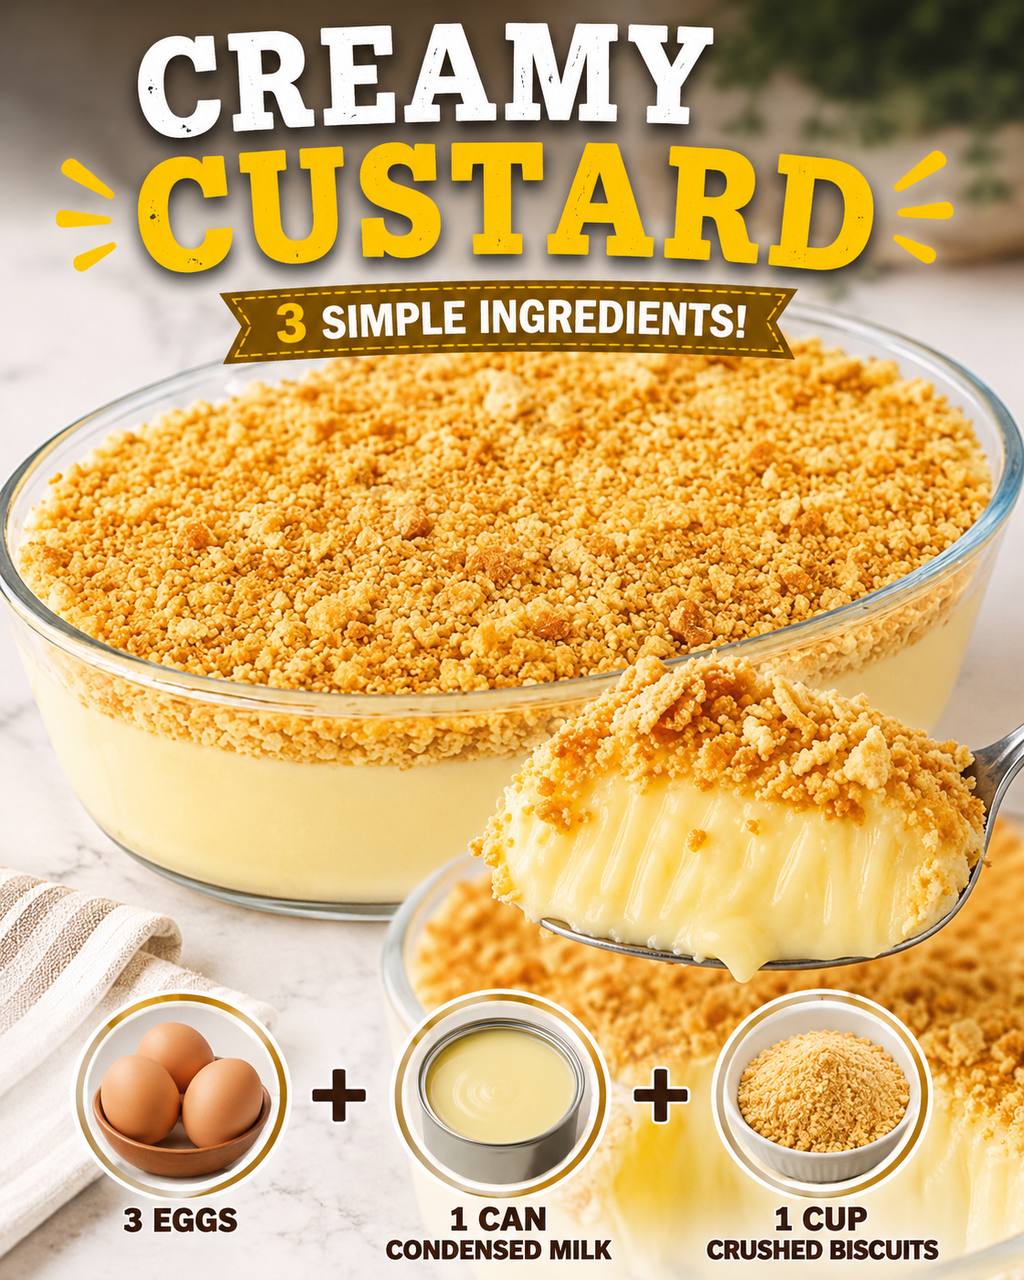
- Prepare the Biscuit Topping: While the custard is still warm, prepare your crushed biscuits. If they aren’t already crushed, place them in a zip-top bag and crush them using a rolling pin, or pulse them briefly in a food processor until they form coarse crumbs. You want a mix of fine crumbs and slightly larger pieces for texture.
- Add the Topping: Generously sprinkle the crushed biscuits evenly over the top of the warm custard. The warmth of the custard will help the biscuit crumbs adhere slightly.
- Chill to Set: Allow the custard to cool at room temperature for about 15-20 minutes. Once it has cooled slightly, cover the dish(es) with plastic wrap (ensure the wrap doesn’t touch the biscuit topping if possible, to keep it crisp). Refrigerate for at least 3-4 hours, or preferably overnight, until the custard is completely set and thoroughly chilled. Chilling is essential for the custard to firm up and for the flavors to meld beautifully.
- Serve and Enjoy: Once fully chilled and set, your creamy 3-ingredient custard is ready to be served!
Cooking Tips and Variations
Achieving the Perfect Smoothness: The key to a silky-smooth custard is gentle heat and constant stirring. Never let the mixture boil, as this will cause the eggs to scramble and result in a lumpy, grainy texture. If you’re concerned about lumps, straining the cooked custard through a fine-mesh sieve before chilling is a fantastic trick for an ultra-smooth finish. Ensure your whisking of the raw eggs and condensed milk is thorough from the start.
Biscuit Brilliance: While any plain biscuit works, experiment with different types! Digestive biscuits offer a wholesome, slightly nutty flavor; graham crackers provide a classic, comforting taste; shortbread adds a buttery richness; and even plain vanilla wafers can be delightful. For an extra touch, you can lightly toast the crushed biscuits in a dry pan for a few minutes before sprinkling them on, enhancing their crunch and flavor.
Flavor Boosters for the Custard: While delicious on its own, you can easily elevate the custard’s flavor. Stir in 1 teaspoon of vanilla extract with the condensed milk for a classic taste. A pinch of ground nutmeg or cinnamon can add warmth. For a citrusy twist, add 1 tablespoon of lemon or orange zest to the custard base. You could also swirl in a tablespoon of cocoa powder for a subtle chocolate custard.
Topping Transformations: Don’t limit yourself to just crushed biscuits! For added indulgence, consider sprinkling chocolate shavings, a drizzle of caramel or chocolate sauce, or a handful of toasted coconut flakes. Fresh fruit, such as sliced berries, peaches, or bananas, makes a wonderful accompaniment, adding freshness and contrasting texture. A dollop of whipped cream just before serving is also a classic pairing.
Serving Suggestions: This creamy custard is fantastic on its own, but it also shines when paired with other elements. Serve it in elegant individual ramekins for a sophisticated touch, or as a communal dessert in a larger bowl. It’s particularly lovely after a hearty meal, offering a light yet satisfying end. Consider serving it with a side of strong coffee or tea.
Preventing a Skin: If you want to prevent a “skin” from forming on top of the custard as it cools, press a piece of plastic wrap directly onto the surface of the warm custard before chilling. This is especially useful if you’re not adding the biscuit topping immediately or if you prefer a perfectly smooth top.
Don’t Overcook: Overcooking will lead to a rubbery or watery custard. It should be thick enough to coat the spoon but still have a slight wobble. Remember, it will continue to set as it chills in the refrigerator.
Storage and Reheating
Storage: This creamy custard stores beautifully in the refrigerator. Once completely cooled and set, cover the serving dish tightly with plastic wrap or transfer individual portions to airtight containers. It will keep well in the refrigerator for up to 3-4 days. For the best texture and freshness, consume it within this timeframe. The biscuit topping may soften slightly over time, but the custard itself will remain delicious.
Reheating: This creamy custard is specifically designed to be served chilled, as its texture and flavor are optimal when cold. Reheating is generally not recommended, as it can cause the custard to separate, become watery, or develop an unappealing grainy texture due to the egg content. The delicate structure of the custard is best preserved by serving it directly from the refrigerator. If you prefer a less cold dessert, simply take it out of the refrigerator 15-20 minutes before serving to let it come closer to room temperature, but avoid any form of heating.
Frequently Asked Questions
Can I make this custard ahead of time?
Absolutely! This creamy custard is an excellent make-ahead dessert. In fact, it needs at least 3-4 hours of chilling time to properly set and for the flavors to fully develop, making it perfect for preparing the day before you plan to serve it. Just cover it tightly and store it in the refrigerator.
What can I use if I don’t have sweetened condensed milk?
Sweetened condensed milk is a core ingredient and crucial for this recipe’s specific texture and sweetness without adding extra sugar or milk. Substituting it would fundamentally change the recipe. There isn’t a direct 1:1 substitute that would yield the same results with just three ingredients. If you don’t have it, it’s best to find a different custard recipe that uses ingredients you have on hand.
Can I make a larger batch?
Yes, you can easily double or triple the recipe to serve a larger crowd. Simply scale up all the ingredients proportionally. Keep in mind that cooking time on the stovetop might be slightly longer for a larger volume of custard, so pay close attention to the consistency rather than strictly adhering to the original cooking time.
Is this custard gluten-free or dairy-free?
As written, this custard is neither gluten-free nor dairy-free. Sweetened condensed milk is a dairy product, and most common biscuits contain gluten and dairy. To make it gluten-free, you would need to use gluten-free biscuits for the topping. For a dairy-free version, you would need to find a suitable dairy-free sweetened condensed milk alternative (often coconut-based) and dairy-free biscuits, which would alter the flavor profile significantly.
Why did my custard turn out lumpy or watery?
Lumpy custard is usually a sign of cooking it too quickly over too high heat, causing the eggs to scramble. Always cook over low to medium-low heat and stir constantly. Watery custard can result from not cooking it long enough for it to thicken properly, or from overcooking it and causing the eggs to separate. Ensure you cook until it coats the back of a spoon and sets firmly after chilling.