Instructions
- Preheat your oven to 400°F (200°C). This temperature is ideal for rendering the fat slowly and achieving maximum crispiness without burning.
- Line a large baking sheet with parchment paper or aluminum foil. This is a crucial step for easy cleanup. If using foil, you might want to crimp the edges slightly to create a small lip to contain the rendered fat.
- If you have a wire rack that fits inside your baking sheet, place it on top of the lined baking sheet. This elevates the bacon, allowing air to circulate around all sides and letting the fat drip away, resulting in even crispier bacon. If you don’t have a wire rack, don’t worry, it will still turn out delicious.
- Arrange the bacon strips in a single layer on the prepared baking sheet or wire rack. Ensure that the slices do not overlap, as this will cause them to steam rather than crisp. Give each strip a little breathing room.
- If desired, lightly sprinkle the bacon with freshly ground black pepper for a savory kick, or a very light dusting of brown sugar for a hint of sweetness. For candied bacon, you can brush a thin layer of maple syrup over the bacon at this stage, or halfway through cooking.
- Place the baking sheet in the preheated oven.
- Bake for 15-25 minutes, depending on the thickness of your bacon and your desired level of crispiness.
- For regular-cut bacon, start checking around 15-18 minutes. For thick-cut bacon, it might take 20-25 minutes or even a few minutes longer.
- You generally do not need to flip the bacon when cooking it in the oven, especially if using a wire rack. However, if you notice uneven cooking or want to ensure maximum crispiness, you can carefully flip the strips halfway through the cooking time using tongs.
- Keep a close eye on the bacon during the last few minutes of cooking. Bacon can go from perfectly crispy to burnt very quickly. It should be golden brown and bubbling, looking firm and brittle.
- Once the bacon has reached your desired crispiness, carefully remove the baking sheet from the oven.
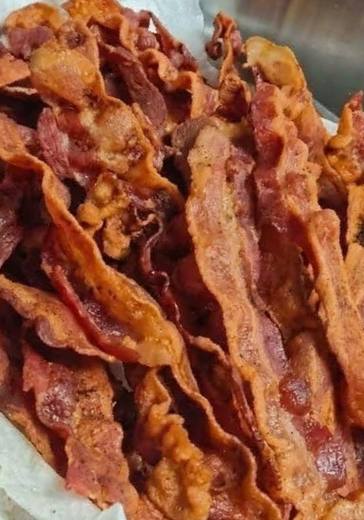
- Using tongs, transfer the cooked bacon strips to a plate lined with several layers of paper towels. This will absorb any excess rendered fat, making the bacon even crispier and less greasy.
- Allow the bacon to rest on the paper towels for a few minutes before serving. As it cools, it will continue to crisp up.
- Carefully pour the rendered bacon fat into a heat-safe container. Once cooled, you can store it in the refrigerator for future use in cooking, or dispose of it responsibly (never pour hot grease down the drain).
- Serve immediately and enjoy your perfectly crispy oven-baked bacon!
Cooking Tips and Variations
Achieving legendary crispy oven bacon is an art, and these tips will help you master it every time. First and foremost, resist the urge to overcrowd the pan. Each strip needs its space to render fat and crisp up properly. If your baking sheet is too full, the bacon will steam instead of bake, resulting in a chewy, less-than-ideal texture. If you’re cooking a large batch, use two baking sheets and rotate them halfway through cooking for even results. Another crucial tip is to start with a cold oven. Placing bacon in a cold oven and letting it heat up gradually with the oven allows the fat to render slowly and evenly, leading to a much crispier finish. This method also helps prevent the bacon from shrinking too much too quickly. However, if you’re in a rush, a preheated oven works perfectly well too, just keep a closer eye on it.
For ultimate crispiness, especially with thicker cuts, using a wire rack set inside your baking sheet is a game-changer. This elevates the bacon, allowing the hot air to circulate completely around each strip and the rendered fat to drip away. This prevents the bacon from cooking in its own grease, which can make it less crispy. If you don’t have a wire rack, simply baking it directly on parchment paper or foil will still yield excellent results; just be sure to blot it thoroughly with paper towels afterward. Always use parchment paper or foil for lining your baking sheets. This makes cleanup incredibly easy, as you can simply discard the liner with the rendered fat once it has cooled and solidified.
When it comes to bacon, thickness matters. Thick-cut bacon will take longer to cook but offers a more substantial, satisfying chew alongside its crispiness. Regular-cut bacon cooks faster and achieves a brittle crispness more quickly. Adjust your cooking times accordingly. And speaking of cooking times, every oven is different, so consider your stated cooking times as a guideline. Keep an eye on your bacon, especially towards the end, as it can go from perfectly golden to burnt in a matter of minutes. The bacon should be deeply golden brown and firm, but not blackened. Once removed from the oven, it will continue to crisp up as it cools on the paper towels.
For variations, the possibilities are endless. For a sweet and savory treat, try making candied bacon. During the last 10-15 minutes of baking, brush the bacon with maple syrup, brown sugar, or a mixture of both. The sugar will caramelize, creating an irresistible sticky-crisp coating. For a spicy kick, sprinkle a pinch of cayenne pepper or red pepper flakes over the bacon before baking. A dash of smoked paprika can also enhance the smoky flavor. For a unique twist, try a black pepper bacon by generously grinding fresh black pepper over the strips before they go into the oven. You can also experiment with different types of bacon, such as applewood smoked, hickory smoked, or even uncured varieties, each offering a distinct flavor profile.
Don’t just think of oven bacon for breakfast. It’s fantastic crumbled over salads, baked potatoes, or creamy soups. Use it to elevate your sandwiches, especially a classic BLT, where its even crispiness truly shines. It’s also a perfect addition to pasta dishes, quiches, or even as a garnish for cocktails. The beauty of oven-baked bacon is its versatility and consistent quality, making it a staple for any meal or snack.
Storage and Reheating
Proper storage and reheating are key to enjoying your crispy oven bacon long after it’s cooked. Once your bacon has cooled completely to room temperature, transfer it to an airtight container or a resealable plastic bag. Store it in the refrigerator for up to 4-5 days. It’s important that the bacon is completely cool before sealing it, as any residual warmth can create condensation, making the bacon soggy. You can also layer the bacon between sheets of paper towel within the container to absorb any lingering moisture and help maintain its crispness.
For longer storage, cooked bacon can be frozen. Arrange the cooled bacon strips in a single layer on a baking sheet and freeze for about an hour until solid. This prevents them from sticking together. Once frozen, transfer the bacon to a freezer-safe bag or container, removing as much air as possible to prevent freezer burn. Frozen cooked bacon can last for up to 1 month. When you’re ready to use it, you can reheat it directly from frozen or thaw it in the refrigerator overnight.
Reheating oven-baked bacon while maintaining its crisp texture is simple. For the best results, use your oven or an air fryer. To reheat in the oven, preheat it to 350°F (175°C). Place the bacon strips in a single layer on a baking sheet (you don’t necessarily need to line it again, but you can if you prefer). Heat for 5-10 minutes, or until warmed through and re-crisped to your liking. Keep an eye on it, as it can quickly go from perfect to burnt.
An air fryer is also an excellent tool for reheating crispy bacon. Place the bacon in a single layer in the air fryer basket. Air fry at 350°F (175°C) for 3-5 minutes, shaking the basket once or twice, until it’s hot and crispy again. This method is particularly fast and effective for smaller batches.
While you can reheat bacon in a microwave, it’s generally not recommended if you want to retain crispiness. Microwaved bacon tends to become chewy and rubbery. If you must use a microwave, place the bacon on a paper towel-lined plate and heat in 15-second intervals until warm, but be aware that the texture won’t be the same as freshly cooked or oven-reheated bacon.
Frequently Asked Questions
What kind of bacon is best for oven baking?
Both regular-cut and thick-cut bacon work wonderfully for oven baking. Thick-cut bacon will yield a more substantial, meaty strip with a satisfying chew, while regular-cut bacon will become more brittle and crispy. The key is to adjust your cooking time accordingly; thick-cut will generally take longer to cook through and crisp up.
Can I cook bacon from frozen in the oven?
Yes, you can cook bacon directly from frozen in the oven. Simply separate the frozen strips and arrange them on your prepared baking sheet. You may need to add an additional 5-10 minutes to the cooking time, or possibly even more, depending on the thickness and how frozen the bacon is. Keep a close eye on it to ensure it cooks evenly and reaches your desired crispness.
How do I prevent my bacon from curling?
To help prevent bacon from curling, you can place another baking sheet or an oven-safe wire rack directly on top of the bacon strips while they cook. This gentle pressure helps keep them flat. Another common method is to start the bacon in a cold oven, allowing it to heat up gradually, which can also contribute to flatter strips as the fat renders more slowly.
What do I do with the rendered bacon fat?
Don’t throw away that flavorful bacon fat! Once it has cooled, carefully pour it into a clean, heat-safe jar or container. You can store it in the refrigerator for several weeks and use it to add incredible flavor to a variety of dishes. It’s excellent for frying eggs, sautéing vegetables (like onions or greens), making gravies, or even for greasing a cast iron pan. Just be sure to strain out any small bits of bacon before storing for longer shelf life.