Instructions
- Prepare the Pork Belly: Begin by thoroughly patting the skin of the pork belly completely dry with paper towels. This is a crucial step for achieving crispy skin, as moisture is the enemy of crispiness.
- Score the Skin: Using a very sharp knife or a razor blade, carefully score the pork belly skin in a crosshatch or parallel pattern. Make sure to cut through the skin and fat layer, but avoid cutting into the meat itself. Scoring helps the fat render and allows the skin to crisp up more effectively.
- Season the Pork Belly: In a small bowl, combine the coarse sea salt, black pepper, garlic powder, onion powder, and smoked paprika. Rub this seasoning mixture generously all over the pork belly, paying extra attention to massaging it into the scored skin. For best results, allow the seasoned pork belly to air-dry uncovered in the refrigerator for at least 4 hours, or preferably overnight. This further dehydrates the skin, enhancing crispiness.
- Preheat Oven: Preheat your oven to 300°F (150°C).
- Slow Roast: Place the seasoned pork belly, skin-side up, on a wire rack set over a baking sheet. Pour about 1/2 cup of water into the bottom of the baking sheet to catch rendered fat and prevent smoking. Roast for 1 hour and 30 minutes to 2 hours, or until the internal temperature of the pork belly reaches 160°F (71°C) and much of the fat has rendered. This low and slow cooking renders the fat, making the meat tender and preparing the skin for crisping.
- Increase Heat for Crisping: Once the initial roasting is complete, increase the oven temperature to 400°F (200°C). Continue to roast for another 30-45 minutes, or until the skin is beautifully golden brown and shatteringly crispy. Keep a close eye on it during this stage to prevent burning. If certain areas are crisping faster than others, you can loosely tent them with foil.
- Make the Glaze: While the pork belly is crisping, prepare the glaze. In a small saucepan, combine the soy sauce, honey, rice vinegar, grated ginger, sesame oil (if using), and water. Bring the mixture to a gentle simmer over medium heat, stirring occasionally, until it thickens slightly, about 5-7 minutes. Remove from heat and set aside.
- Rest and Cut: Once the pork belly is perfectly crispy, remove it from the oven and let it rest on a cutting board for 10-15 minutes. This allows the juices to redistribute, ensuring tender and moist meat.
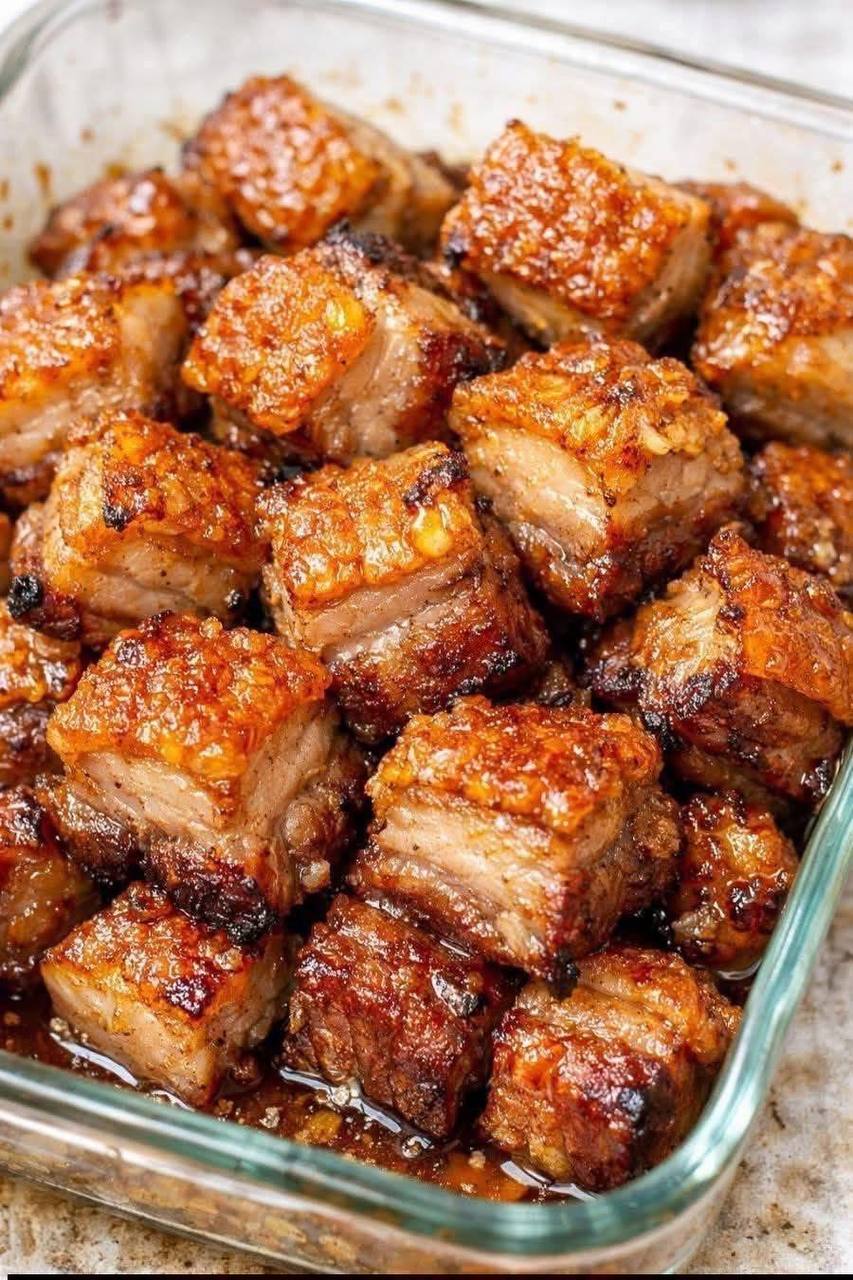
- Cut into Bites: Using a sharp knife, cut the pork belly into 1-inch to 1.5-inch cubes or “bites.”
- Glaze and Serve: In a large bowl, gently toss the pork belly bites with the prepared glaze until evenly coated. Alternatively, you can brush the glaze onto each piece. Garnish with chopped scallions and sesame seeds. Serve immediately and enjoy the incredible crispy texture and rich flavor!
Cooking Tips and Variations
To ensure your Crispy Pork Belly Bites are nothing short of perfection, here are some invaluable tips and exciting variations:
- The Drying is Key: We cannot stress this enough – a dry skin is a crispy skin. After patting it dry, leaving the pork belly uncovered in the fridge overnight significantly enhances the crisping process. The circulating air further dehydrates the skin, resulting in an unbeatable crunch.
- Don’t Rush the Scoring: Take your time when scoring the skin. Deep cuts through the skin and fat, but not into the meat, are essential. This allows the fat to render out efficiently and creates more surface area for crisping. A sharp utility knife or even a box cutter blade (carefully used) can work wonders if your kitchen knives aren’t quite sharp enough.
- Salt is Your Friend (for the skin): Generously salting the skin not only seasons it but also helps draw out more moisture, contributing to that desired crackling texture. Don’t be shy with the coarse salt on the skin.
- Monitor the Crisp: During the high-heat crisping stage, keep a close eye on the pork belly. Ovens can vary, and what’s perfect in one might burn in another. If you notice the skin browning too quickly, you can reduce the heat slightly or even use a broiler for the last few minutes, but watch it constantly as it can go from perfect to burnt in seconds.
- Don’t Over-Glaze: While the glaze adds fantastic flavor, applying too much too early can make the skin soggy. Toss the bites in the glaze right before serving to maintain maximum crispiness.
- Spicy Kick: For those who love a bit of heat, add a pinch of red pepper flakes to the glaze or a dash of sriracha for a fiery twist.
- Garlic Lover’s Dream: Mince a few cloves of fresh garlic and add them to the glaze as it simmers for an extra aromatic boost.
- Herbaceous Twist: Consider adding a teaspoon of dried thyme or rosemary to your initial seasoning rub for an earthy, aromatic flavor profile.
- Citrus Brightness: A squeeze of fresh lime juice in the glaze just before tossing can add a lovely brightness that cuts through the richness of the pork belly.
- Different Glazes: Experiment with other glaze combinations! A maple-Dijon glaze, a gochujang-based Korean BBQ glaze, or even a simple balsamic reduction can offer exciting new flavors.
- Air Fryer Finish: If you have an air fryer, you can achieve extra crispiness. After the initial slow roast in the oven, cut the pork belly into bites, and then air fry them at 400°F (200°C) for 8-12 minutes, shaking the basket occasionally, until super crispy. Then toss with glaze.
Storage and Reheating
While these Crispy Pork Belly Bites are best enjoyed fresh, you can certainly store and reheat leftovers. However, be aware that the skin will lose some of its initial crispness upon refrigeration.
- Storage: Allow the pork belly bites to cool completely. Store them in an airtight container in the refrigerator for up to 3-4 days. It’s best to store them without the glaze if possible, and then glaze just before reheating.
- Reheating for Crispness: To bring back some of that coveted crispiness, avoid the microwave.
- Oven Method: Preheat your oven or toaster oven to 350°F (175°C). Place the pork belly bites in a single layer on a wire rack set over a baking sheet. Reheat for 10-15 minutes, or until heated through and the skin has re-crisped. Keep a close eye on them to prevent burning.
- Air Fryer Method: This is often the best method for reheating. Place the cooled pork belly bites in a single layer in your air fryer basket. Air fry at 375°F (190°C) for 5-8 minutes, shaking the basket halfway through, until heated through and crispy.
- Reheating with Glaze: If the bites are already glazed, the reheating process might make the glaze a bit stickier or slightly burn. It’s still possible, but watch carefully. Adding a fresh drizzle of glaze after reheating can refresh the flavors.
- Freezing: While technically possible, freezing pork belly bites is not recommended as the texture, especially the crispiness of the skin, will be significantly compromised upon thawing and reheating.
Frequently Asked Questions
What kind of pork belly should I buy?
Look for skin-on pork belly from a reputable butcher or grocery store. Aim for a piece with a good balance of meat and fat, and ensure the skin is intact and not too thick or thin. Quality pork belly will yield the best results.
My pork belly skin isn’t getting crispy. What went wrong?
The most common reasons for soggy skin are insufficient drying, not scoring deeply enough, or not cooking at a high enough temperature for long enough during the crisping phase. Ensure you pat the skin completely dry, consider air-drying overnight in the fridge, and don’t be afraid to increase the oven temperature or use the broiler carefully for the last few minutes.
Can I make these in advance for a party?
You can prepare the pork belly up to the point of cutting into bites and storing them in the refrigerator. Reheat them using the oven or air fryer method, then toss with the freshly made glaze just before serving to ensure maximum crispiness and flavor. This makes them a fantastic make-ahead appetizer.
Can I use boneless, skinless pork belly?
While you can cook boneless, skinless pork belly, it won’t achieve the “crispy skin” aspect that is central to this recipe. The meat will still be tender and delicious, but you’ll miss out on the signature crackling. If you use skinless, adjust cooking times slightly as there’s no need to crisp the skin, and focus on slow roasting for tenderness.