Instructions
- In a large mixing bowl, combine the warm buttermilk and 1 tablespoon of the granulated sugar. Sprinkle the active dry yeast over the top. Let it sit for 5-10 minutes until the yeast is foamy and activated. This is called “proofing” the yeast and ensures it’s alive and ready to make your dough rise.
- Once the yeast is proofed, add the remaining granulated sugar, egg, salt, and melted butter to the buttermilk mixture. Whisk everything together until well combined.
- Gradually add the all-purpose flour, one cup at a time, mixing with a wooden spoon or a stand mixer with a dough hook on low speed. Once all the flour is incorporated, the dough will be shaggy and sticky.
- Turn the dough out onto a lightly floured surface. Knead the dough for 5-7 minutes, or until it becomes smooth and elastic. If using a stand mixer, knead on medium-low speed for about 5 minutes. The dough should be soft but not overly sticky.
- Lightly grease a clean large bowl with a little oil. Place the dough in the bowl, turning it once to coat the entire surface. Cover the bowl tightly with plastic wrap or a clean kitchen towel.
- Let the dough rise in a warm place for 1 to 1.5 hours, or until it has doubled in size. A warm oven (turned off, with just the light on) or a sunny spot on your counter works well.
- Once the dough has doubled, gently punch it down to release the air. Turn the dough out onto a lightly floured surface.
- Using a rolling pin, roll the dough out to an even thickness of about ½ inch. Try to maintain a rectangular shape if possible.
- Using a sharp knife or a pizza cutter, cut the dough into 2-inch by 2-inch squares. You can re-roll the scraps once to get a few more beignets, but avoid overworking the dough.
- Line one or two baking sheets with parchment paper and lightly dust with flour. Carefully transfer the cut beignet squares to the prepared baking sheets, leaving a little space between each one.
- Cover the beignet squares loosely with plastic wrap or a clean kitchen towel. Let them rise again in a warm place for another 30-45 minutes, or until they look puffy and slightly larger. This second rise is crucial for light and airy beignets.
- While the beignets are undergoing their second rise, prepare for frying. In a large, heavy-bottomed pot or Dutch oven, pour enough vegetable oil to reach a depth of about 3 inches. Attach a deep-fry thermometer to the side of the pot.
- Heat the oil over medium heat until it reaches a temperature of 350°F (175°C). Maintaining the correct oil temperature is vital for perfectly cooked beignets.
- Once the oil is at temperature, carefully drop 3-4 beignet squares into the hot oil at a time. Do not overcrowd the pot, as this will lower the oil temperature and result in greasy beignets.
- Fry the beignets for 1-2 minutes per side, or until they are golden brown and puffed up. Use a slotted spoon or spider to gently flip them.
- Once golden brown on both sides, remove the beignets from the oil and transfer them to a wire rack set over a baking sheet lined with paper towels. This allows excess oil to drain off. Repeat with the remaining beignet squares, ensuring the oil returns to 350°F before adding the next batch.
- While the beignets are still warm, prepare the glaze. In a medium bowl, whisk together the sifted powdered sugar, milk (or buttermilk), and vanilla extract until smooth and free of lumps. Adjust consistency as needed, adding a tiny bit more milk for a thinner glaze or a bit more powdered sugar for a thicker glaze.
- Dip each warm beignet square into the glaze, turning to coat all sides, or drizzle the glaze generously over the beignets. Place them back on the wire rack for the glaze to set slightly.
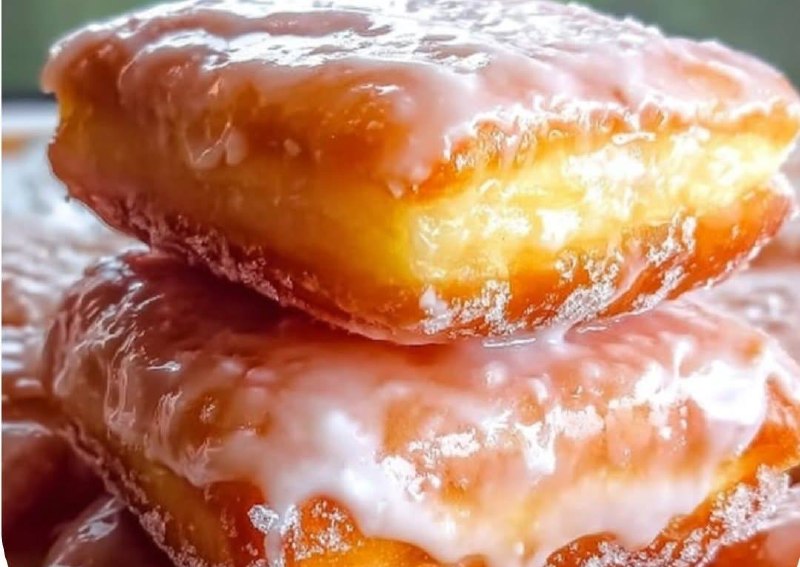
- Serve the Glazed Buttermilk Beignet Squares immediately for the best taste and texture.
Cooking Tips and Variations
Achieving beignet perfection largely comes down to a few key techniques. First and foremost, oil temperature control is paramount. Invest in a good deep-fry thermometer; it’s your best friend here. If the oil is too cool, your beignets will absorb too much oil and become greasy and dense. If it’s too hot, they’ll brown too quickly on the outside, leaving the inside raw. Aim for a consistent 350°F (175°C). Another crucial tip is to avoid overcrowding the pan. Frying only 3-4 beignets at a time allows them enough space to puff up properly and helps maintain the oil temperature. When flipping them, be gentle with your slotted spoon or spider to avoid deflating their airy structure. You’ll know they’re cooked through when they are gloriously golden brown on all sides and feel light. For the best adherence and melt-in-your-mouth experience, glaze your beignets while they are still warm, but not piping hot, allowing the glaze to set beautifully without completely melting off. Pair these delightful squares with a strong cup of coffee, especially chicory coffee for an authentic New Orleans experience, or a glass of cold milk.
While delicious as is, these Glazed Buttermilk Beignet Squares are also wonderfully versatile for variations. For a different glaze flavor, consider adding a squeeze of fresh lemon juice to the glaze for a bright, tangy lemon glaze, or a tablespoon of maple syrup for a warm maple glaze. A touch of cocoa powder can transform it into a chocolate glaze. For an extra indulgent treat, you could even fill these beignets. After their first rise, roll out the dough, place small dollops of jelly, fruit preserves, or even pastry cream on one half, then fold the other half over and seal tightly before cutting and frying. This creates a delightful surprise inside. You can also experiment with different spices in the dough itself, such as a pinch of nutmeg or cinnamon, to add another layer of aromatic warmth. Remember, the base dough is a fantastic canvas, so feel free to get creative and make these squares truly your own.
Storage and Reheating
Glazed Buttermilk Beignet Squares are undeniably at their absolute best when served fresh, warm from the fryer and with a glistening glaze. The light, airy texture and delicate crispness are fleeting, and they tend to lose some of their charm as they cool and sit. However, if you do find yourself with leftovers (a rare but possible occurrence!), they can be stored. Place any remaining beignets in an airtight container at room temperature for up to 1 day. Beyond that, the quality will significantly diminish, becoming chewier and less appealing. Avoid refrigerating them, as the cold air tends to dry out fried dough very quickly and makes them hard.
Reheating beignets is a bit of a challenge to regain their original glory, but it can be done to some extent. The best method for reheating is in an oven or toaster oven. Preheat your oven to a low temperature, around 275-300°F (135-150°C). Place the beignets on a baking sheet and heat for about 5-7 minutes, or until they are warmed through. Be careful not to overheat them, as this will make them dry and tough. The glaze might melt a bit during reheating, which is perfectly fine. You can also try a quick flash in an air fryer at 300°F (150°C) for 2-3 minutes. While they won’t be as light and crisp as fresh, these methods will at least warm them up and soften the dough, making them more enjoyable than eating them cold.
Frequently Asked Questions
What’s the difference between a beignet and a doughnut?
While both beignets and doughnuts are types of fried dough, there are some key differences. Beignets are traditionally square-shaped (though ours are specifically Glazed Buttermilk Beignet Squares, beignets don’t always have a glaze) and classically served liberally dusted with powdered sugar, particularly in New Orleans. They are typically made from a yeast-leavened dough that results in a very light, airy, and sometimes hollow interior. Doughnuts, on the other hand, come in many shapes (rings, filled, holes) and can be yeast-leavened or cake-doughnuts. They often have a denser crumb and a wider variety of glazes, frostings, and toppings.
Can I make the dough ahead of time?
Yes, you can prepare the dough for these Glazed Buttermilk Beignet Squares ahead of time. After the first rise, punch down the dough, then cover the bowl tightly with plastic wrap and refrigerate it for up to 12-24 hours. When you’re ready to fry, take the dough out of the refrigerator and let it sit at room temperature for about 30-60 minutes to warm up slightly before rolling, cutting, and proceeding with the second rise and frying instructions. This can be a great way to break up the preparation process, especially for a brunch.
Why are my beignets not puffing up?
There are a few common reasons why your beignets might not be puffing up properly. The most frequent culprit is inactive yeast. Ensure your yeast is fresh and that your buttermilk is warm (105-115°F/40-46°C) but not too hot, which can kill the yeast. Not allowing enough time for the first and second rises is another factor; the dough needs adequate time in a warm environment to develop air pockets. Lastly, if your frying oil is too cold, the beignets won’t puff up quickly and instead absorb oil, becoming dense and greasy. Always use a thermometer to maintain the correct oil temperature (350°F/175°C).
Can I bake these instead of frying?
While you can technically bake yeast dough, baking will not yield the same light, airy texture and characteristic crisp exterior that is essential to a traditional beignet. Frying is what gives beignets their unique qualities. If you bake them, they will be more like soft rolls or sweet bread, rather than the delicate, puffy fried dough you expect from a beignet. For an authentic experience, frying is highly recommended.