Instructions
- Prepare Your Equipment: Ensure your heavy cream is very cold. For best results when whipping, you can also chill your mixing bowl (preferably a metal one) and whisk attachment in the freezer for 10-15 minutes before starting. This helps the cream whip up faster and more effectively.
- Whip the Heavy Cream: In the chilled mixing bowl, pour in the very cold heavy cream. Using an electric mixer (stand mixer with whisk attachment or a hand mixer), begin whipping the cream on medium-high speed. Continue to whip until stiff peaks form. This means when you lift the whisk, the cream holds its shape firmly. Be careful not to over-whip, as it can turn into butter.
- Combine Sweetened Condensed Milk and Vanilla (for base): In a separate, large bowl, pour the chilled sweetened condensed milk. If making a vanilla base, stir in the vanilla extract at this stage. If you’re going for another flavor directly (e.g., chocolate or coffee), you might incorporate some of the flavorings here as well, ensuring they are well mixed with the condensed milk.
- Fold in the Whipped Cream: Gently add about one-third of the whipped cream to the sweetened condensed milk mixture. Using a spatula, carefully fold it in until just combined. This lightens the condensed milk mixture, making it easier to incorporate the rest of the whipped cream without deflating it.
- Add Remaining Whipped Cream: Add the remaining whipped cream to the bowl. Gently fold it into the condensed milk mixture until no streaks of condensed milk remain and the mixture is uniform and light. The key here is to be gentle to maintain as much air as possible in the mixture, which contributes to the ice cream’s creamy texture.
- Incorporate Your Chosen Flavorings (if not vanilla): Now is the time to fold in your desired flavorings or mix-ins.
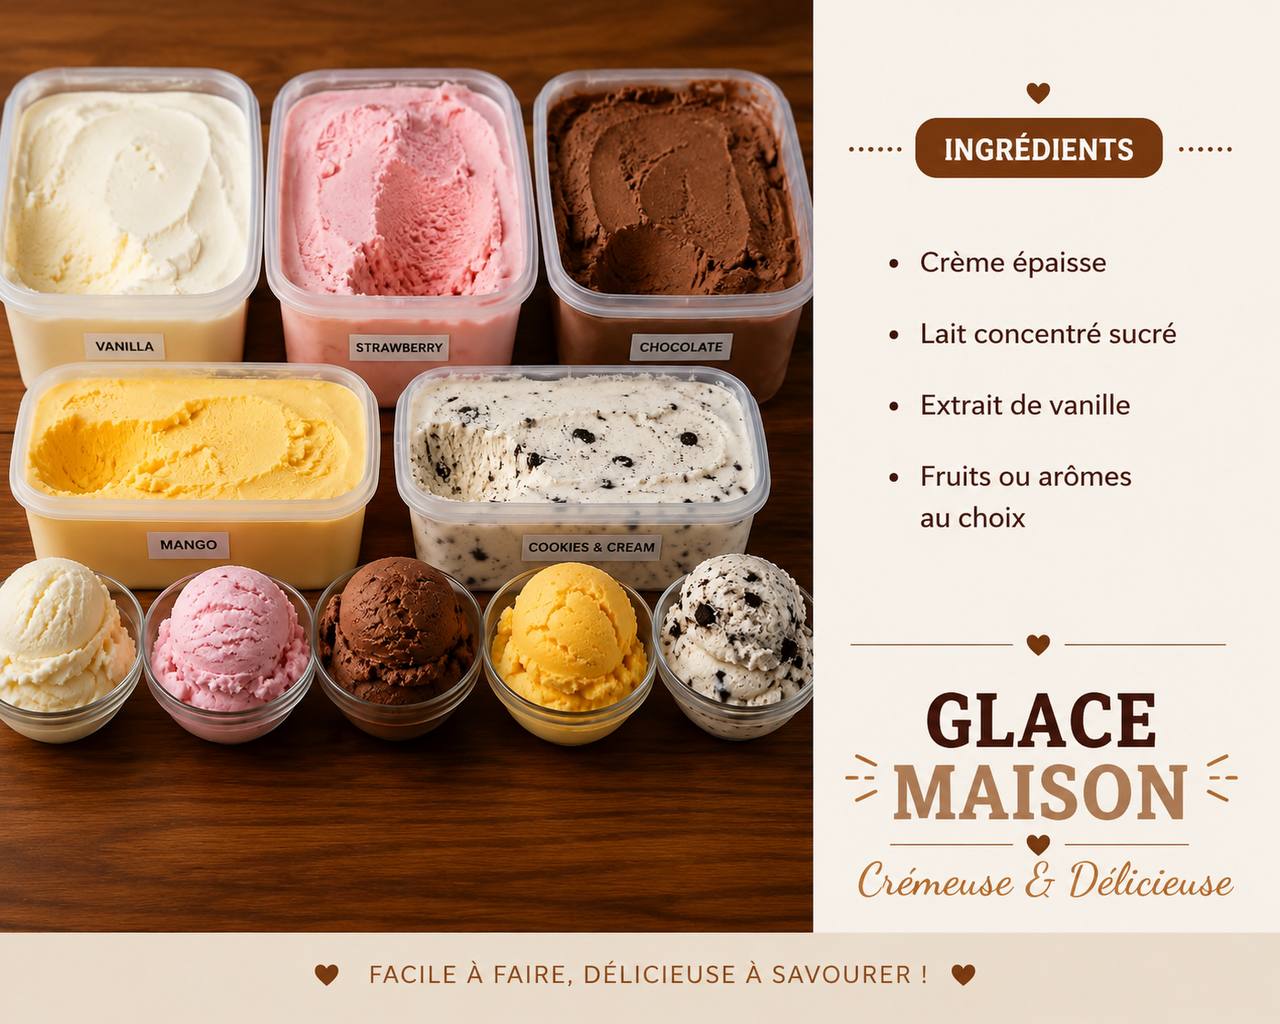
- For Strawberry: Gently fold in the chopped or pureed strawberries.
- For Chocolate: If using cocoa powder, fold it in with the condensed milk before adding whipped cream. If using melted chocolate, fold it in after the whipped cream is combined.
- For Mango: Gently fold in the mango puree.
- For Cookies & Cream: Gently fold in the crushed cookies.
- For Swirls (e.g., Peanut Butter): Pour about half of the ice cream base into your freezing container, drizzle with half of the warmed peanut butter, then add the remaining ice cream base and drizzle with the rest of the peanut butter. Swirl gently with a knife or skewer.
- Transfer to a Freezing Container: Pour or spoon the ice cream mixture into a freezer-safe container. A loaf pan (9×5 inches) works wonderfully, or any shallow, airtight container. If you used a swirl, create your pattern now.
- Freeze: Cover the container tightly with a lid or plastic wrap, pressing the plastic wrap directly onto the surface of the ice cream to prevent ice crystals from forming. Place it in the freezer for at least 6-8 hours, or preferably overnight, until it is firm.
- Serve: Before serving, let the ice cream sit at room temperature for 5-10 minutes to soften slightly, making it easier to scoop. Enjoy in cones, bowls, or as an accompaniment to other desserts!
Cooking Tips and Variations
Achieving the perfect no-churn ice cream is a delightful journey, and a few simple tips can elevate your homemade creation from good to extraordinary. Firstly, the temperature of your ingredients is paramount. Always ensure your heavy cream and sweetened condensed milk are thoroughly chilled. Cold ingredients whip up more efficiently and create a more stable, airy base, which is crucial for that signature creamy texture. A trick many professional bakers use is to chill your mixing bowl and whisk attachment in the freezer for 15-20 minutes before whipping the cream. This extra chill factor significantly aids in achieving stiff peaks faster and prevents the cream from warming up too quickly.
When it comes to whipping the heavy cream, aim for stiff peaks – the cream should hold its shape firmly when the whisk is lifted. However, be cautious not to over-whip, as this can lead to a grainy texture or even turn your cream into butter. Stop as soon as those firm peaks are achieved. The folding process is equally important; it’s where you gently combine the whipped cream with the sweetened condensed milk and any flavorings. Use a light hand and a spatula, folding from the bottom up, to maintain as much of the incorporated air as possible. This air is what gives the ice cream its light, ethereal quality. Over-mixing at this stage can deflate the cream, resulting in a denser, icier texture.
The beauty of no-churn ice cream lies in its endless customization. Beyond the classic flavors like vanilla, chocolate, and strawberry, consider these exciting variations. For a rich Coffee ice cream, dissolve 2 tablespoons of instant espresso powder in 1 tablespoon of hot water, cool it, and then mix it into the condensed milk. For a vibrant Pistachio ice cream, blend 1/2 cup of shelled, unsalted pistachios with 1/4 teaspoon almond extract and a tiny drop of green food coloring (optional) into the base. A delightful Berry Swirl can be created by gently folding in a homemade berry compote (cooked down berries with a touch of sugar) or a good quality berry jam. For an adult treat, add 2 tablespoons of your favorite liquor, like rum or Kahlúa, to the condensed milk mixture; the alcohol helps keep the ice cream softer due to its lower freezing point. You can also experiment with different extracts: almond, peppermint, coconut, or even a touch of rosewater for an exotic twist. For mix-ins, think beyond cookies: chopped nuts, mini marshmallows, chocolate chunks, caramel swirls, or even crushed pretzels for a salty-sweet crunch. The key is to add mix-ins after the cream is folded in, to prevent them from sinking to the bottom.
Finally, the freezing process itself can be optimized. Use a shallow, freezer-safe container, such as a loaf pan, as it allows the ice cream to freeze more evenly and quickly. Covering the container tightly with plastic wrap, ensuring the wrap touches the surface of the ice cream, helps prevent the formation of ice crystals on top, keeping your ice cream smooth and creamy. Patience is a virtue here; allow at least 6-8 hours for freezing, but overnight is always best for the firmest, most scoopable results. When you’re ready to serve, letting the ice cream sit at room temperature for 5-10 minutes before scooping will make it much easier to portion out those perfect scoops.
Storage and Reheating
Storing your homemade creamy ice cream properly is essential to maintaining its texture and preventing freezer burn, ensuring every scoop is as delicious as the first. Once your ice cream is fully frozen and firm, transfer it to an airtight freezer-safe container. While a loaf pan is excellent for initial freezing, for long-term storage, a container with a tight-fitting lid is preferable. Press a piece of plastic wrap directly onto the surface of the ice cream before securing the lid. This creates an extra barrier against air, which is the primary cause of ice crystals and freezer burn. Stored this way, your no-churn ice cream will remain fresh and delightful in the freezer for up to 2-3 weeks. Beyond that, while still safe to eat, its texture and flavor might begin to degrade slightly. Avoid storing it in the freezer door, as temperature fluctuations from opening and closing can compromise its quality; instead, keep it in the coldest part of your freezer, usually towards the back.
As for “reheating,” ice cream isn’t typically reheated in the traditional sense, but rather softened for optimal scooping. Straight from the freezer, homemade ice cream can be quite hard. To achieve that perfect scoopable consistency, simply remove the container from the freezer and let it sit at room temperature for about 5 to 10 minutes. The exact time will depend on the ambient temperature of your kitchen and how hard your freezer is. You can also place the container in the refrigerator for 15-20 minutes for a more gradual softening. Avoid using a microwave to soften ice cream, as it can lead to uneven melting, creating soupy edges while the center remains hard. If you find your ice cream has become too hard over time due to prolonged storage or repeated freezing and thawing, it might develop more ice crystals. While there’s no way to fully “reheat” it back to its original creamy state, you can sometimes blend it in a food processor with a tablespoon of milk or cream to somewhat restore its texture, then refreeze it. However, this is a last resort, and proper initial storage is the best defense against texture issues.
Frequently Asked Questions
Why is my no-churn ice cream icy instead of creamy?
The most common reasons for icy no-churn ice cream are not whipping the heavy cream to stiff peaks, or over-mixing once the whipped cream is combined with the condensed milk. Whipping the cream sufficiently incorporates air, which is crucial for a light, creamy texture. Over-mixing, on the other hand, deflates the cream, losing that essential air. Additionally, not covering the ice cream tightly in the freezer can allow moisture to evaporate and then refreeze as ice crystals. Ensure your cream is very cold, whip it until firm, fold gently, and cover tightly with plastic wrap directly touching the surface.
Can I make this recipe dairy-free or vegan?
Yes, you can adapt this recipe to be dairy-free or vegan! Replace the heavy cream with full-fat canned coconut cream (chilled overnight, scoop out the thick cream, leaving the liquid behind) and use a dairy-free sweetened condensed milk (available in many health food stores or online, often made from coconut or oat milk). The process remains the same: whip the coconut cream until fluffy, then gently fold in the dairy-free condensed milk and your chosen flavorings. The texture will be slightly different, with a subtle coconut flavor, but still wonderfully creamy and delicious.
How long does no-churn ice cream last in the freezer?
When stored properly in an airtight container with plastic wrap pressed directly onto the surface, homemade no-churn ice cream will typically last for 2-3 weeks in the freezer. Beyond this period, while still safe to eat, its quality, texture, and flavor may start to diminish, and it might become more prone to developing ice crystals or freezer burn. For the best experience, try to enjoy it within the first two weeks.
What are some unique flavor combinations I can try?
The possibilities for unique flavor combinations are truly endless! Consider a Lavender Honey ice cream by infusing the condensed milk with culinary lavender and stirring in a swirl of honey. For a sophisticated touch, try Mascarpone Fig, by folding in mascarpone cheese and chopped dried figs. A Spiced Pear ice cream could involve pureed cooked pears with cinnamon, nutmeg, and a hint of ginger. For something playful, a Cereal Milk flavor can be achieved by steeping your favorite cereal (like Fruity Pebbles or Cinnamon Toast Crunch) in the heavy cream for an hour before straining and whipping. Don’t be afraid to experiment with extracts, spices, and different types of candies or cookies!