Introduction
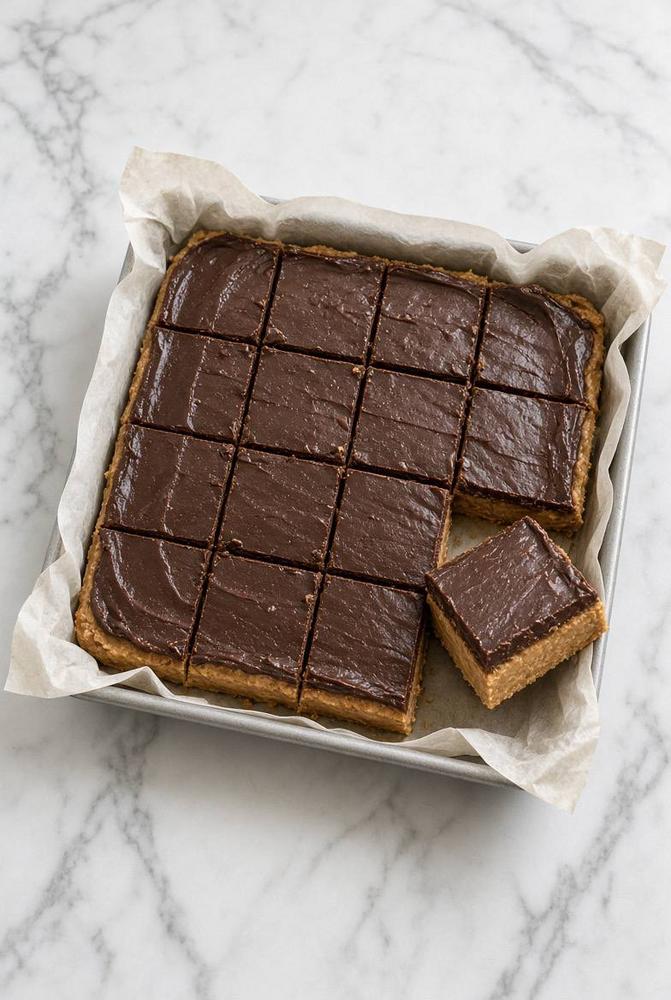
Prepare to meet your new favorite no-bake dessert: Layered Peanut Butter Fudge Bars! These decadent treats are an absolute dream for anyone who adores the classic combination of rich chocolate and creamy peanut butter. Imagine a thick, sweet, and slightly salty peanut butter base, perfectly complemented by a smooth, glossy, and intensely chocolatey fudge topping. Each bite is a symphony of textures and flavors that will leave you craving another.
What makes these bars truly special isn’t just their irresistible taste, but also their incredible ease of preparation. Forget about turning on the oven; these beauties come together with minimal effort and maximum reward, making them an ideal choice for busy bakers or anyone looking for a quick yet impressive dessert. They’re perfect for potlucks, parties, holiday gatherings, or simply as a delightful treat to satisfy your sweet tooth any day of the week. Their make-ahead nature also means you can whip them up in advance, freeing you up to enjoy your event without last-minute stress.
These Layered Peanut Butter Fudge Bars are more than just a dessert; they’re a celebration of comfort food at its finest. The dense, satisfying peanut butter layer provides a wonderful counterpoint to the melt-in-your-mouth fudge, creating a harmonious balance that’s both rich and comforting. Get ready to impress your friends and family with a dessert that looks sophisticated but is surprisingly simple to create, earning you rave reviews with every square.
Nutritional Information
Per serving (approximate values):
- Calories: 380
- Protein: 7g
- Carbohydrates: 45g
- Fat: 22g
- Fiber: 2g
- Sodium: 180mg
Ingredients
For the Peanut Butter Base:
- 1 cup (2 sticks) unsalted butter, melted
- 1 ½ cups creamy peanut butter
- 3 cups powdered sugar, sifted
- 1 teaspoon vanilla extract
- ¼ teaspoon salt
For the Chocolate Fudge Topping:
- ½ cup (1 stick) unsalted butter
- 1 cup (180g) semi-sweet chocolate chips
- ½ cup powdered sugar, sifted
- ¼ cup milk (whole milk recommended)
- 1 teaspoon vanilla extract
- Pinch of salt
Instructions
- Prepare Your Pan: Line a 9×13 inch baking pan with parchment paper, leaving an overhang on the sides. This overhang will act as handles, making it easy to lift the entire slab of bars out of the pan once set.
- Melt Butter for Base: In a large microwave-safe bowl, melt the 1 cup of unsalted butter for the peanut butter base. This can also be done on the stovetop over low heat.
- Combine Peanut Butter Base Ingredients: Add the creamy peanut butter to the melted butter in the bowl. Stir until well combined and smooth.
- Add Dry Ingredients to Base: Gradually add the sifted powdered sugar, vanilla extract, and ¼ teaspoon of salt to the peanut butter mixture. Mix well until all ingredients are thoroughly incorporated and you have a thick, uniform dough-like consistency.
- Press Base into Pan: Transfer the peanut butter mixture to the prepared 9×13 inch pan. Using the back of a spoon, a spatula, or your hands (lightly greased if sticking), press the mixture evenly and firmly into the bottom of the pan. Make sure it’s a compact and level layer.
- Chill the Base: Place the pan in the refrigerator for at least 30 minutes to allow the peanut butter layer to firm up while you prepare the fudge topping.
- Prepare Fudge Ingredients: In a medium saucepan, combine the ½ cup (1 stick) unsalted butter, semi-sweet chocolate chips, ½ cup powdered sugar, ¼ cup milk, and a pinch of salt.
- Melt Fudge Mixture: Heat the saucepan over low to medium heat, stirring constantly. Continue to stir until the butter and chocolate chips are completely melted and the mixture is smooth and glossy. Be careful not to scorch the chocolate. Alternatively, you can melt this mixture in a microwave-safe bowl in 30-second intervals, stirring after each, until smooth.
- Add Vanilla to Fudge: Remove the fudge mixture from the heat and stir in the 1 teaspoon of vanilla extract until fully incorporated.
- Pour Fudge Over Base: Carefully pour the warm chocolate fudge mixture evenly over the chilled peanut butter base in the pan.
- Spread Fudge Evenly: Gently spread the fudge topping with a spatula to create a smooth and even layer across the entire surface.
- Chill Until Set: Return the pan to the refrigerator for at least 2-3 hours, or preferably until completely firm. The longer it chills, the easier it will be to cut cleanly.
- Lift and Slice: Once fully chilled and set, use the parchment paper overhang to carefully lift the entire slab of layered bars out of the pan and onto a cutting board.
- Cut into Bars: Using a sharp knife (a warm knife wiped clean between cuts works best for a smooth finish), cut the slab into 16-24 uniform squares or rectangles, depending on your desired serving size.
- Serve and Enjoy: Serve immediately or store in an airtight container in the refrigerator.
Cooking Tips and Variations
For the cleanest cuts on your bars, especially through the fudge layer, use a sharp knife that has been warmed under hot water and then wiped dry. Wipe the knife clean between each cut to prevent dragging and smudging the layers. Ensuring your bars are thoroughly chilled is paramount for a neat slice.
When selecting your peanut butter, creamy varieties are best for achieving that smooth, dense base. However, if you love a bit of crunch, you can certainly experiment with crunchy peanut butter for an added textural element. For the chocolate fudge, using high-quality semi-sweet chocolate chips will yield the richest flavor, but milk chocolate or even a blend of dark and semi-sweet can be used to customize the sweetness to your liking.
To add an extra layer of flavor and texture, consider mixing in ½ cup of mini chocolate chips or finely chopped roasted peanuts into the peanut butter base before pressing it into the pan. You could also sprinkle a pinch of flaky sea salt over the top of the chocolate fudge layer just after pouring it for a gourmet touch that enhances both the sweet and savory notes. For a gluten-free option, simply ensure all your ingredients are certified gluten-free, as this recipe naturally avoids flour.
If your fudge topping seems too thick to spread easily, you can gently warm it slightly more over very low heat or in the microwave for a few seconds, stirring until it reaches a pourable consistency. Conversely, if it’s too thin, it might need a bit more chilling time to firm up properly. Always ensure the peanut butter base is well-chilled before adding the warm fudge to prevent the layers from melting into each other.
Storage and Reheating
These Layered Peanut Butter Fudge Bars are best stored in an airtight container in the refrigerator. This will keep them firm and fresh for up to one week. Storing them in the fridge also ensures the fudge layer remains perfectly set and the peanut butter base maintains its dense, satisfying texture. If you stack the bars, it’s a good idea to place a piece of parchment paper or wax paper between layers to prevent them from sticking together.
For longer storage, these bars freeze beautifully. Place the cut bars in a single layer on a baking sheet and freeze until solid, about 1-2 hours. Once frozen, transfer them to a freezer-safe airtight container or heavy-duty freezer bag, again with parchment paper between layers to prevent sticking. They can be stored in the freezer for up to 2-3 months. When you’re ready to enjoy them, simply thaw the frozen bars in the refrigerator overnight or at room temperature for about 30 minutes to an hour before serving. There is no need for reheating; these bars are meant to be enjoyed chilled or at room temperature.
Frequently Asked Questions
Can I use natural peanut butter for the base?
While you can use natural peanut butter, be aware that it can affect the texture of the base. Natural peanut butter tends to be oilier and less sweet than conventional creamy peanut butter, which is typically stabilized. If you use natural peanut butter, you might need to adjust the amount of powdered sugar to achieve the desired consistency and sweetness. It’s often recommended to use the “no-stir” natural peanut butter for best results in no-bake recipes like this.
Why did my fudge layer not set properly?
There are a few reasons why your fudge layer might not have set. The most common reason is insufficient chilling time; these bars need a good 2-3 hours in the refrigerator, or even longer, to become completely firm. Another factor could be the ratio of ingredients; ensure you’ve measured accurately, especially the butter and milk, as too much liquid can prevent proper setting. Lastly, make sure your chocolate melted thoroughly and was fully incorporated with the other ingredients before pouring.
Can I make these bars ahead of time for a party?
Absolutely! These Layered Peanut Butter Fudge Bars are an excellent make-ahead dessert. You can prepare them 1-2 days in advance and store them in an airtight container in the refrigerator. In fact, making them ahead often improves their texture and allows the flavors to meld beautifully. Just make sure they are well-chilled before serving for the best experience.
What kind of pan is best for this recipe?
A standard 9×13 inch rectangular baking pan is ideal for this recipe. Using parchment paper with an overhang is highly recommended, as it allows you to easily lift the entire slab of bars out of the pan once set. This makes cutting much simpler and cleaner, and also aids in cleanup. If you don’t have a 9×13 inch pan, you can use an 8×8 inch pan for thicker bars, but be aware that the chilling time might need to be extended.