Instructions
- Prepare the Beef Filling: Heat 1 tablespoon olive oil in a large skillet or Dutch oven over medium-high heat. Season the beef generously with salt and black pepper. Add the beef to the hot skillet in a single layer, working in batches if necessary to avoid overcrowding, and sear until browned on all sides. Remove the beef and set aside.
- Reduce the heat to medium. Add the chopped onion to the skillet and cook until softened, about 5-7 minutes. Add the minced garlic, chili powder, cumin, oregano, smoked paprika, and cayenne pepper (if using). Cook, stirring constantly, for 1 minute until fragrant.
- Return the browned beef to the skillet. Pour in the beef broth and diced tomatoes (undrained). Bring the mixture to a simmer, then reduce the heat to low, cover, and cook for 1.5 to 2 hours, or until the beef is fork-tender. If the beef is in cubes, you can shred it with two forks directly in the pot. If it was thinly sliced, it will likely be tender enough as is. Taste and adjust seasonings as needed. Keep warm.
- Prepare the Masa Dough: In a large bowl, combine the masa harina and 1 teaspoon of salt. Gradually add the warm water, mixing with your hands until a soft, pliable dough forms. The dough should be firm but not sticky, similar to play-doh. If it’s too dry, add a tablespoon of water at a time. If it’s too wet, add a tablespoon of masa harina. Knead for 2-3 minutes until smooth. Cover the bowl with a damp cloth to prevent the dough from drying out.
- Form the Gordita Shells: Divide the dough into 12 equal portions. Roll each portion into a ball. Using a tortilla press lined with two pieces of plastic wrap (cut from a Ziploc bag or plastic grocery bag), press each dough ball into a thick patty, about 1/4 to 1/3 inch thick and 4-5 inches in diameter. You want them thicker than a regular tortilla. If you don’t have a tortilla press, you can use two flat plates or a heavy skillet to press them.
- Fry the Gordita Shells: Pour vegetable or canola oil into a large, heavy-bottomed skillet or Dutch oven to a depth of about 1.5 to 2 inches. Heat the oil over medium-high heat to 350-375°F (175-190°C).
- Carefully place 2-3 gordita patties into the hot oil, ensuring not to overcrowd the pan. Fry for 2-4 minutes per side, or until golden brown and puffed up. The gorditas should be crispy on the outside and cooked through. Remove the fried gorditas with a slotted spoon and place them on a paper towel-lined plate to drain excess oil. Repeat with the remaining dough.
- Create the Gordita Pockets: While the gorditas are still warm, using a sharp knife, carefully slice along one edge of each gordita (about two-thirds of the way around) to create a pocket, similar to a pita bread. Be gentle to avoid cutting all the way through.
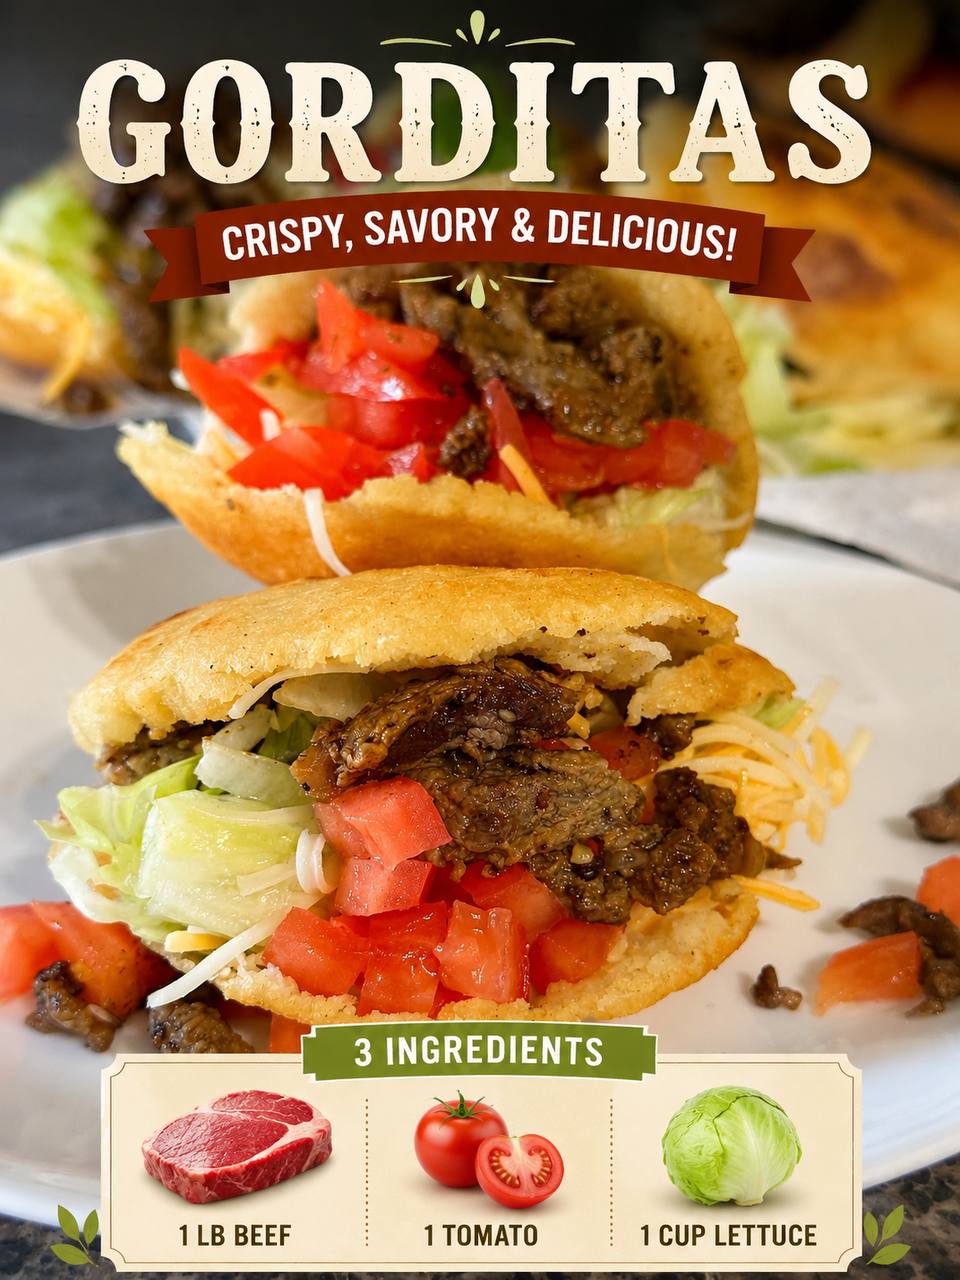
- Assemble the Gorditas: Open up each warm gordita pocket. Spoon a generous amount of the prepared beef filling inside. Add a handful of shredded lettuce, diced tomatoes, and shredded cheese.
- Serve Immediately: Serve your homemade Mexican Beef Gorditas warm with your favorite optional toppings such as salsa, sour cream or Mexican crema, fresh cilantro, pickled jalapeños, or avocado slices. Enjoy!
Cooking Tips and Variations
Achieving the perfect gordita involves a bit of finesse, but with these tips, you’ll be a pro in no time. The consistency of your masa dough is paramount; it should feel like soft play-doh – not too crumbly, not too sticky. If it’s too dry, your gorditas will crack; too wet, and they’ll be hard to handle. Adjust with small amounts of water or masa harina as needed. When pressing your gorditas, aim for a thickness of about 1/4 to 1/3 inch. Thinner gorditas won’t puff up as well, and thicker ones might not cook through evenly.
Frying temperature is another critical factor. Maintain a consistent oil temperature between 350-375°F (175-190°C). If the oil is too cool, your gorditas will absorb too much oil and become greasy. If it’s too hot, they’ll burn on the outside before cooking through. A kitchen thermometer is your best friend here. Don’t overcrowd the pan; fry in batches to maintain the oil temperature and ensure even cooking. Once fried, creating the pocket requires a gentle touch. While the gordita is still warm, carefully slice it with a sharp knife, leaving one side attached to form a hinge. This creates the perfect opening for your delicious fillings.
For the beef filling, consider marinating the steak for at least an hour, or even overnight, in a mixture of lime juice, cumin, chili powder, and garlic for an extra depth of flavor. If you prefer a slow-cooked approach, a chuck roast cooked low and slow for several hours will yield incredibly tender, shreddable beef. You can also experiment with other meats like shredded chicken or pork carnitas for different flavor profiles. Vegetarian? Black beans or sautéed mushrooms and peppers make fantastic fillings!
Don’t be afraid to customize your toppings. Beyond the classic lettuce, tomato, and cheese, consider adding thinly sliced red onion, a dollop of fresh guacamole or sliced avocado, a sprinkle of cotija cheese, or a generous drizzle of your favorite salsa or spicy crema. For an added kick, pickled jalapeños or a dash of hot sauce can elevate the experience. Remember to serve your gorditas immediately after assembling, while the shells are still warm and delightfully crispy. This dish is all about fresh, vibrant flavors and textures coming together in every delicious bite.
Storage and Reheating
If you find yourself with leftover gorditas – a rare occurrence, but it happens! – proper storage is key to maintaining their deliciousness. The best approach is to store the components separately. Store any leftover beef filling in an airtight container in the refrigerator for up to 3-4 days. The fresh toppings like shredded lettuce, diced tomatoes, and cheese should also be stored separately in airtight containers in the fridge to maintain their freshness and prevent them from making the gordita shells soggy.
For the fried gordita shells, allow them to cool completely before storing. You can store them in an airtight container at room temperature for up to 1-2 days, or in the refrigerator for up to 3-4 days. For longer storage, you can freeze the cooked, unfried masa patties. Place them on a baking sheet lined with parchment paper and freeze until solid, then transfer to a freezer-safe bag for up to 1 month. When ready to use, thaw in the refrigerator and then fry as directed.
Reheating the beef filling is straightforward: gently warm it in a skillet over medium-low heat until heated through, or microwave in short bursts, stirring occasionally. For the gordita shells, the goal is to bring back their crispiness. Avoid microwaving them, as this will make them soft and chewy. The best methods for reheating are:
- Oven: Preheat your oven to 350°F (175°C). Place the gordita shells directly on a baking sheet and heat for 5-7 minutes, or until warmed through and crispy.
- Toaster Oven: A toaster oven works wonderfully for reheating a few gorditas, using the same temperature and time as a conventional oven.
- Air Fryer: For ultimate crispiness, an air fryer is excellent. Reheat at 350°F (175°C) for 3-5 minutes, shaking the basket halfway through.
- Skillet: You can also briefly reheat them in a dry skillet over medium heat for a minute or two per side until crisp.
Once the components are reheated, assemble your gorditas fresh with the cold toppings for the best experience. This ensures you enjoy that satisfying contrast of warm, savory filling and crispy shell with cool, fresh vegetables, just like they were made the first time.
Frequently Asked Questions
What is the difference between a gordita and a taco?
While both gorditas and tacos are delicious Mexican dishes made with corn masa, their main difference lies in their preparation and thickness. A taco uses a thin tortilla that is usually soft or lightly fried and folded around fillings. A gordita, on the other hand, is made from a thicker masa dough patty that is fried until golden and puffed, then split open to create a pocket for the fillings. This gives gorditas a unique crispy exterior and soft, chewy interior, making them heartier and more substantial than a typical taco.
Can I make gorditas without a tortilla press?
Absolutely! While a tortilla press makes the process quicker and more uniform, you can definitely make gorditas without one. Simply place each masa dough ball between two pieces of plastic wrap (cut from a Ziploc bag or grocery bag) on a flat, sturdy surface. Then, use the bottom of a heavy skillet, a flat plate, or even a cutting board to press down firmly and evenly until you achieve the desired thick patty shape (about 1/4 to 1/3 inch thick). Just be sure to apply even pressure to avoid uneven edges.
What kind of beef is best for gorditas?
For this recipe, cuts of beef like flank steak, skirt steak, or chuck roast work wonderfully. Flank and skirt steak are great for slicing thin and searing quickly, offering a rich beefy flavor. Chuck roast, while requiring a longer cooking time, becomes incredibly tender and easily shreddable, perfect for a succulent, melt-in-your-mouth filling. The key is to choose a cut that will become tender and flavorful when simmered with the spices and tomatoes, allowing it to absorb all those delicious juices.
Can I prepare any parts of the gorditas ahead of time?
Yes, you can definitely prepare components in advance to make assembly quicker. The beef filling can be cooked 1-2 days ahead of time and stored in an airtight container in the refrigerator. The masa dough can also be made a day in advance and stored covered with plastic wrap in the refrigerator, though it’s best used fresh. The fresh toppings like diced tomatoes and shredded lettuce can be prepped a few hours beforehand and kept chilled. For the best texture, it’s recommended to fry the gordita shells just before serving, but if absolutely necessary, they can be fried a few hours in advance and reheated as described in the “Storage and Reheating” section.