Instructions
- Preheat your oven to 400°F (200°C) if baking, or prepare a cast-iron skillet or griddle over medium heat if pan-frying.
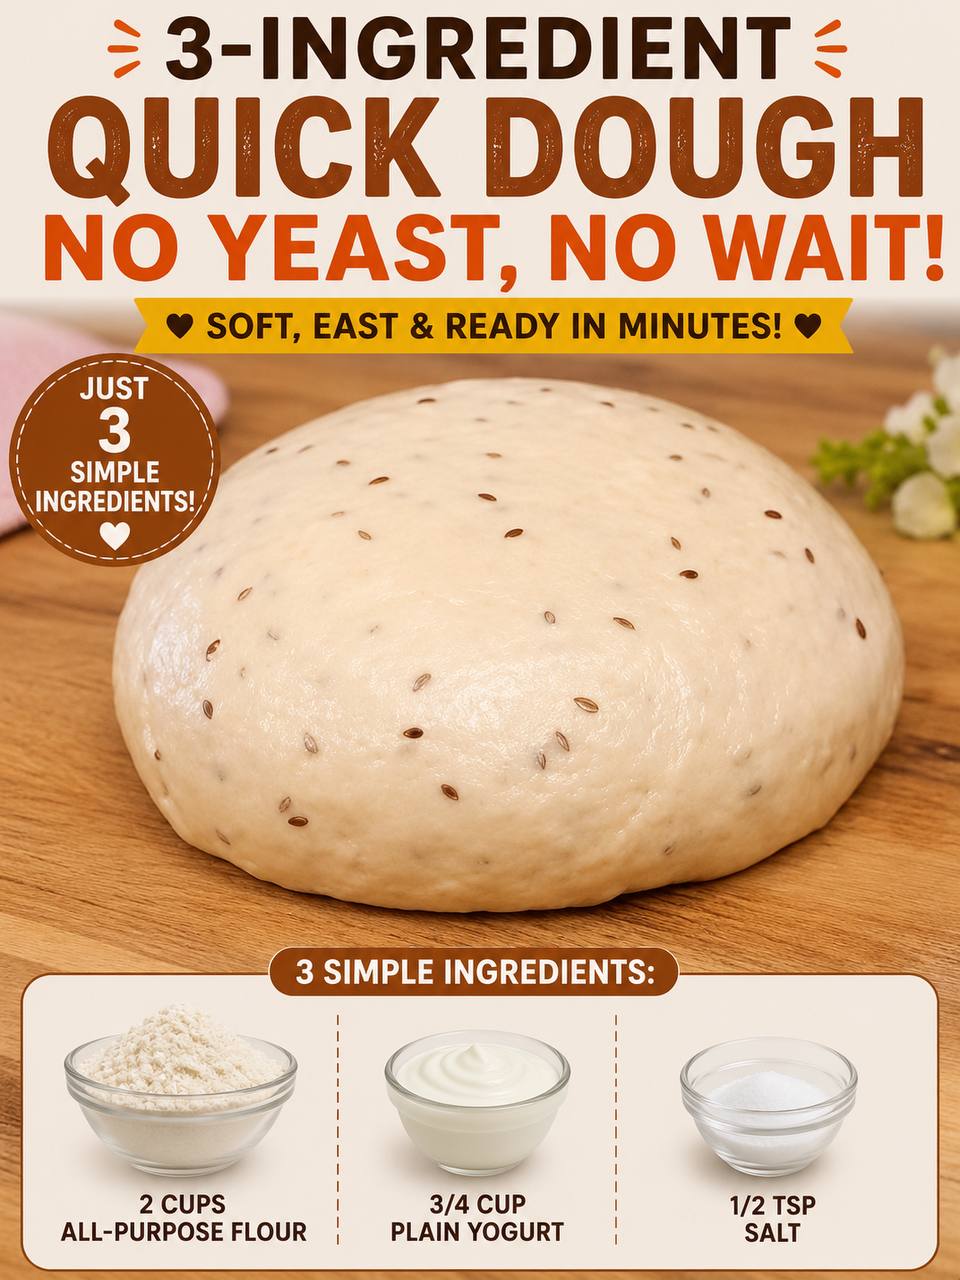
- In a large mixing bowl, combine the all-purpose flour and salt. If you’re using self-rising flour, you can omit the salt or adjust to taste, as self-rising flour often contains salt. If using all-purpose flour and opting for extra lift, whisk in the optional 1 teaspoon of baking powder at this stage. If adding optional seeds, stir them into the dry ingredients now.
- Create a well in the center of the dry ingredients and pour in the plain yogurt.
- Using a sturdy spoon or a rubber spatula, gradually mix the wet and dry ingredients together. Start from the center and work your way outwards, incorporating the flour until a shaggy, cohesive dough begins to form.
- Once the dough is mostly combined in the bowl, turn it out onto a lightly floured surface.
- Gently knead the dough for about 1-2 minutes. The goal is just to bring the dough together and ensure all ingredients are well incorporated, not to develop gluten extensively like traditional bread. The dough should be soft and slightly tacky, but not overly sticky. If it’s too sticky, add a tiny bit more flour; if too dry, add a tiny splash of water or yogurt.
- Shape the dough according to your desired end product. For a rustic loaf, form it into a round disc, about 1-inch thick. For flatbreads, divide the dough into 4-6 equal pieces and roll each into a thin circle (about 1/4-inch thick). For quick biscuits, pat the dough into a 1-inch thick slab and cut with a biscuit cutter.
- To Bake (for a loaf or biscuits): Place the shaped dough on a parchment-lined baking sheet. For a rustic loaf, you can score the top with a sharp knife (make an X or parallel lines) for a decorative effect and to help it expand. Bake in the preheated oven for 20-25 minutes for a loaf, or 12-15 minutes for biscuits, or until golden brown and cooked through. The internal temperature should reach 200-210°F (93-99°C).
- To Pan-Fry (for flatbreads): Heat a lightly oiled cast-iron skillet or non-stick pan over medium-high heat. Cook each flatbread for 2-3 minutes per side, or until puffed up, golden brown spots appear, and it’s cooked through.
- Remove from the oven or pan and let cool slightly on a wire rack before slicing and serving. Enjoy warm!
Cooking Tips and Variations
For the best results with this 3-Ingredient Quick Dough, paying attention to a few key details will make all the difference. Firstly, the type of yogurt matters. Full-fat plain yogurt, especially Greek yogurt, tends to work best as its acidity is higher and its thicker consistency contributes to a tender crumb. If using thinner yogurt, you might need slightly more flour. Conversely, if using very thick Greek yogurt, you might need a tablespoon or two of milk or water to achieve the right dough consistency. Always aim for a dough that is soft and slightly tacky, but not so sticky that it clings to your hands. Resist the urge to over-knead; unlike traditional yeast breads, extensive kneading here will only make the bread tough. A gentle minute or two to bring the ingredients together is plenty. When baking, a hot oven ensures a good rise and a golden crust. For pan-fried flatbreads, don’t overcrowd the pan, and ensure it’s hot enough to create those beautiful brown spots.
The beauty of this quick dough lies in its incredible versatility. For a savory twist, knead in a tablespoon of dried herbs like rosemary or thyme, a teaspoon of garlic powder, or a sprinkle of shredded cheese such as cheddar or Parmesan. Imagine warm garlic-herb flatbreads ready in minutes! You can even add finely chopped olives or sun-dried tomatoes for Mediterranean-inspired bread. If you’re craving something sweet, transform this dough into a delightful treat. Knead in a tablespoon of sugar, a teaspoon of cinnamon, and a handful of dried cranberries or raisins. These can be baked as sweet biscuits or even pan-fried as quick cinnamon-sugar “donuts” if cut into smaller pieces and fried in a little oil. To truly embrace the “multigrain” idea, beyond the visible seeds, you can substitute up to half of the all-purpose flour with whole wheat flour, though this might result in a slightly denser dough. For a richer flavor, you can also add a tablespoon of olive oil or melted butter to the dough mixture. This quick dough is also fantastic as a base for mini pizzas, quickly rolled out and topped with sauce, cheese, and your favorite toppings, then baked until bubbly.
Storage and Reheating
This 3-Ingredient Quick Dough bread is best enjoyed fresh and warm, straight from the oven or pan. The texture is at its peak when it’s just cooked. However, if you have leftovers, they can be stored. Allow any leftover bread to cool completely before storing to prevent condensation, which can make it soggy. Store the bread in an airtight container or a resealable plastic bag at room temperature for up to 2 days. For longer storage, you can refrigerate it for up to 4-5 days, though it may dry out slightly.
To reheat, revive the bread by warming it gently. For baked loaves or biscuits, a few minutes in a preheated oven at 300°F (150°C) will bring back some of its softness and warmth. You can also toast slices in a toaster oven. For pan-fried flatbreads, a quick reheat in a dry skillet over medium heat for 1-2 minutes per side works wonderfully, making them soft and pliable again. Avoid microwaving for extended periods, as it can make the bread chewy or tough; a very short burst (10-15 seconds) might be acceptable for warming, but it won’t restore the crispness. This bread also freezes surprisingly well. Wrap individual portions tightly in plastic wrap, then place them in a freezer-safe bag or container. It can be frozen for up to 1 month. Thaw at room temperature and then reheat as desired.
Frequently Asked Questions
Can I make this dough ahead of time?
While this dough is designed for “no wait” immediate use, you can prepare the dough up to a few hours in advance and store it, covered, in the refrigerator. However, for the best texture and rise, it’s generally recommended to mix and cook it right away. The leavening reaction starts as soon as the yogurt hits the flour, so prolonged waiting might diminish the final rise.
What if I don’t have all-purpose flour? Can I use other types of flour?
All-purpose flour works best for this recipe due to its protein content and consistent results. You can use self-rising flour, in which case you might omit the salt or reduce it, and potentially the baking powder if you want to stick strictly to “3 ingredients.” Whole wheat flour can be substituted for up to half of the all-purpose flour, but it will result in a denser, chewier bread. Gluten-free flour blends can also be used, but results will vary significantly, and you may need to adjust liquid content or add a binder like xanthan gum.
My dough is too sticky/too dry. What should I do?
The consistency of the dough largely depends on the type and thickness of your yogurt and the humidity in your environment. If the dough is too sticky to handle, add flour one tablespoon at a time, kneading gently until it reaches a manageable consistency. If it’s too dry and crumbly, add a teaspoon of yogurt or a splash of water, mixing until it comes together. The ideal dough should be soft and slightly tacky, but not wet or overly sticky.
Can I add yeast to this recipe for a different texture?
While you certainly *could* add yeast, doing so would fundamentally change the nature of this “no yeast, no wait” recipe. If you add yeast, you would then need to allow the dough to proof, negating the quick aspect. This recipe relies on chemical leavening for its speed and unique texture. If you’re looking for a yeast-leavened bread, it’s best to follow a traditional recipe designed for yeast to ensure proper gluten development and rise.