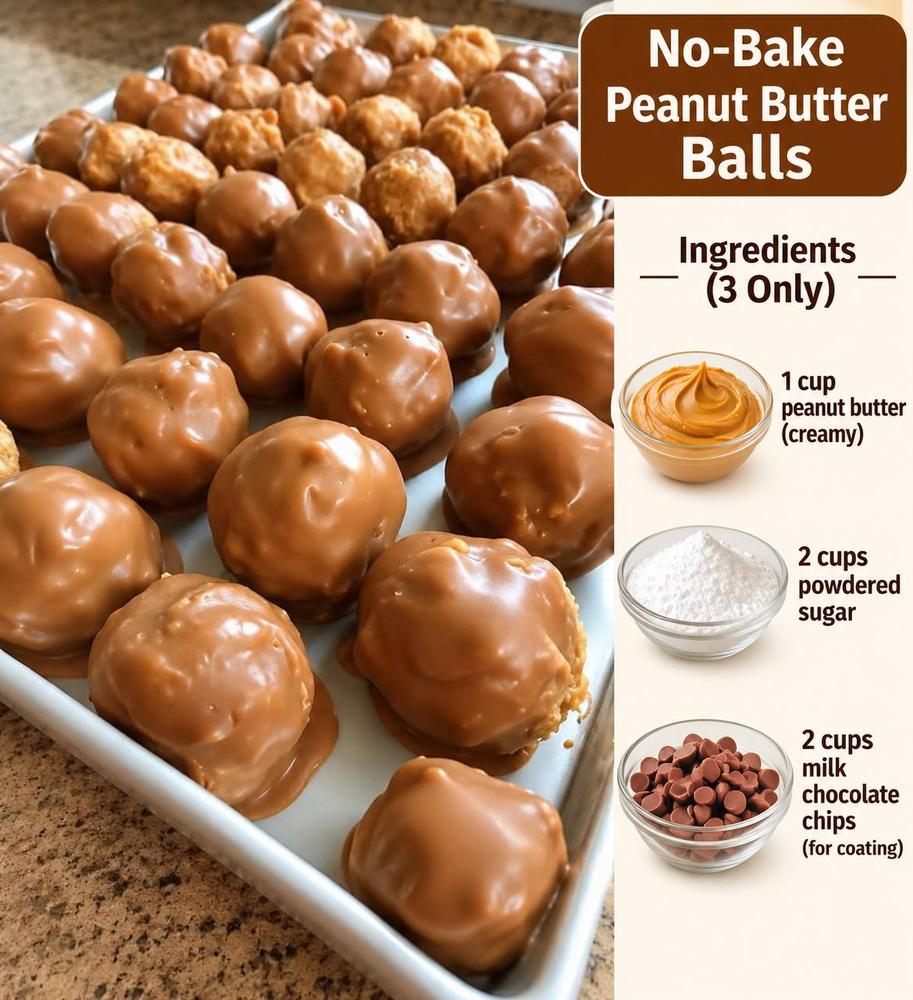
Introduction
Craving something sweet, satisfying, and utterly delicious, but the thought of turning on your oven fills you with dread? Look no further! These No-Bake Chocolate Peanut Butter Balls are about to become your new favorite dessert. Imagine a rich, creamy peanut butter center enrobed in a luscious chocolate shell – all without a single minute of baking. This isn’t just a recipe; it’s a revelation for anyone with a sweet tooth and a desire for instant gratification. Perfect for a quick treat, a last-minute party dessert, or a fun activity with the kids, these little bites of heaven are incredibly simple to make and even easier to devour.
What makes these peanut butter balls so special? It’s their unbelievably short ingredient list and even shorter prep time. You only need THREE essential ingredients to create a batch of these irresistible confections. That’s right, just three! This minimal approach doesn’t compromise on flavor or texture; in fact, it highlights the perfect harmony between the salty-sweet peanut butter and the decadent chocolate. They’re naturally gluten-free (just check your chocolate chips!) and can easily be adapted for various dietary needs, making them a crowd-pleaser for almost any occasion.
Get ready to impress yourself and everyone around you with these delightful no-bake wonders. Whether you’re a seasoned baker or a complete novice in the kitchen, this recipe guarantees success. So, ditch the oven mitts, grab your mixing bowl, and prepare to whip up the easiest, most delicious chocolate peanut butter treat you’ve ever experienced. Your sweet cravings are about to meet their match!
Nutritional Information
Per serving (approximate values, based on 30 balls):
- Calories: 180
- Protein: 4g
- Carbohydrates: 18g
- Fat: 11g
- Fiber: 1g
- Sodium: 80mg
Ingredients
- 1 cup creamy peanut butter
- 2 cups powdered sugar (also known as confectioners’ sugar)
- 2 cups milk chocolate chips (for coating)
Instructions
- In a large mixing bowl, combine the creamy peanut butter and the powdered sugar.
- Using a sturdy spoon or your hands, mix the ingredients thoroughly until a thick, uniform dough forms. It will be stiff, so don’t be afraid to get in there with your hands to ensure everything is well combined and no dry pockets of powdered sugar remain.
- Once the dough is smooth, begin rolling it into small, bite-sized balls. Aim for approximately 1-inch to 1.5-inch diameter balls. This recipe typically yields about 30-35 balls, depending on their size. Place the rolled balls on a baking sheet lined with parchment paper or wax paper.
- Once all the peanut butter mixture has been rolled into balls, place the baking sheet in the refrigerator for at least 15-20 minutes. This chilling step is crucial as it helps the balls firm up, making them easier to dip and preventing them from falling apart in the warm chocolate.
- While the peanut butter balls are chilling, prepare your chocolate coating. Place the milk chocolate chips in a microwave-safe bowl.
- Microwave the chocolate chips in 30-second intervals, stirring well after each interval, until the chocolate is completely melted and smooth. Be careful not to overheat the chocolate, as this can cause it to seize. Alternatively, you can melt the chocolate using a double boiler method for a more controlled melt.
- Once the chocolate is melted and smooth, retrieve the chilled peanut butter balls from the refrigerator.
- Using a fork or a toothpick, carefully dip each peanut butter ball into the melted chocolate, ensuring it is fully coated. Gently tap the fork against the side of the bowl to allow any excess chocolate to drip off.
- Carefully place the chocolate-coated peanut butter balls back onto the parchment-lined baking sheet.
- If desired, immediately sprinkle with sea salt, sprinkles, or chopped nuts before the chocolate sets.
- Once all the balls are coated, return the baking sheet to the refrigerator for at least 30-60 minutes, or until the chocolate coating is completely set and firm to the touch.
- Serve chilled and enjoy your delicious No-Bake Chocolate Peanut Butter Balls!
Cooking Tips and Variations
Achieving the perfect No-Bake Chocolate Peanut Butter Ball is all about consistency and technique. Here are some tips to ensure your treats turn out perfectly every time, along with exciting variations to keep things interesting:
Tips for Success:
- Peanut Butter Choice: Stick with creamy peanut butter for the smoothest texture. Natural peanut butter can be used, but you might need to adjust the amount of powdered sugar slightly. Natural peanut butter tends to be oilier and can separate, so ensure it’s well-stirred before measuring. If using natural peanut butter, you might find you need to add an extra tablespoon or two of powdered sugar to achieve the right firm, rollable dough consistency.
- Powdered Sugar is Key: Do not substitute powdered sugar with granulated sugar. Powdered sugar (confectioners’ sugar) contains cornstarch, which helps absorb moisture and gives the balls their smooth, non-gritty texture. Granulated sugar would result in a grainy and unpleasant mouthfeel.
- Mixing the Dough: The peanut butter and powdered sugar mixture will be quite stiff. Don’t be afraid to use your hands to really work the ingredients together. This ensures an even consistency and helps the dough come together properly. It’s a bit messy but effective!
- Chilling is Crucial: Do not skip the chilling step for the peanut butter balls before dipping. Cold balls hold their shape better and prevent the warm chocolate from melting them, making the dipping process much easier and cleaner. A minimum of 15-20 minutes in the fridge is ideal.
- Melting Chocolate Safely: When melting your chocolate, go low and slow. The microwave method is quick, but short bursts (30 seconds at a time) and frequent stirring are essential to prevent burning or seizing. If using a double boiler, ensure the bottom of the bowl does not touch the simmering water, and stir continuously until smooth.
- Dipping Technique: Use a fork or a toothpick for dipping. If using a fork, gently lower the ball into the chocolate, spoon some chocolate over it, lift it out, and tap the fork against the edge of the bowl to remove excess chocolate. This prevents puddles of chocolate at the bottom of your finished balls. For a super smooth finish, you can also use two forks to roll the ball in the chocolate.
- Setting the Chocolate: Place the coated balls back on parchment or wax paper. Return them to the refrigerator immediately after dipping to help the chocolate set quickly and achieve a firm, glossy finish.
Creative Variations:
- Different Chocolate Types: While milk chocolate is classic, feel free to experiment with other varieties. Dark chocolate provides a richer, less sweet contrast to the peanut butter, while semi-sweet is a good middle ground. White chocolate can also be used for a different flavor profile, but be aware it can be trickier to melt and temper.
- Add Mix-Ins to the Base: Before rolling the peanut butter dough, stir in some fun additions! Mini chocolate chips, finely crushed graham crackers, finely chopped pretzels for a salty crunch, or even a tablespoon of cocoa powder for a deeper chocolate-peanut butter flavor.
- Exciting Garnishes: Beyond a simple sprinkle of sea salt (which is fantastic for enhancing the flavors!), consider other toppings. Sprinkles add a festive touch, finely chopped nuts (peanuts, pecans, walnuts) provide extra texture, or a drizzle of contrasting melted chocolate (e.g., white chocolate over dark chocolate coating) creates a beautiful visual appeal.
- Flavor Boosters: A tiny splash of vanilla extract (1/2 teaspoon) can be added to the peanut butter mixture for an extra layer of flavor. You could also try a pinch of cinnamon or a dash of espresso powder to enhance the chocolate.
- Dietary Adaptations: For a dairy-free version, ensure you use dairy-free chocolate chips. For a sugar-free option, use a powdered sugar substitute and sugar-free chocolate chips. Always check ingredient labels carefully.
- Stuffed Peanut Butter Balls: For an extra surprise, press a small piece of a mini Reese’s peanut butter cup, a mini marshmallow, or a small piece of caramel into the center of each peanut butter ball before rolling.
These tips and variations ensure that your No-Bake Chocolate Peanut Butter Balls are not only perfect but also customizable to your personal taste and any occasion!
Storage and Reheating
No-Bake Chocolate Peanut Butter Balls are incredibly easy to store, making them perfect for meal prepping desserts or having a sweet treat on hand whenever a craving strikes. Reheating is generally not necessary, as they are best enjoyed chilled or at room temperature.
Storage:
- Refrigerator: This is the ideal storage method for these treats. Once the chocolate coating has fully set, transfer the peanut butter balls to an airtight container. You can layer them with parchment paper between layers to prevent sticking. Stored in the refrigerator, they will remain fresh and firm for up to 1-2 weeks. Chilling also keeps the chocolate coating from becoming too soft and maintains the integrity of the peanut butter center.
- Freezer: For longer-term storage, these balls freeze beautifully. Arrange the fully set, chocolate-coated balls in a single layer on a baking sheet and freeze for about an hour, or until solid. Once frozen, transfer them to a freezer-safe airtight container or a heavy-duty freezer bag. They can be stored in the freezer for up to 2-3 months. Freezing them individually first prevents them from sticking together in the container.
Reheating (or rather, serving from cold):
- From Refrigerator: No reheating is required! These treats are typically enjoyed chilled straight from the refrigerator. If you prefer a slightly softer texture, you can let them sit at room temperature for 10-15 minutes before serving. This will soften the chocolate coating and the peanut butter center slightly, enhancing their melt-in-your-mouth quality.
- From Freezer: When ready to enjoy frozen peanut butter balls, simply remove them from the freezer and let them thaw in the refrigerator overnight, or at room temperature for about 30-60 minutes. They are also delicious eaten directly from the freezer for a firmer, almost candy-like bite, though the chocolate will be quite hard.
Always ensure they are stored in an airtight container to prevent them from absorbing any odors from the refrigerator or freezer and to maintain their freshness and texture.
Frequently Asked Questions
What kind of peanut butter is best for these balls?
For the best results and the smoothest texture, creamy peanut butter is highly recommended. It blends easily with the powdered sugar to create a consistent, pliable dough. While natural peanut butter can be used, ensure it is well-stirred before measuring, as its oilier consistency might require a slight adjustment (perhaps a bit more powdered sugar) to achieve the desired firm dough.
Can I use granulated sugar instead of powdered sugar?
No, it is strongly advised not to substitute granulated sugar for powdered sugar. Powdered sugar (also known as confectioners’ sugar) is much finer and contains a small amount of cornstarch, which helps absorb moisture and gives the peanut butter balls their smooth, melt-in-your-mouth texture. Using granulated sugar would result in a gritty, unpleasant texture that won’t hold together as well.
My chocolate seized when I melted it. What went wrong?
Chocolate can seize (become thick, grainy, and unworkable) for a few reasons. The most common culprits are overheating (melting too quickly or at too high a temperature) or introducing even a tiny amount of water or steam into the chocolate. When melting, use low heat and short intervals, stirring frequently. If using a double boiler, ensure the bowl does not touch the simmering water, and no steam escapes into the chocolate. If your chocolate does seize, sometimes you can rescue it by stirring in a teaspoon of vegetable oil or shortening at a time until it smooths out, but this can alter the final texture.
How long do these No-Bake Chocolate Peanut Butter Balls last?
When stored in an airtight container in the refrigerator, these delicious treats will stay fresh and firm for up to 1-2 weeks. If you want to keep them longer, they freeze exceptionally well for up to 2-3 months. Just make sure they are completely set and then transfer them to a freezer-safe container or bag.