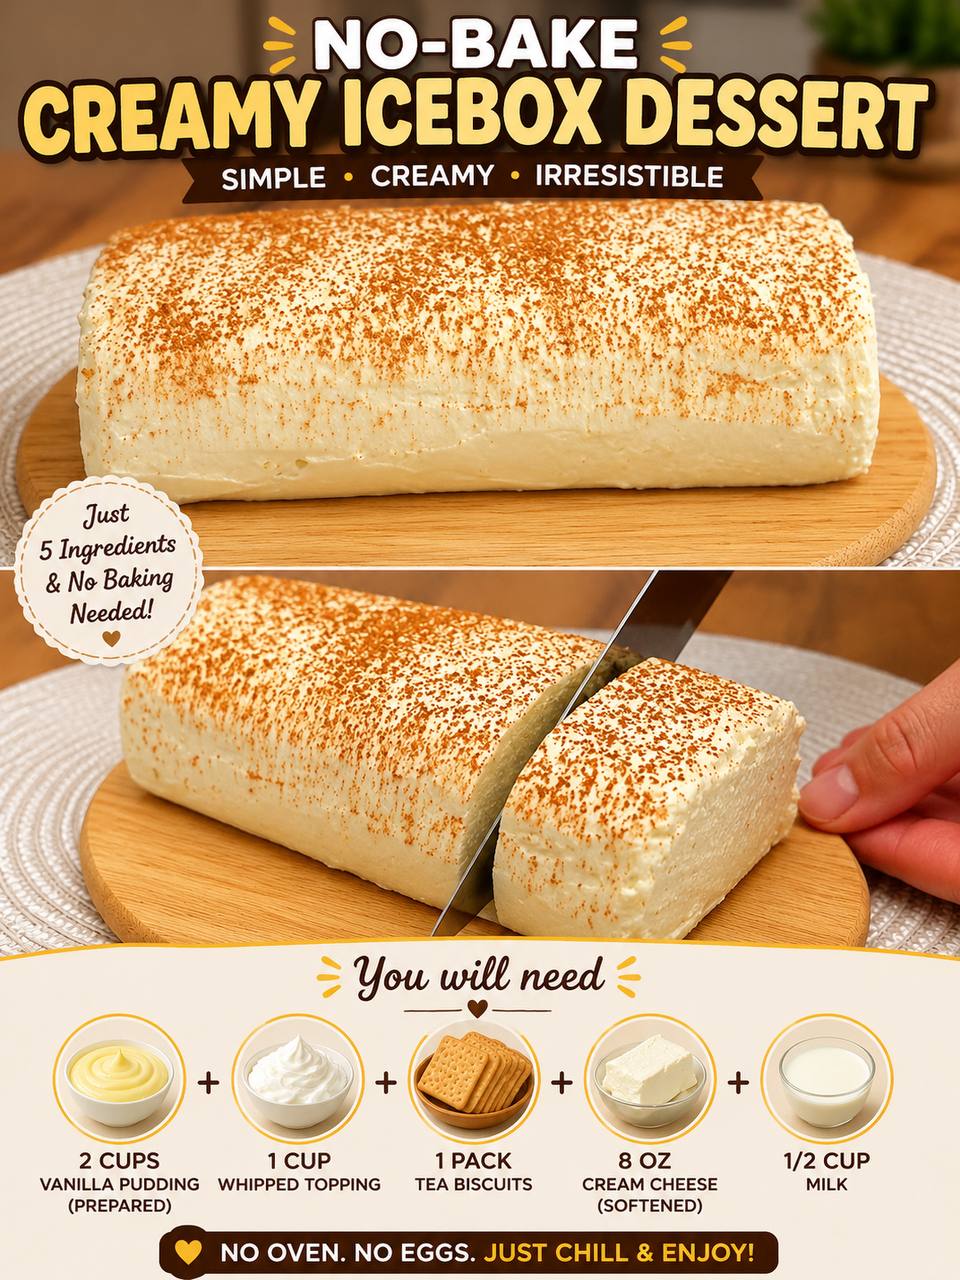
Instructions
- Prepare the Pudding: If using instant pudding mix, prepare it according to package directions using 2 cups of milk. Whisk until thickened, then set aside. If using pre-made pudding, ensure it is ready to use.
- Soften Cream Cheese: Make sure your 8 oz block of cream cheese is softened to room temperature. This is crucial for a smooth, lump-free mixture. You can leave it on the counter for 30-60 minutes or microwave it for 10-15 seconds if in a hurry.
- Create the Creamy Base: In a large mixing bowl, combine the softened cream cheese, the prepared vanilla pudding, 1/2 cup of milk, and the optional 1 teaspoon of vanilla extract.
- Mix Until Smooth: Using an electric mixer on medium speed (or a whisk and a lot of elbow grease), beat the mixture until it is completely smooth, creamy, and well combined. Ensure there are no lumps of cream cheese. Scrape down the sides of the bowl as needed.
- Fold in Whipped Topping: Gently fold in the 1 cup of thawed whipped topping into the cream cheese and pudding mixture. Use a spatula to carefully incorporate it until no streaks remain, keeping the mixture light and airy.
- Prepare Your Pan: Line a loaf pan (approximately 9×5 inches) with plastic wrap or parchment paper, leaving an overhang on the sides. This will make it much easier to lift the dessert out later.
- Layer the Dessert: Spread a thin layer of the creamy mixture on the bottom of the prepared loaf pan.
- Add the First Biscuit Layer: Arrange a single layer of tea biscuits over the creamy mixture, breaking them as needed to fit snugly and cover the entire surface.
- Continue Layering: Repeat the layering process: another layer of the creamy mixture, followed by another layer of tea biscuits. Continue alternating layers, ending with a generous layer of the creamy mixture on top. You should aim for 3-4 layers of biscuits, depending on the size of your pan and biscuits.
- Smooth the Top: Gently smooth the top layer of the creamy mixture with a spatula.
- Chill Thoroughly: Cover the loaf pan tightly with the overhanging plastic wrap or another piece of plastic wrap. Place the dessert in the refrigerator and chill for a minimum of 4-6 hours, but preferably overnight. This chilling time is essential for the biscuits to soften and the dessert to set properly.
- Unmold and Garnish: Once thoroughly chilled, use the plastic wrap overhangs to carefully lift the dessert out of the loaf pan and onto a serving platter.
- Serve: Dust the top with ground cinnamon or cocoa powder, if desired, just before serving. Slice with a sharp knife and enjoy!
Cooking Tips and Variations
Chilling Time is Non-Negotiable: The success of this icebox dessert hinges on adequate chilling. Do not rush this step! A minimum of 4-6 hours allows the biscuits to soften and the creamy mixture to firm up, creating that perfect cake-like texture. Overnight chilling is always best for optimal results.
Biscuit Brilliance: While tea biscuits are specified, feel free to experiment! Graham crackers, digestive biscuits, vanilla wafers, or even thin chocolate wafers can be excellent substitutes, each offering a slightly different flavor and texture profile. For an extra touch, you can briefly dip plain biscuits in milk or coffee before layering, but this isn’t necessary as they will soften beautifully in the cream.
Pudding Power: Don’t limit yourself to vanilla! Chocolate pudding will create a rich, decadent dessert. Banana, butterscotch, or even lemon pudding can offer exciting new flavor dimensions. Just be sure to use instant pudding mix for the best consistency in this no-bake recipe.
Cream Cheese Temperature: Seriously, ensure your cream cheese is at room temperature. Cold cream cheese will result in a lumpy mixture, no matter how much you beat it. If you forget, a few seconds in the microwave (check every 5 seconds) can help, but be careful not to melt it.
Whipped Topping vs. Fresh Cream: Store-bought whipped topping (like Cool Whip) provides excellent stability and convenience. If you prefer to use fresh whipped cream, ensure it’s sweetened and whipped to stiff peaks. Be aware that fresh whipped cream might make the dessert slightly less stable and should be served more promptly after chilling.
Flavor Boosters: A teaspoon of vanilla extract is an easy addition to enhance the vanilla pudding flavor. Consider adding a pinch of almond extract, a tablespoon of instant espresso powder, or even some citrus zest (lemon or orange) to the creamy mixture for an extra layer of taste.
Garnishing Galore: Beyond cinnamon or cocoa powder, get creative with your garnishes! Fresh berries (raspberries, strawberries, blueberries) add a beautiful pop of color and freshness. Chocolate shavings, a drizzle of caramel or chocolate sauce, or even a sprinkle of chopped nuts can elevate the presentation and flavor.
Pan Preparation for Easy Release: Lining your loaf pan with plastic wrap or parchment paper is crucial. Leave generous overhangs on all sides. This acts as a sling, allowing you to effortlessly lift the fully set dessert out of the pan without any sticking or damage.
Portion Control and Slicing: For clean slices, use a sharp knife that has been run under hot water and then wiped dry before each cut. This helps prevent the creamy layers from sticking and smearing.
Make Ahead Magic: This dessert is a dream for meal prep or entertaining. Since it requires extended chilling, it’s perfect for making a day or even two in advance. The flavors meld and the textures deepen beautifully with time.
Dietary Adaptations: For a lighter version, you can use light cream cheese, sugar-free instant pudding, and sugar-free whipped topping. For a dairy-free option, explore dairy-free cream cheese alternatives, plant-based milk for the pudding, and coconut whipped topping.
Individual Servings: Instead of a loaf pan, you can assemble this dessert in individual ramekins or small glasses for single servings. This looks elegant and makes serving a breeze.
Storage and Reheating
Storage: This No-Bake Creamy Icebox Dessert stores beautifully in the refrigerator. After serving, any leftovers should be covered tightly with plastic wrap or placed in an airtight container to prevent them from drying out or absorbing refrigerator odors. It will remain fresh and delicious for up to 3-4 days in the refrigerator. The biscuits will continue to soften over time, making it even more cake-like.
Reheating: This is a no-reheat dessert! It is meant to be served chilled, straight from the refrigerator. Reheating is not recommended as it will cause the creamy layers to melt and lose their structure, resulting in a runny and unappetizing dessert. Simply take it out of the fridge, slice, and enjoy its cool, creamy goodness.
Frequently Asked Questions
What kind of tea biscuits should I use?
Any plain, firm, rectangular or square tea biscuit will work well. Brands like Maria cookies, Rich Tea biscuits, or even plain digestive biscuits are excellent choices. The key is a biscuit that can absorb moisture and soften into a cake-like texture without becoming mushy too quickly. Avoid heavily flavored or very thin, delicate biscuits.
Can I make this dessert ahead of time for a party?
Absolutely! In fact, this dessert is perfect for making ahead. Since it requires a minimum of 4-6 hours to chill and set, preparing it the day before your event is ideal. This allows the flavors to meld beautifully and the biscuits to fully soften, resulting in the best possible texture. Simply keep it covered tightly in the refrigerator until ready to serve.
My cream cheese mixture is lumpy. What went wrong?
Lumpy cream cheese is almost always due to using cold cream cheese. It’s crucial for the cream cheese to be at room temperature and soft before you start mixing. If your mixture is lumpy, you can try beating it for a longer period with an electric mixer, scraping down the sides of the bowl frequently. If it’s still very lumpy, you might have to accept a slightly less smooth texture or, in extreme cases, start over with properly softened cream cheese.
Can I freeze this icebox dessert?
While you technically can freeze this dessert, the texture may change slightly upon thawing. The creamy layers might become a bit grainy, and the biscuits could become excessively soft or crumbly. For the best quality, it’s recommended to enjoy this dessert fresh from the refrigerator. If you do freeze it, wrap it very tightly in plastic wrap and then foil, and thaw it slowly in the refrigerator overnight before serving.