Introduction
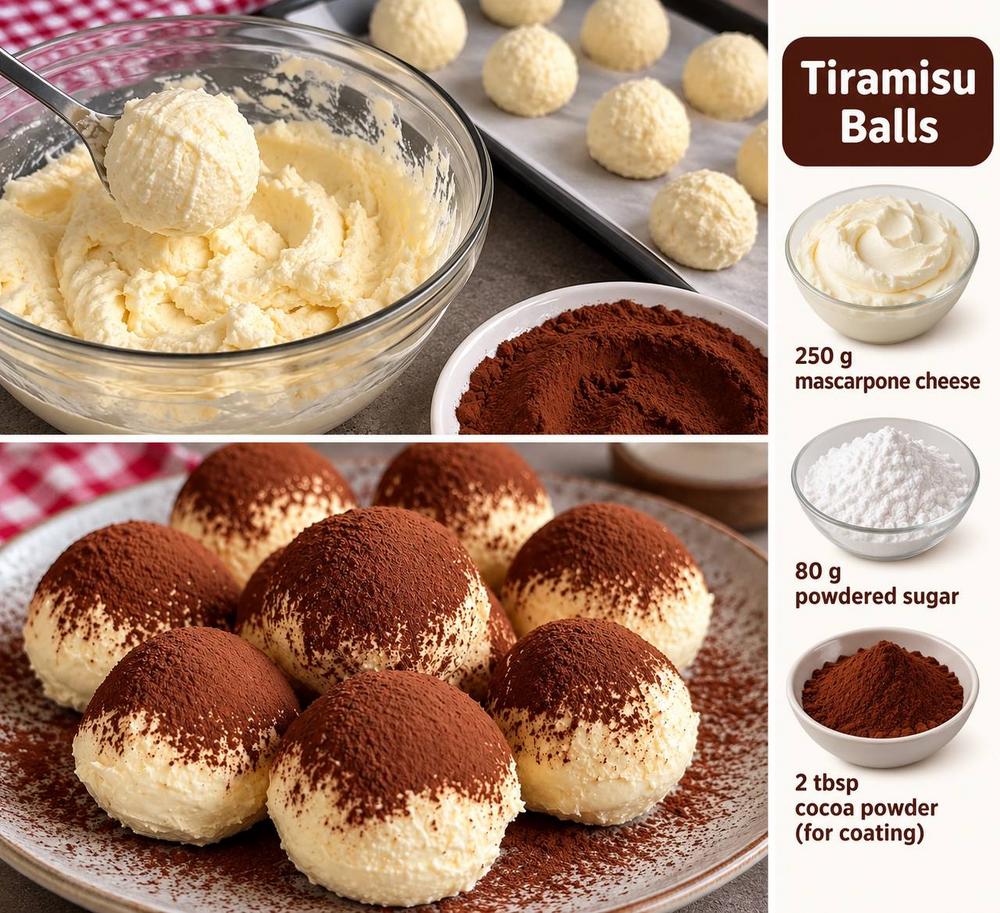
Get ready to indulge in the sublime flavors of tiramisu, reimagined into the most delightful, bite-sized treats you could ever imagine! We’re talking about No-Bake Creamy Tiramisu Balls – an easy, elegant dessert that delivers all the classic Italian charm without any of the fuss. Forget the lengthy assembly of traditional tiramisu; these little spheres of heaven are here to revolutionize your dessert game, making sophisticated flavors accessible to even the busiest home cooks. They’re perfect for satisfying that sweet craving, impressing guests, or simply treating yourself to a moment of pure, unadulterated bliss.
What makes these tiramisu balls truly special? It’s the harmonious blend of rich, tangy mascarpone cheese, balanced sweetness from powdered sugar, and a generous dusting of bitter cocoa powder, all coming together in a smooth, creamy texture that melts in your mouth. The “no-bake” aspect is a game-changer, especially during warmer months or when you’re short on time but still want to create something spectacular. Plus, their individual portion size makes them incredibly versatile – elegant for entertaining, convenient for grab-and-go treats, and easy to control portions (if you can stop at just one!).
Whether you’re a long-time tiramisu aficionado or new to its enchanting allure, these No-Bake Creamy Tiramisu Balls offer a fresh, exciting way to experience a beloved classic. They require minimal ingredients, simple steps, and deliver maximum impact in terms of flavor and presentation. Prepare to fall in love with your new favorite dessert that proves you don’t need an oven to create something truly extraordinary!
Nutritional Information
Per serving (approximate values):
- Calories: 150
- Protein: 2g
- Carbohydrates: 10g
- Fat: 11g
- Fiber: 0.5g
- Sodium: 25mg
Ingredients
- 250 g mascarpone cheese, softened at room temperature
- 80 g powdered sugar (confectioners’ sugar), sifted
- 1 teaspoon vanilla extract (optional, but recommended)
- 1 tablespoon strong brewed espresso or coffee liqueur (like Kahlua or rum), cooled (optional, for authentic flavor)
- 2 tablespoons unsweetened cocoa powder, for coating
- Pinch of espresso powder (optional, for mixing into the mascarpone)
Instructions
- Begin by ensuring your mascarpone cheese is softened at room temperature. This will make it much easier to mix and achieve a smooth, lump-free consistency.
- In a medium-sized mixing bowl, combine the softened mascarpone cheese and the sifted powdered sugar.
- Using a spatula or a hand mixer on low speed, gently mix the mascarpone and powdered sugar until they are just combined and smooth. Be careful not to overmix, as mascarpone can curdle if beaten too vigorously or for too long.
- If desired, now is the time to add your optional flavor enhancers. Stir in the vanilla extract, the cooled espresso or coffee liqueur, and/or a pinch of espresso powder. Mix until just incorporated. The mixture should be thick and creamy.
- Cover the bowl with plastic wrap and refrigerate the mascarpone mixture for at least 1-2 hours. This chilling step is crucial as it allows the mixture to firm up, making it much easier to roll into balls.
- Once the mixture is thoroughly chilled and firm, prepare your coating station. Pour the 2 tablespoons of unsweetened cocoa powder into a shallow dish or plate.
- Using a small cookie scoop (about 1-inch diameter) or two spoons, scoop out portions of the chilled mascarpone mixture. Gently roll each portion between your palms to form a smooth, uniform ball. If the mixture becomes too sticky, you can lightly dust your hands with a little extra powdered sugar, or re-chill the mixture for a short period.
- Immediately after forming each ball, drop it into the dish with the cocoa powder. Roll the ball around until it is completely coated on all sides.
- Carefully transfer the coated tiramisu balls to a serving platter or an airtight container.
- For the best flavor and texture, refrigerate the finished tiramisu balls for at least another 30 minutes before serving. This allows the flavors to meld and the coating to adhere well.
- Serve chilled and enjoy these delightful, bite-sized tiramisu treats!
Cooking Tips and Variations
Achieving perfectly creamy and delicious tiramisu balls is all about technique and a few clever tricks. First and foremost, ensure your mascarpone cheese is at room temperature before mixing. This prevents lumps and allows for a smoother, more homogenous blend with the powdered sugar. Overmixing mascarpone is a common pitfall; it can cause the cheese to separate and become grainy, so mix just until combined. Sifting your powdered sugar is also key to preventing a lumpy texture. If you find your mixture is too soft to roll after the initial chilling, don’t panic! Simply pop it back into the refrigerator for another 30 minutes to an hour. The colder it is, the firmer it will be and the easier it will be to handle. For uniform balls, a small cookie scoop (about 1 tablespoon capacity) is your best friend. This ensures each tiramisu ball is roughly the same size, which looks professional and helps with even chilling and serving.
When it comes to rolling, work quickly. Your hands’ warmth can soften the mixture, so if you’re making a large batch, consider chilling the mixture in smaller portions or taking breaks to re-chill your hands under cold water. For the cocoa coating, use a good quality unsweetened cocoa powder; it provides that essential bitter contrast to the sweet, creamy interior, which is characteristic of classic tiramisu. Dusting the balls just before serving can also help prevent the cocoa powder from absorbing moisture from the mascarpone and appearing damp. If you’re preparing these for a party, arrange them attractively on a platter, perhaps with a few coffee beans or a light drizzle of chocolate sauce for extra flair.
Flavor Boosters:
- Espresso Powder: For an intensified coffee kick, dissolve 1/2 teaspoon of instant espresso powder in 1 teaspoon of hot water and add it to the mascarpone mixture along with the vanilla.
- Coffee Liqueur/Rum: For an adult twist, substitute or add 1-2 tablespoons of coffee liqueur (like Kahlua), dark rum, or brandy to the mascarpone mixture. This truly enhances the authentic tiramisu experience.
- Vanilla Bean Paste: For a gourmet touch, use vanilla bean paste instead of extract; the visible specks add elegance and a deeper vanilla flavor.
Variations:
- Hazelnut Tiramisu Balls: Fold in 2 tablespoons of finely ground toasted hazelnuts into the mascarpone mixture. Alternatively, after coating in cocoa, roll them lightly in more finely ground hazelnuts for a delightful crunch and nutty flavor.
- Chocolate Chip Tiramisu Balls: Gently fold in 1/4 cup of mini chocolate chips (dark or semi-sweet) into the mascarpone mixture before chilling.
- White Chocolate Tiramisu Balls: For a lighter appearance and different flavor profile, you can omit the cocoa powder coating and instead roll the balls in finely grated white chocolate or drizzle them with melted white chocolate after chilling.
- Coconut Tiramisu Balls: Roll the finished balls in toasted shredded coconut for a tropical twist that pairs surprisingly well with the creamy interior.
- Orange Zest Tiramisu Balls: Add 1 teaspoon of finely grated orange zest to the mascarpone mixture for a bright, citrusy note that complements the rich flavors.
Storage and Reheating
These No-Bake Creamy Tiramisu Balls are fantastic make-ahead desserts, perfect for entertaining or enjoying throughout the week. To store them, place the coated tiramisu balls in a single layer in an airtight container. If you need to stack them, place a piece of parchment paper or wax paper between the layers to prevent them from sticking together or the cocoa coating from rubbing off. Store the container in the refrigerator. They will stay fresh and delicious for up to 3-4 days. While they technically won’t “go bad” beyond that, their texture and flavor are best within this timeframe. The cocoa coating can sometimes absorb moisture over time, becoming slightly damp, so if presentation is key, you might consider dusting with fresh cocoa powder just before serving if they’ve been stored for more than a day.
These tiramisu balls are designed to be served chilled, straight from the refrigerator. There is no reheating required or recommended, as warming them would cause the mascarpone mixture to soften significantly and lose its firm, creamy consistency. If you’ve stored them for a few days, simply take them out of the fridge a few minutes before serving to allow them to lose their chill slightly, which can enhance their flavor, but they should still be enjoyed cold.
Frequently Asked Questions
Can I make these ahead of time for a party?
Absolutely! These No-Bake Creamy Tiramisu Balls are an ideal make-ahead dessert. You can prepare them entirely, including the coating, up to 2-3 days in advance. Store them in an airtight container in the refrigerator, and they will be perfectly ready to serve when your guests arrive. In fact, making them ahead allows the flavors to meld and deepen, often making them even more delicious.
Do these tiramisu balls contain actual coffee?
The base recipe, as written, focuses on the “tiramisu flavor” profile using mascarpone and cocoa, mimicking the classic dessert’s essence. However, to achieve a more authentic coffee taste, it is highly recommended to add 1 tablespoon of strong brewed espresso or coffee liqueur (like Kahlua or rum) to the mascarpone mixture. This addition truly elevates the flavor to classic tiramisu standards. Without it, they are still delicious, but more of a creamy, chocolatey delight inspired by tiramisu.
Are these tiramisu balls gluten-free?
Yes, as per this recipe, these No-Bake Creamy Tiramisu Balls are naturally gluten-free. The ingredients listed – mascarpone cheese, powdered sugar, vanilla extract, optional coffee/liqueur, and cocoa powder – do not contain gluten. Traditional tiramisu often uses ladyfingers, which contain gluten, but since these balls do not incorporate ladyfingers, they are a safe and delicious option for those following a gluten-free diet.
What if my mixture is too sticky to roll into balls?
If your mascarpone mixture is too sticky or soft to roll, it likely needs more chilling time. Mascarpone softens quickly at room temperature. Place the bowl back into the refrigerator for at least another 30 minutes, or even an hour. A well-chilled mixture will be much firmer and easier to handle. You can also try lightly dusting your hands with a tiny bit of extra powdered sugar while rolling, or work quickly and re-chill your hands periodically if they are warming the mixture too much.