Instructions
- Preheat your oven to 350°F (175°C). Grease and flour (with oat flour or cocoa powder) an 8×8 inch square baking pan or a 9-inch round cake pan. Line the bottom with parchment paper for easier removal if desired.
- In a large mixing bowl, combine the dry ingredients: rolled oats, unsweetened cocoa powder, baking powder, baking soda, salt, and ground cinnamon. Whisk them together thoroughly, ensuring there are no lumps of cocoa powder. This step is crucial for an even rise and flavor distribution.
- In a separate medium bowl, whisk together the wet ingredients: unsweetened applesauce, almond milk, eggs, sugar substitute, melted coconut oil, and vanilla extract. Whisk until the mixture is smooth and well combined.
- Pour the wet ingredients into the dry ingredients. Mix with a spatula or wooden spoon until just combined. Be careful not to overmix, as this can lead to a tougher cake texture. A few lumps are perfectly fine.
- Gently fold in the chopped walnuts or pecans. Distribute them evenly throughout the batter.
- Pour the cake batter into the prepared baking pan, spreading it evenly with your spatula.
- Bake for 25-30 minutes, or until a wooden skewer or toothpick inserted into the center of the cake comes out clean. The exact baking time may vary slightly depending on your oven.
- Once baked, remove the cake from the oven and let it cool in the pan for about 10-15 minutes. This allows the cake to set and prevents it from breaking when transferred.
- Carefully invert the cake onto a wire rack to cool completely. It’s essential that the cake is fully cooled before applying the glaze, otherwise, the glaze will melt and run off.
- While the cake is cooling, prepare the chocolate glaze. In a microwave-safe bowl, combine the sugar-free chocolate chips, unsweetened almond milk, and coconut oil.
- Microwave on high for 30-second intervals, stirring well after each interval, until the chocolate is completely melted and smooth. Alternatively, you can melt the ingredients in a double boiler over simmering water, stirring constantly.
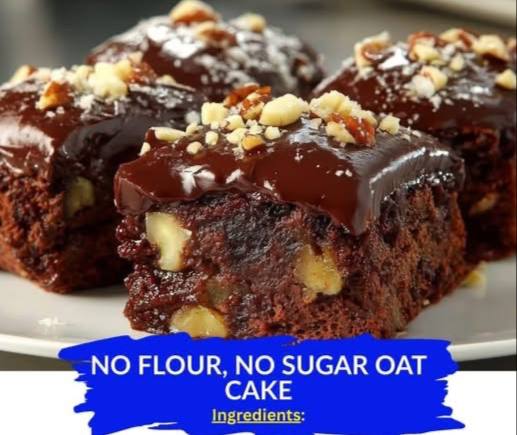
- Once the cake is completely cool, pour the warm chocolate glaze over the top, spreading it evenly with a spatula or the back of a spoon. Let some of it drip down the sides for a rustic look.
- Immediately sprinkle with additional chopped walnuts or pecans for garnish, if desired, before the glaze sets.
- Allow the glaze to set for about 15-20 minutes at room temperature, or you can place it in the refrigerator for 5-10 minutes to speed up the setting process.
- Slice and serve your delicious No Flour, No Sugar Oat Cake!
Cooking Tips and Variations
Achieving the perfect “No Flour, No Sugar Oat Cake” is an art, and these tips will help you master it. First, the type of oats matters. While rolled oats are ideal for their texture and ability to absorb moisture without becoming mushy, you can also use quick oats in a pinch. If you prefer a finer cake texture, you can pulse the rolled oats in a food processor a few times before mixing them in, creating a coarse oat flour. However, avoid turning them into a fine flour, as this can alter the cake’s density and moisture content. For a truly gluten-free cake, ensure your rolled oats are certified gluten-free, as conventional oats can be cross-contaminated during processing.
When it comes to sugar substitutes, there’s a world of options. Erythritol, Stevia blends, and monk fruit sweeteners are excellent choices, offering a clean sweetness without the calories or blood sugar spikes. Always check the conversion ratio on your specific sweetener’s packaging, as some are much sweeter than sugar and require less quantity. If you prefer a more natural, fruit-based sweetness, you can substitute some of the sugar substitute with mashed ripe bananas or date paste, though this will slightly increase the carbohydrate and calorie count and alter the overall flavor profile, leaning more towards a banana bread or date cake.
For the chocolate glaze, consistency is key. If your glaze seems too thick, add almond milk a teaspoon at a time until it reaches a pourable, yet still rich, consistency. If it’s too thin, you can add a few more chocolate chips and melt them in. A common mistake is to try and glaze a warm cake; this will result in a messy, runny glaze. Patience is a virtue here – let that cake cool completely! For an extra decadent touch, you can add a pinch of espresso powder to the glaze to deepen the chocolate flavor without adding a coffee taste.
Don’t be afraid to experiment with variations to make this cake your own. Instead of walnuts or pecans, try slivered almonds, shredded coconut, or a mix of seeds like chia or flax for added crunch and nutrients. A dash of cardamom or nutmeg can complement the cinnamon beautifully, adding another layer of warm spice. For a citrusy twist, add the zest of an orange or lemon to the batter. You can also incorporate dried fruits like unsweetened cranberries or chopped apricots for bursts of chewy sweetness, but be mindful that these will add natural sugars. For a richer flavor, consider toasting your nuts before adding them to the batter or as a garnish; this brings out their inherent oils and enhances their nutty aroma, adding another dimension of flavor and texture to your cake.
Storage and Reheating
Proper storage is essential to maintain the freshness and deliciousness of your “No Flour, No Sugar Oat Cake.” Once the cake has completely cooled and the chocolate glaze has set, it should be stored in an airtight container. This prevents it from drying out and keeps it fresh for longer. At room temperature, on your countertop, the cake will remain fresh for up to 2-3 days. However, due to the moisture content from the applesauce and eggs, and to prolong its shelf life, refrigeration is recommended. When stored in an airtight container in the refrigerator, this oat cake will stay moist and flavorful for up to 5-7 days.
If you plan to keep the cake for an extended period, it freezes beautifully. To freeze, first, ensure the cake is completely cooled and the glaze is fully set. You can freeze the entire cake or individual slices. For individual slices, wrap each slice tightly in plastic wrap, then place them in a freezer-safe bag or airtight container. For a whole cake, wrap it tightly in several layers of plastic wrap, then an additional layer of aluminum foil to prevent freezer burn. Frozen, the oat cake can last for up to 2-3 months. Thaw frozen slices overnight in the refrigerator or at room temperature for a few hours before serving.
Reheating this oat cake is simple, though it’s often delightful served chilled or at room temperature. If you prefer a warm slice, especially on a chilly day, you have a couple of options. For a quick warm-up, place a slice in the microwave for 15-30 seconds, depending on your microwave’s power. Be careful not to overheat, as this can dry out the cake. The goal is to gently warm it through. Alternatively, you can warm individual slices in a preheated oven at 300°F (150°C) for about 5-10 minutes, or until just warm to the touch. This method helps to maintain a slightly firmer texture than microwaving. Avoid reheating the entire cake at once unless you plan to serve it all immediately, as repeated reheating can affect its texture and moisture. Enjoy your delicious, healthy treat any way you like!
Frequently Asked Questions
Can I make this cake vegan?
Yes, absolutely! To make this “No Flour, No Sugar Oat Cake” vegan, you’ll need to make a few simple substitutions. Replace the two large eggs with flax eggs (2 tablespoons ground flaxseed mixed with 6 tablespoons water, let sit for 5 minutes until thickened). Ensure your almond milk is plant-based, which it typically is. For the coconut oil, you can use a vegan butter substitute or simply stick with coconut oil. For the chocolate glaze, make sure to use dairy-free chocolate chips. These changes will result in a delicious vegan oat cake that’s just as moist and flavorful.
Why is my oat cake dry?
Several factors can contribute to a dry oat cake. The most common culprit is overbaking. Ovens can vary, so always keep an eye on the cake and test for doneness with a toothpick at the earlier end of the recommended baking time. Another reason could be incorrect measurement of wet ingredients; ensure you’re using the specified amounts of applesauce, milk, and eggs. Also, if your oats were too finely ground (like oat flour), they might absorb too much moisture, leading to a drier cake. Lastly, using a pan size that is too large for the amount of batter can cause the cake to spread too thin and bake faster, resulting in dryness.
Can I use other types of flour instead of oats?
This recipe is specifically formulated to be “No Flour,” relying entirely on oats for its structure and texture. Substituting other flours, even gluten-free ones like almond or coconut flour, would drastically change the cake’s consistency, moisture content, and baking requirements. These flours absorb liquids differently and have varying protein and fat contents, meaning the recipe would need significant adjustments to ratios of wet and dry ingredients, leavening agents, and baking times. For the best results and to maintain the “No Flour” integrity of this recipe, it’s highly recommended to stick with rolled oats as specified.
How important is the cooling process before glazing?
The cooling process before glazing is critically important and should not be rushed. If you apply the chocolate glaze to a warm cake, the heat from the cake will melt the glaze, causing it to become runny and seep into the cake rather than forming a distinct, set layer on top. This not only makes for a messy appearance but also affects the texture of both the glaze and the cake. Allowing the cake to cool completely ensures that the glaze sets properly, creating a smooth, shiny, and firm topping that complements the cake beautifully. Patience here truly pays off for a visually appealing and delicious finish.