Introduction
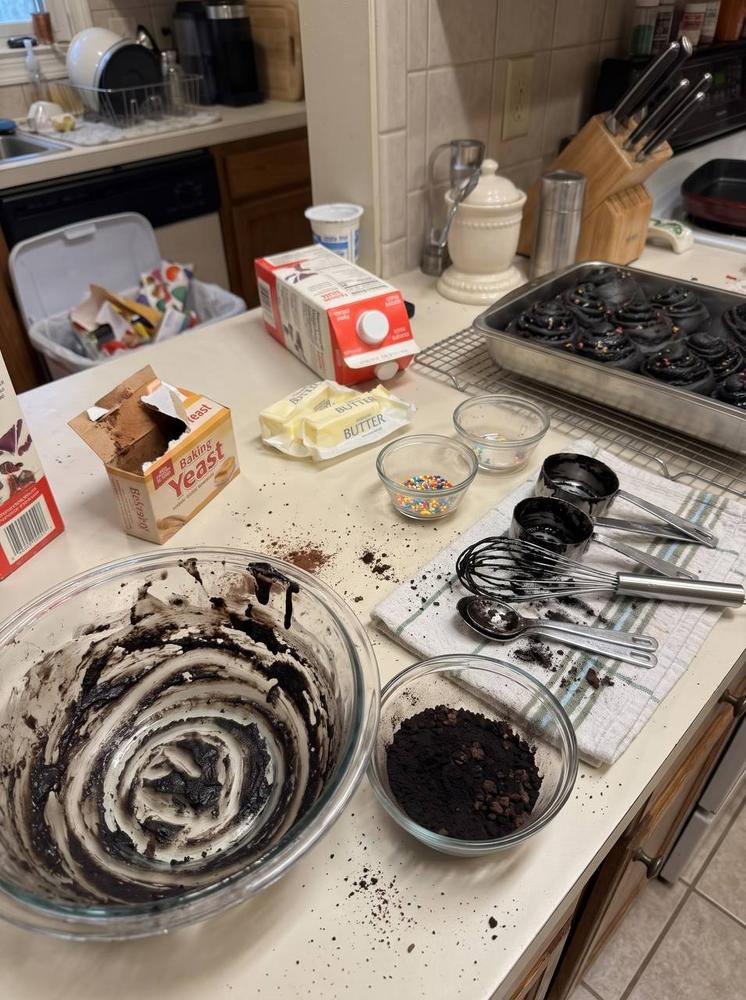
Prepare yourselves for a baking adventure that takes a beloved breakfast classic and catapults it into a realm of pure, unadulterated indulgence! We’re talking about Oreo Cookies and Cream Cinnamon Rolls – a recipe that marries the comforting warmth of a tender, yeasted cinnamon roll with the iconic, irresistible flavor of America’s favorite cookie. Imagine a soft, dark chocolatey dough, reminiscent of an Oreo wafer itself, swirled with a rich, buttery filling packed with crushed Oreo crumbs, all crowned with a luscious, tangy cream cheese glaze and a playful scattering of colorful sprinkles. This isn’t just breakfast; it’s an experience, a celebration, and quite possibly, the most fun you’ll ever have baking.
This recipe isn’t just about taste; it’s about creating something visually stunning and incredibly unique. The dough itself takes on a dramatic, deep black hue, thanks to the magic of black cocoa powder (or food coloring, if you prefer a purely aesthetic approach), making these rolls stand out from any other cinnamon roll you’ve ever encountered. Each bite delivers a symphony of textures and flavors: the delicate chew of the dough, the delightful crunch and chocolatey goodness of the Oreo filling, and the smooth, sweet tang of the cream cheese glaze that brings everything into perfect harmony. They’re decadent enough for dessert, special enough for a holiday brunch, and undeniably perfect for a weekend treat that will impress everyone.
So, whether you’re a seasoned baker looking for a fun new challenge or a curious culinary enthusiast ready to dive into something truly extraordinary, these Oreo Cookies and Cream Cinnamon Rolls are calling your name. Get ready to activate your yeast, crush some cookies, and transform simple ingredients into a batch of rolls that are as delicious to eat as they are beautiful to behold. Prepare for ooey-gooey, cookies and cream perfection that will have everyone asking for the recipe!
Nutritional Information
Per serving (approximate values):
- Calories: 550 kcal
- Protein: 8g
- Carbohydrates: 75g
- Fat: 25g
- Fiber: 2g
- Sodium: 350mg
Ingredients
- For the Dough:
- 1 cup (240ml) whole milk, warmed (105-115°F / 40-46°C)
- 2 ¼ teaspoons (1 packet) active dry yeast
- ¼ cup (50g) granulated sugar, plus 1 teaspoon for yeast
- 1 large egg, room temperature
- ¼ cup (56g) unsalted butter, melted and cooled slightly
- 3 ½ – 4 cups (420-480g) all-purpose flour, plus more for dusting
- ½ cup (45g) black cocoa powder (such as King Arthur Flour Black Cocoa), or regular cocoa powder plus black food coloring gel
- 1 teaspoon salt
- For the Oreo Filling:
- 1 ½ cups (about 18-20 Oreos) crushed Oreo cookie crumbs (about 150g)
- ½ cup (113g) unsalted butter, softened
- ½ cup (100g) packed light brown sugar
- 1 tablespoon all-purpose flour
- 1 teaspoon vanilla extract
- For the Cream Cheese Glaze:
- 4 oz (113g) cream cheese, softened
- ¼ cup (56g) unsalted butter, softened
- 2 cups (240g) powdered sugar, sifted
- 2-3 tablespoons whole milk or heavy cream
- 1 teaspoon vanilla extract
- Pinch of salt
- For Garnish (Optional):
- Colorful sprinkles
- Extra crushed Oreo crumbs
Instructions
- Activate the Yeast: In a large mixing bowl (or the bowl of a stand mixer), combine the warm milk and 1 teaspoon of granulated sugar. Sprinkle the active dry yeast over the top. Let it sit for 5-10 minutes until foamy, indicating the yeast is active.
- Prepare the Dough: To the foamy yeast mixture, add the remaining ¼ cup granulated sugar, the egg, and the melted butter. Whisk until well combined. In a separate bowl, whisk together 3 ½ cups of the all-purpose flour, black cocoa powder, and salt. Gradually add the dry ingredients to the wet ingredients, mixing with a wooden spoon or a dough hook on low speed until a shaggy dough forms. If using a stand mixer, increase speed to medium-low and knead for 5-7 minutes until the dough is smooth, elastic, and pulls away from the sides of the bowl. If kneading by hand, turn the dough out onto a lightly floured surface and knead for 8-10 minutes. The dough will be dark black and slightly sticky. Add more flour, a tablespoon at a time, if the dough is too sticky to handle, but avoid adding too much as it can make the rolls tough.
- First Rise: Lightly grease a large bowl with oil. Place the dough in the bowl, turning it once to coat. Cover the bowl with plastic wrap or a clean kitchen towel and let it rise in a warm, draft-free place for 1-1.5 hours, or until doubled in size. The exact rising time will depend on the temperature of your kitchen.
- Prepare the Oreo Filling: While the dough is rising, prepare the filling. In a medium bowl, combine the softened butter, brown sugar, 1 tablespoon of flour, and vanilla extract. Beat with a spoon or electric mixer until creamy and well combined. Stir in the crushed Oreo cookie crumbs. Set aside.
- Assemble the Rolls: Once the dough has doubled, gently punch it down to release the air. Turn the dough out onto a lightly floured surface. Using a rolling pin, roll the dough into a large rectangle, approximately 18×12 inches (45×30 cm). It should be about ¼ inch thick.
- Spread the Filling: Evenly spread the Oreo filling over the entire surface of the rolled-out dough, leaving a small ½-inch border along one of the long edges.
- Roll and Slice: Starting from the long edge opposite the border, carefully and tightly roll the dough into a log. Once rolled, pinch the seam closed to seal. Using a sharp knife or unflavored dental floss, cut the log into 12 even slices, each about 1.5 inches thick.
- Second Rise: Lightly grease a 9×13 inch (23×33 cm) baking pan. Arrange the sliced cinnamon rolls in the prepared pan, leaving a little space between each roll as they will expand. Cover the pan loosely with plastic wrap or a clean kitchen towel and let them rise in a warm place for another 30-45 minutes, or until visibly puffy.
- Bake: Preheat your oven to 375°F (190°C). Once the rolls have completed their second rise, remove the cover and bake for 20-25 minutes, or until the edges are lightly golden and the rolls are cooked through. Due to the dark color of the dough, it may be harder to tell if they are golden, so check for firmness and an internal temperature of around 200-205°F (93-96°C) if you have a thermometer.
- Make the Glaze: While the rolls are baking or cooling slightly, prepare the cream cheese glaze. In a medium bowl, beat the softened cream cheese and softened butter together until smooth and creamy. Gradually add the sifted powdered sugar, beating until fully incorporated. Add the vanilla extract, pinch of salt, and 2 tablespoons of milk or cream. Beat until smooth. If the glaze is too thick, add the remaining milk/cream a teaspoon at a time until you reach a pourable but still thick consistency.
- Finish and Serve: Remove the baked cinnamon rolls from the oven. Let them cool in the pan for about 5-10 minutes. While still warm, generously spoon or spread the cream cheese glaze over the top of the rolls. If desired, sprinkle with colorful sprinkles and extra crushed Oreos. Serve warm and enjoy!
Cooking Tips and Variations
Dough Handling is Key: Don’t rush the kneading or the rising process. Proper kneading develops the gluten, resulting in a tender, chewy roll. The first rise allows the yeast to work its magic, creating air pockets and flavor. A warm, draft-free spot (like a slightly warm oven that’s been turned off, or near a sunny window) is ideal for rising.
Achieving Deep Black Color: Black cocoa powder is highly recommended as it not only provides the stunning dark color but also a rich, deep chocolate flavor that complements the Oreos perfectly. If you can’t find black cocoa, you can use regular unsweetened cocoa powder and add a few drops of black food coloring gel to the wet ingredients for color, though the flavor will be less intense.
Crushing Oreos: For the filling, you want fine crumbs. A food processor is the quickest and easiest way to achieve this. If you don’t have one, place the Oreos in a sturdy Ziploc bag, seal it, and crush them with a rolling pin until you have fine crumbs. A few larger pieces are fine for texture.
Glaze Consistency: The amount of milk or cream needed for the glaze can vary slightly depending on the humidity and temperature. Add the liquid gradually, starting with 2 tablespoons, and then adding more a teaspoon at a time until your glaze is smooth, thick enough to cling to the rolls, but still pourable. Taste and adjust sweetness if desired.
Even Slicing: For perfectly uniform rolls, use unflavored dental floss to slice the log. Slide a piece of floss under the log, cross the ends over the top, and pull to cut through cleanly. This prevents squishing the dough, which can happen with a knife.
Don’t Overbake: Because the dough is dark, it can be tricky to tell when the rolls are done. Overbaking will result in dry rolls. Look for firmness to the touch and a slight pulling away from the sides of the pan. An internal temperature of 200-205°F (93-96°C) is ideal.
Variations:
- Different Cookie Flavors: Experiment with other sandwich cookies! Golden Oreos, Nutter Butters, or even chocolate chip cookies could make for exciting variations.
- Add-ins: Fold white chocolate chips, milk chocolate chips, or even chopped pecans into the Oreo filling for extra texture and flavor.
- Espresso Boost: Add a teaspoon of instant espresso powder to the dough or the filling to deepen the chocolate flavor.
- Chocolate Drizzle: For an extra touch of decadence, drizzle melted white or dark chocolate over the glazed rolls.
Storage and Reheating
Storage: These Oreo Cookies and Cream Cinnamon Rolls are best enjoyed fresh and warm. If you have leftovers, store them in an airtight container at room temperature for up to 2 days. For longer storage, refrigerate them for up to 5 days. If they are already glazed, the glaze may firm up in the refrigerator.
Reheating: To reheat, place individual rolls in the microwave for 15-30 seconds until warm and soft. If reheating multiple rolls or from the refrigerator, place them in a baking dish, cover loosely with foil, and warm in a preheated oven at 300°F (150°C) for 10-15 minutes, or until heated through. This will help to soften the dough and melt the glaze slightly, bringing them back to their fresh-baked glory.
Freezing (Unbaked): You can prepare the rolls up to the second rise. After slicing and arranging them in the baking pan, cover the pan tightly with plastic wrap and then aluminum foil. Freeze for up to 1 month. When ready to bake, transfer the frozen rolls to the refrigerator overnight to thaw and complete their second rise, or let them rise at room temperature for 3-5 hours before baking as directed.
Freezing (Baked): Baked and unglazed rolls can be frozen for up to 2 months. Wrap individual rolls tightly in plastic wrap and then foil. Thaw at room temperature and then warm in the oven. Glaze after reheating.
Frequently Asked Questions
Can I make the dough ahead of time?
Yes, you can! After the first rise, punch down the dough, cover the bowl tightly with plastic wrap, and refrigerate it overnight (up to 24 hours). The next day, let the dough come to room temperature for about 30 minutes before rolling it out and proceeding with the rest of the recipe. This slow rise in the fridge can actually enhance the flavor of the dough!
My dough isn’t rising, what went wrong?
The most common reasons for dough not rising are inactive yeast or incorrect milk temperature. Ensure your milk is warm (105-115°F / 40-46°C) – too hot will kill the yeast, too cold won’t activate it. Also, check the expiration date on your yeast. If your yeast didn’t foam in the initial step, it likely wasn’t active, and you’ll need to start over with fresh yeast.
Can I use regular cocoa powder instead of black cocoa powder?
You can, but the rolls will not have the distinctive dark black color of an Oreo cookie. They will be a lighter brown chocolate color. If you want to achieve the black color with regular cocoa, you will need to add a few drops of black food coloring gel to the wet ingredients of the dough. Keep in mind that black cocoa powder also contributes a unique, less bitter, and deeper chocolate flavor that regular cocoa might not provide.
How do I get fine Oreo crumbs for the filling?
The easiest way to get fine Oreo crumbs is to use a food processor. Simply pulse the whole Oreos (cream filling and all) until they are finely ground. If you don’t have a food processor, place the Oreos in a sturdy zip-top bag, seal it, and use a rolling pin or the bottom of a heavy pan to crush them until you achieve a fine, sandy consistency. A few larger bits are okay for texture, but aim for mostly fine crumbs for the best filling.