Instructions
- Preheat your oven to 350°F (175°C). Lightly grease a 9×13 inch baking dish with cooking spray or butter.
- In a large mixing bowl, combine the frozen hash browns, cream of chicken soup, sour cream, and about three-quarters of the shredded cheddar cheese (reserve the remaining cheese for the topping).
- Add any optional seasonings you desire, such as salt, black pepper, garlic powder, and onion powder, to the mixture. Stir well with a spoon or spatula until all ingredients are thoroughly combined and the hash browns are evenly coated.
- Pour the potato mixture into the prepared baking dish and spread it out evenly with your spatula or the back of a spoon.
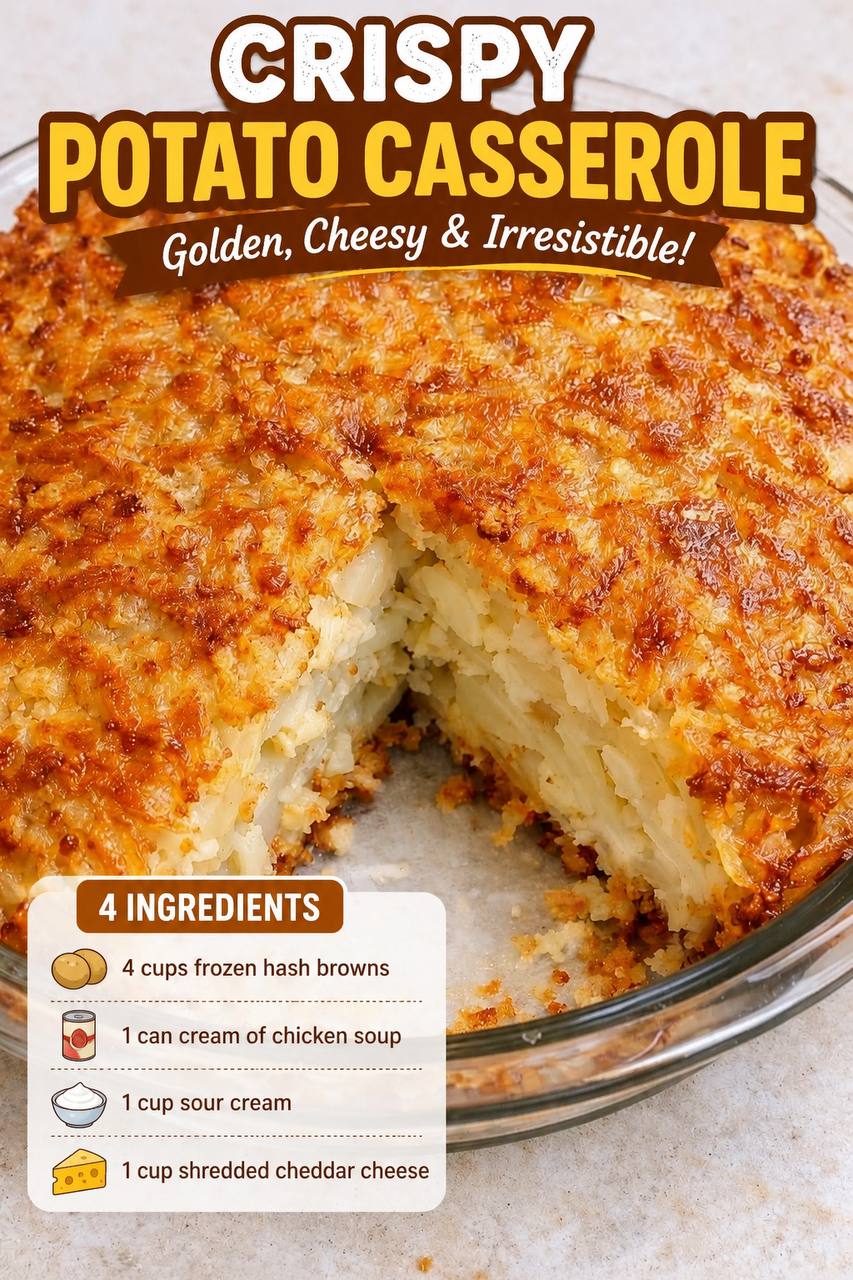
- Sprinkle the remaining reserved shredded cheddar cheese evenly over the top of the casserole. This will create that gorgeous golden and crispy crust.
- Bake in the preheated oven for 45-60 minutes, or until the casserole is bubbly around the edges, the potatoes are tender, and the top is beautifully golden brown and crispy.
- Once baked, remove the casserole from the oven. For an even crispier top, you can place it under the broiler for 1-2 minutes, watching carefully to prevent burning.
- Let the casserole rest for 5-10 minutes before serving. This allows the flavors to meld and the casserole to set, making it easier to serve.
- Garnish with fresh chives or green onions, if desired, before serving hot.
Cooking Tips and Variations
To achieve the absolute best Crispy Potato Casserole, there are a few tricks and variations you can try. For that signature crispy top, resist the urge to cover the casserole during the final stages of baking. Uncovered baking allows the cheese to melt, bubble, and turn golden brown and delightfully crunchy. If your oven tends to bake unevenly, or if you want an extra-crisp finish, consider a quick blast under the broiler for the last minute or two. Just be sure to watch it like a hawk, as cheese can go from perfectly golden to burnt in seconds.
Preventing a soggy casserole is key to its success. While the recipe calls for frozen hash browns, if they seem particularly icy or have a lot of frost, you can lightly press them with a paper towel to remove excess moisture before mixing. This helps ensure the casserole isn’t watery and sets up perfectly. Also, ensure your oven is fully preheated to the correct temperature, as a consistently hot oven is crucial for even cooking and crisping.
The beauty of this casserole is its adaptability. Don’t be afraid to experiment with your cheese choices! While cheddar is a classic, Monterey Jack, Colby Jack, a Mexican blend, or even a touch of smoked gouda can add wonderful new dimensions of flavor. For a richer, tangier note, consider using half sour cream and half cream cheese, softened, for an even creamier texture.
The “cream of” soup is another area for delicious variation. While cream of chicken soup provides a savory, umami base, you can easily swap it for cream of mushroom for a more earthy flavor, cream of celery for a subtle vegetal note, or even a dairy-free cream of mushroom soup for a plant-based option. Always check the ingredients if you’re catering to specific dietary needs.
To truly make this casserole your own, consider adding some mix-ins. For a heartier dish, cooked and crumbled bacon, diced ham, or shredded cooked chicken can be folded into the mixture. Sautéed aromatics like diced onions, bell peppers, or even mushrooms can add depth and flavor. A pinch of paprika sprinkled over the top along with the cheese can also enhance the golden color and add a subtle smoky flavor. Fresh herbs like chives or parsley stirred in at the end or sprinkled as a garnish add a fresh burst of flavor.
This casserole is also a fantastic make-ahead option. You can assemble the entire dish, cover it tightly with plastic wrap, and refrigerate it for up to 24 hours before baking. When ready to bake, remove it from the fridge and let it sit at room temperature for about 30 minutes before placing it in the oven. You may need to add an extra 10-15 minutes to the baking time if baking from cold. This makes it perfect for holiday meals or potlucks, allowing you to do most of the prep work in advance.
Finally, think about how you’ll serve it. This Crispy Potato Casserole is incredibly versatile. It makes an excellent side dish for roasted chicken, a juicy ham, grilled steak, or even a simple meatloaf. It’s also a fantastic addition to a brunch spread alongside eggs, bacon, and fresh fruit. Its comforting nature makes it a perfect accompaniment to almost any meal where you want a reliable, delicious, and easy-to-make side.
Storage and Reheating
Proper storage and reheating are key to enjoying your Crispy Potato Casserole for days after it’s baked. Once the casserole has cooled completely to room temperature, cover the baking dish tightly with plastic wrap or aluminum foil. Alternatively, you can transfer individual portions to airtight containers. Store the casserole in the refrigerator for up to 3-4 days. It’s important to cool it completely before refrigerating to prevent condensation and maintain texture.
When it comes to reheating, you have a few options depending on your preference for crispiness. For best results, especially if you want to revive that crispy top, preheat your oven to 300-325°F (150-160°C). Place the casserole (covered with foil to prevent drying out, or uncovered for crispier edges) in the oven and bake for 20-30 minutes, or until heated through. If reheating a whole casserole, you might want to remove the foil for the last 5-10 minutes to help re-crisp the top. For individual portions, a toaster oven works wonderfully for achieving crispiness.
You can also reheat individual portions in the microwave, though this method will result in a softer texture rather than a crispy one. Place a serving on a microwave-safe plate and heat on high for 1-2 minutes, stirring halfway through, until hot. Be careful not to overheat, as this can dry out the potatoes. While freezing is possible, the texture of the potatoes and the creaminess of the sauce can change upon thawing and reheating, often becoming a bit mushier. If you do freeze, wrap tightly in foil and then plastic wrap, and it can be stored for up to 2-3 months. Thaw overnight in the refrigerator before reheating in the oven.
Frequently Asked Questions
Can I use fresh potatoes instead of frozen hash browns?
While you certainly can use fresh potatoes, this recipe is specifically designed for the convenience and texture that frozen hash browns provide. If using fresh, you’ll need to peel and shred or dice them, and then par-boil or blanch them for a few minutes to ensure they cook through within the casserole’s baking time. You’ll also need to thoroughly drain and pat them dry to remove excess moisture, which is crucial for preventing a watery casserole.
My casserole isn’t getting crispy on top. What can I do?
There are a few reasons why your casserole might not be crisping up. Ensure your oven is fully preheated to the correct temperature. Make sure you aren’t covering the casserole during the entire baking process, as this traps steam and prevents crisping. For an extra boost, try increasing the oven temperature to 375°F (190°C) for the last 10-15 minutes, or, as mentioned in the tips, use the broiler for 1-2 minutes at the very end. Keep a very close eye on it if using the broiler to prevent burning.
Can I make this casserole dairy-free or gluten-free?
Yes, with a few substitutions! For a dairy-free version, use frozen hash browns that are dairy-free (most are, but check labels), a dairy-free cream of mushroom soup, dairy-free sour cream, and a dairy-free shredded cheese alternative. For a gluten-free version, ensure your cream of chicken soup is certified gluten-free (some brands are, or you can use a gluten-free cream of mushroom soup) and that your hash browns do not contain any gluten-added ingredients. All other ingredients are typically naturally gluten-free.
How far in advance can I prepare this casserole?
You can assemble the Crispy Potato Casserole up to 24 hours in advance. Simply mix all the ingredients, spread them into the prepared baking dish, cover tightly with plastic wrap, and refrigerate. When you’re ready to bake, remove it from the refrigerator about 30 minutes before placing it in the oven to allow it to come closer to room temperature. You might need to add an extra 10-15 minutes to the baking time to ensure it’s heated through and golden brown.