Introduction
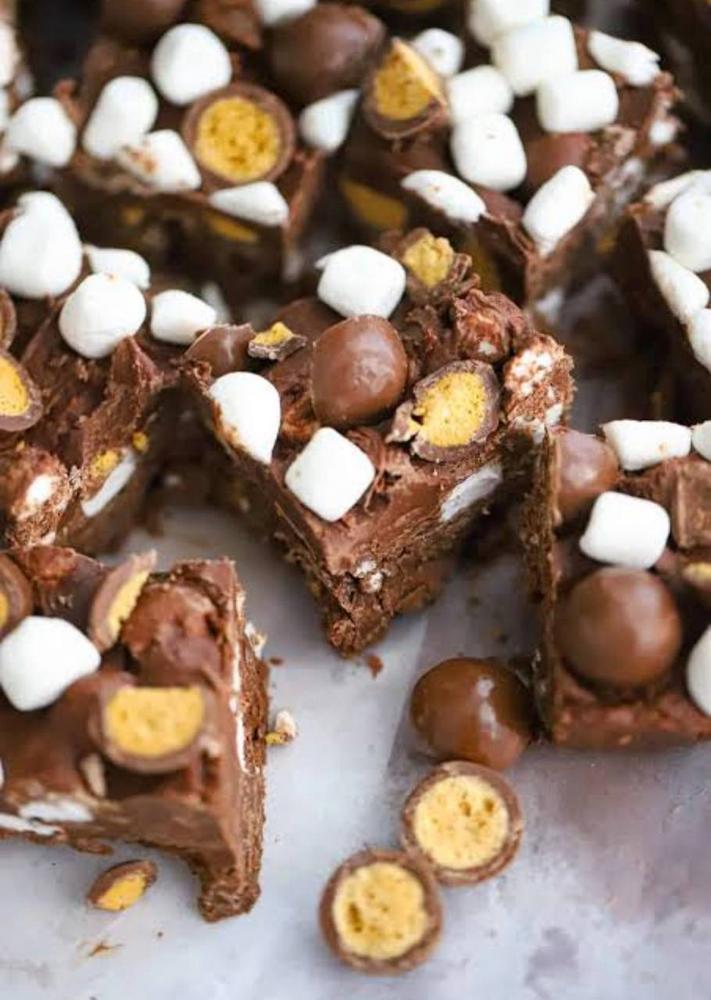
Get ready to experience dessert nirvana with our Sheet Pan Malted Milk Ball Magic Bars! Imagine the irresistible combination of chewy, crunchy, and intensely chocolatey, all packed into a convenient, easy-to-make bar. These aren’t just any ordinary dessert bars; they’re a symphony of textures and flavors, starring the nostalgic, slightly malty crunch of your favorite candy. Perfect for when you need a crowd-pleasing treat that looks impressive but comes together with minimal fuss, these magic bars live up to their name by magically disappearing from the pan almost as fast as you can make them.
What makes these bars truly “magic” is the effortless way layers of deliciousness meld together during baking. The unique malted milk flavor profile, a beloved classic, is elevated by gooey marshmallows and rich chocolate, creating a dessert that’s both familiar and excitingly new. Whether you’re whipping them up for a party, a potluck, satisfying a sudden sweet craving, or simply looking for a fun and rewarding baking project, these Sheet Pan Malted Milk Ball Magic Bars are your go-to. The “sheet pan” aspect means less cleanup and more time enjoying your delectable creation, making them an ideal choice for busy bakers and dessert enthusiasts alike.
Forget complicated recipes and endless dishes. With a simple layering technique and a single pan, you’ll achieve dessert perfection every time. The interplay of soft, chewy, gooey, and crunchy elements in every bite is truly addictive, guaranteeing that these bars will become a staple in your baking repertoire. Prepare to be enchanted by the ease and deliciousness of these delightful treats!
Nutritional Information
Per serving (approximate values):
- Calories: 320
- Protein: 4g
- Carbohydrates: 45g
- Fat: 15g
- Fiber: 2g
- Sodium: 180mg
Ingredients
- 1 ½ cups graham cracker crumbs (about 10-12 full graham cracker sheets)
- ½ cup (1 stick) unsalted butter, melted
- 1 (14-ounce) can sweetened condensed milk
- 1 ½ cups semi-sweet chocolate chips
- 1 cup milk chocolate chips
- 1 ½ cups malted milk balls, roughly chopped (about 6 ounces)
- 1 cup mini marshmallows
- ½ cup white chocolate chips (optional, for extra visual appeal and sweetness)
Instructions
- Preheat your oven to 350°F (175°C). Line a 9×13-inch baking pan with parchment paper, leaving an overhang on the sides to easily lift the bars out later. Lightly grease the parchment paper with cooking spray.
- In a medium bowl, combine the graham cracker crumbs and melted butter. Mix until the crumbs are evenly moistened.
- Press the graham cracker mixture evenly into the bottom of the prepared baking pan. Use the back of a spoon or your fingers to create a firm, compact crust.
- Evenly sprinkle the semi-sweet chocolate chips over the graham cracker crust.
- Next, sprinkle the milk chocolate chips over the semi-sweet chocolate chips.
- Distribute the roughly chopped malted milk balls over the chocolate chips. Ensure they are spread as evenly as possible.
- Scatter the mini marshmallows over the malted milk balls and chocolate chips. If using, sprinkle the white chocolate chips over the marshmallows.
- Pour the entire can of sweetened condensed milk evenly over all the layers. Gently tilt the pan to ensure the milk coats as much of the toppings as possible.
- Bake for 25-30 minutes, or until the edges are lightly golden brown and the center is set and bubbly. The marshmallows should be puffed and lightly toasted.
- Remove the pan from the oven and place it on a wire rack to cool completely. This is a crucial step for the bars to set properly and for clean cuts. Allow at least 2 hours for cooling, or even better, chill in the refrigerator for 1-2 hours after initial cooling.
- Once completely cooled and set, use the parchment paper overhangs to lift the entire slab of bars out of the pan. Place on a cutting board.
- Using a sharp knife, cut the bars into desired sizes, usually 16 or 24 squares. For cleaner cuts, you can warm your knife under hot water and wipe it clean between each slice.
- Serve and enjoy the magic!
Cooking Tips and Variations
Achieving perfect Sheet Pan Malted Milk Ball Magic Bars is all about attention to a few key details. First and foremost, do not skimp on lining your baking pan with parchment paper. This is your absolute best friend for easy removal and cleanup. Leave a generous overhang on the sides so you can lift the entire slab of bars out once cooled. Lightly greasing the parchment also helps, ensuring no sticky situations.
When pressing the graham cracker crust, aim for a firm and even layer. A compact crust prevents crumbling when you cut the bars. You can use the bottom of a flat glass or a measuring cup to get a really nice, even press. As for the toppings, even distribution is key to ensuring every bite gets a taste of all the delicious elements. Don’t just dump them in one spot; spread them out as best you can before pouring over the sweetened condensed milk.
The sweetened condensed milk acts as the magical binder that holds everything together and creates that signature chewy, gooey texture. Make sure to pour it evenly over all the layers. You might need to gently tilt the pan back and forth to help it spread into all the nooks and crannies. Don’t worry if it doesn’t cover absolutely everything; it will spread further during baking.
Baking time is crucial. Keep an eye on the bars, especially towards the end. You’re looking for lightly golden edges and a bubbly, set center. The marshmallows should be puffed and slightly golden brown. Overbaking can lead to a dry, hard bar, while underbaking will result in a messy, unset gooey center. When in doubt, a little bit longer is better than too short, as long as it’s not burning.
Perhaps the most important tip for success is patience during the cooling process. These bars absolutely need to cool completely, preferably for at least two hours at room temperature, or even better, a chill in the refrigerator for an hour or two after that. Attempting to cut them while warm will result in a sticky, crumbly mess. The cooling time allows the condensed milk to firm up and bind all the layers into a cohesive bar.
For cleaner cuts, use a sharp knife. For the absolute best results, run your knife under hot water, wipe it dry, and then make your cut. Repeat this process for each slice, wiping the knife clean of any sticky residue. This prevents dragging and creates beautifully neat squares.
Now, let’s talk variations! The beauty of magic bars is their versatility. While malted milk balls are the star here, you can certainly experiment. Feel free to swap out some of the chocolate chips for other varieties like dark chocolate, peanut butter chips, or even butterscotch chips for a different flavor profile. If you’re a nut lover, a sprinkle of chopped pecans, walnuts, or almonds would add another layer of crunch and richness. Just be mindful of any allergies if you’re serving these to a crowd.
For a seasonal twist, consider adding a sprinkle of crushed peppermint candies during the holidays, or a handful of toasted coconut flakes for a tropical vibe. You could also try different types of cookies for the crust; crushed shortbread or even chocolate wafer cookies would make a fantastic base. If you want to lean into the malt flavor even more, you could add a tablespoon or two of malted milk powder into the condensed milk before pouring it over. The possibilities are truly endless, allowing you to customize these bars to your heart’s content and create your own unique “magic” combinations!
Storage and Reheating
Proper storage is essential to keep your Sheet Pan Malted Milk Ball Magic Bars fresh, chewy, and delicious for as long as possible. Once the bars have completely cooled and been cut, transfer them to an airtight container. Layering them between sheets of parchment paper can prevent sticking, especially if they are particularly gooey. Store the container at room temperature for up to 3-4 days. For extended freshness, you can store them in the refrigerator for up to a week. Chilling them can also enhance their chewiness and make them even firmer, which some people prefer.
For longer-term storage, these magic bars freeze exceptionally well. Arrange the cut bars in a single layer on a baking sheet and freeze until solid, about 1-2 hours. Once frozen, transfer them to a freezer-safe airtight container or a heavy-duty freezer bag, again, layering with parchment paper to prevent sticking. They can be stored in the freezer for up to 2-3 months. Thaw frozen bars at room temperature for a few hours, or overnight in the refrigerator, before serving. There’s no need to reheat them; they are best enjoyed at room temperature or slightly chilled, where their textures truly shine.
Frequently Asked Questions
Can I use different types of malted milk balls?
Absolutely! While classic chocolate-coated malted milk balls are used in this recipe, you can experiment with different brands or even varieties if available (e.g., dark chocolate coated, white chocolate coated). Just ensure they are roughly chopped to allow for even distribution and a mix of crunchy textures throughout the bars.
My bars are too sticky and hard to cut. What went wrong?
This is a common issue and almost always due to not allowing the bars to cool completely. The sweetened condensed milk needs ample time to set and firm up. Make sure the bars are fully cooled at room temperature for at least 2 hours, or even better, chill them in the refrigerator for an additional 1-2 hours. A warm, sharp knife wiped clean between cuts can also help achieve cleaner slices.
Can I make these bars ahead of time for a party?
Yes, these bars are an excellent make-ahead dessert! They actually benefit from sitting for a few hours (or even overnight) as it allows the flavors to meld and the bars to fully set, making them easier to cut and serve. Follow the storage instructions to keep them fresh until your event.
What if I don’t have graham cracker crumbs?
No problem! You can easily substitute other crushed cookies for the crust. Popular choices include shortbread cookies, digestive biscuits, vanilla wafers, or even chocolate wafer cookies. Just ensure you have the same quantity of crumbs and mix them with melted butter as directed in the recipe.