Instructions
- Begin by ensuring your butter is properly softened. It should be pliable but not melted. In a large mixing bowl, using an electric mixer (stand mixer with paddle attachment or a hand mixer), cream together the softened unsalted butter and granulated sugar on medium-high speed. Beat for 3-5 minutes, scraping down the sides of the bowl occasionally, until the mixture is light, fluffy, and pale in color. This creaming step is crucial for incorporating air and creating a tender cookie.
- Reduce the mixer speed to low and add the egg yolk and pure vanilla extract. Mix until just combined, being careful not to overmix. Scrape down the sides of the bowl again to ensure everything is fully incorporated.
- In a separate bowl, whisk together the sifted all-purpose flour and fine sea salt. Gradually add the dry ingredients to the wet ingredients, a third at a time, mixing on low speed until just combined. Mix only until no streaks of flour remain. Overmixing the dough at this stage will develop the gluten in the flour, resulting in tough cookies. If the dough seems too stiff to pipe later, you can add 1-2 tablespoons of milk or cream, one teaspoon at a time, until it reaches a pipeable consistency.
- Once the dough is mixed, transfer it to a large pastry bag fitted with a large open star tip (such as an Ateco 826 or Wilton 1M). If you don’t plan to pipe immediately, cover the bowl with plastic wrap and chill the dough in the refrigerator for at least 30 minutes. Chilling the dough helps prevent the cookies from spreading too much during baking and helps them hold their intricate piped shapes.
- Preheat your oven to 375°F (190°C). Line two large baking sheets with parchment paper or silicone baking mats.
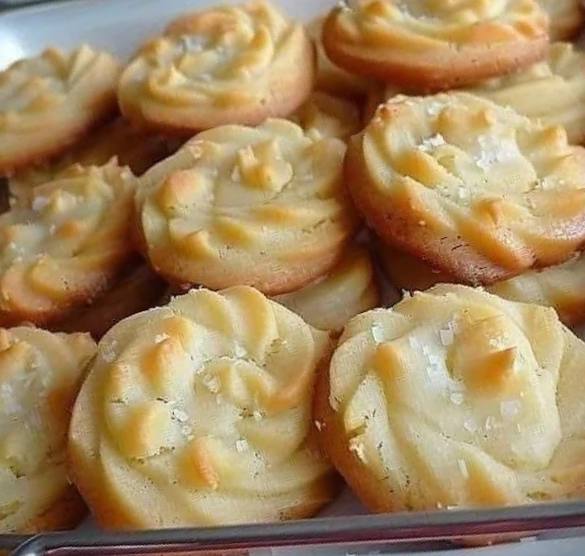
- Pipe the cookie dough onto the prepared baking sheets, leaving about 1 inch between each cookie. You can create various shapes like rosettes, S-shapes, or simple swirls. To make a rosette, hold the bag perpendicular to the baking sheet and pipe a small star, then pipe a circle around it, working outwards. For S-shapes, pipe a continuous S-curve. If desired, sprinkle a tiny pinch of coarse sea salt on top of each piped cookie.
- Bake one baking sheet at a time in the preheated oven for 10-14 minutes, or until the edges are lightly golden brown and the centers are set. The exact baking time will depend on your oven and the size of your cookies. Do not overbake, as these cookies are meant to be delicate and pale.
- Remove the baking sheets from the oven and let the cookies cool on the sheets for 5 minutes before carefully transferring them to a wire rack to cool completely. Cooling on the baking sheet initially helps them firm up before handling.
- Repeat the piping and baking process with the remaining dough. Ensure your baking sheets are cool before piping new batches of dough onto them, or the butter in the dough will melt too quickly.
- Once completely cooled, store the World’s Best Butter Cookies in an airtight container at room temperature.
Cooking Tips and Variations
For the absolute best butter cookies, the quality of your ingredients is paramount. Always opt for a high-quality, full-fat unsalted butter. European-style butters, with their higher fat content, will lend an even richer flavor and superior texture. Ensure your butter is truly at room temperature – not melted, not cold – for optimal creaming. If it’s too cold, it won’t cream properly, and if it’s too warm, it can separate and lead to greasy cookies. A good test is if your finger leaves an indentation easily when pressed. Similarly, your egg yolk should be at room temperature to prevent the butter mixture from seizing when added.
Do not skip the chilling step! Even a short 30-minute chill can make a significant difference in how well your cookies hold their shape. If your kitchen is particularly warm, or if you find your piped cookies are spreading too much, pop your baking sheets with the piped dough into the refrigerator for 10-15 minutes before baking. When piping, maintain steady pressure on the pastry bag for consistent shapes and sizes. If your hands get warm and soften the dough in the bag, you can briefly chill the pastry bag itself.
To prevent over-baking, watch your cookies closely. They should have just a hint of golden brown around the edges, but the centers should remain pale. They will continue to firm up as they cool. For perfectly even baking, rotate your baking sheet halfway through the baking time.
These butter cookies are a fantastic canvas for flavor variations. For a citrusy twist, add 1-2 teaspoons of finely grated lemon, orange, or lime zest to the butter and sugar mixture. For an almond butter cookie, swap out half of the vanilla extract for almond extract. A pinch of cardamom or a sprinkle of finely chopped pistachios can add an exotic touch. For chocolate lovers, you could dip one end of the cooled cookies in melted tempered chocolate and sprinkle with more coarse sea salt or finely chopped nuts. Alternatively, mix in mini chocolate chips or finely chopped white chocolate into the dough for a different texture and flavor profile.
Storage and Reheating
Once your World’s Best Butter Cookies are completely cooled, they can be stored in an airtight container at room temperature for up to 1 week. Placing a piece of parchment paper between layers of cookies can help prevent them from sticking together, especially if you have delicate piped designs. For longer storage, butter cookies freeze exceptionally well. Arrange the cooled cookies in a single layer on a baking sheet and freeze until solid, about 1-2 hours. Once frozen, transfer them to a freezer-safe airtight container or heavy-duty freezer bag, again with parchment paper between layers, for up to 2-3 months. Thaw frozen cookies at room temperature for about 30 minutes to an hour before serving. Reheating is generally not necessary, as these cookies are meant to be enjoyed at room temperature, but if you desire a slightly warmed cookie, you can briefly pop them in a preheated oven at 250°F (120°C) for 3-5 minutes, just until warmed through, being careful not to dry them out.
Frequently Asked Questions
Why are my butter cookies spreading too much?
There are several common reasons for cookies spreading. Your butter might have been too soft or even slightly melted when you started creaming. The dough might not have been chilled sufficiently before baking, or your oven temperature could be too low. Ensure your butter is at the correct room temperature, chill the dough for at least 30 minutes (or longer if your kitchen is warm), and double-check your oven temperature with an oven thermometer to ensure accuracy.
Can I make these cookies without a pastry bag and star tip?
Absolutely! While the piped design adds to their charm, you can certainly make delicious butter cookies without special equipment. You can roll the dough into a log, chill it, and then slice it into rounds before baking. Alternatively, you can roll out the dough to about 1/4-inch thickness between two sheets of parchment paper, chill it, and then cut out shapes using cookie cutters. The texture and flavor will be just as amazing, even if the appearance is different.
My dough is too stiff to pipe. What should I do?
If your dough is too stiff to pipe comfortably, it’s likely a bit too cold or there’s not enough liquid. Allow the dough to sit at room temperature for 10-15 minutes to soften slightly. If it’s still too stiff, you can beat in 1-2 tablespoons of milk or cream, one teaspoon at a time, until it reaches a more pliable, pipeable consistency. Be careful not to add too much liquid, as this can make the cookies spread excessively.
How can I make my butter cookies even more tender?
To achieve maximum tenderness, ensure you are not overmixing the dough once the flour is added. Mix only until the flour streaks disappear. Overmixing develops gluten, which can lead to a tougher cookie. Additionally, using cake flour instead of all-purpose flour for a portion of the recipe (e.g., swapping 1/4 to 1/2 cup of all-purpose flour for cake flour) can result in an even more delicate crumb, as cake flour has a lower protein content.