Introduction
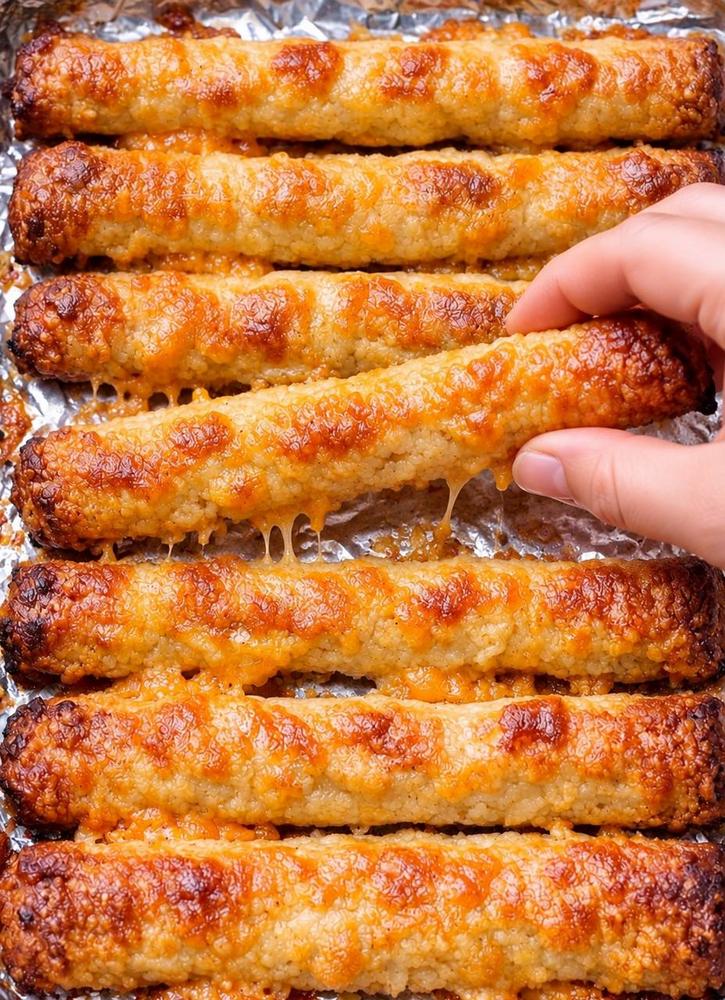
Get ready to meet your new favorite snack sensation: Crispy Baked Cheesy Potato Sticks! Imagine the ultimate comfort food experience, where every bite delivers a satisfying crunch, followed by a soft, fluffy potato interior, all enveloped in savory, melted cheese. These aren’t your average fries; they’re a homemade, baked masterpiece designed to elevate your snack game without the fuss of deep-frying. Perfect for game day, movie night, or simply when a craving for something truly delicious strikes, these potato sticks are about to become a staple in your culinary repertoire.
What makes these Crispy Baked Cheesy Potato Sticks so utterly irresistible? It’s the perfect harmony of textures and flavors. We start with a wholesome potato base, expertly seasoned and mixed with a generous helping of shredded cheese. Baked to golden-brown perfection, they develop an incredibly crispy exterior that gives way to a tender, cheesy heart. The aroma alone will have everyone flocking to the kitchen, and the taste? Pure bliss. They’re easy to make, a guaranteed crowd-pleaser, and incredibly versatile – equally fantastic as a standalone snack, a fun appetizer, or a delightful side dish to almost any meal.
Forget bland, greasy alternatives. This recipe focuses on simple ingredients and clever techniques to achieve maximum crispiness and cheesy goodness. You’ll love how effortlessly they come together, transforming humble potatoes and cheese into a snack that feels gourmet yet comforting. Prepare yourself for the ultimate crispy, cheesy, potato experience that will have you reaching for just one more, every single time!
Nutritional Information
Per serving (approximate values):
- Calories: 280
- Protein: 12g
- Carbohydrates: 35g
- Fat: 10g
- Fiber: 4g
- Sodium: 450mg
Ingredients
- 2 large Russet or Yukon Gold potatoes (about 1.5 lbs), peeled
- 1.5 cups shredded sharp Cheddar cheese, divided
- 1/2 cup all-purpose flour (plus more for dusting)
- 1 large egg, lightly beaten
- 2 tablespoons unsalted butter, melted
- 1 teaspoon salt
- 1/2 teaspoon black pepper
- 1 teaspoon garlic powder
- 1/2 teaspoon onion powder
- 1/2 teaspoon smoked paprika (optional, for color and flavor)
- 2 tablespoons fresh parsley, chopped (for garnish, optional)
- Cooking spray or additional melted butter for brushing
Instructions
- Prepare the Potatoes: Wash and peel the potatoes. Cut them into 1-inch chunks to ensure even cooking. Place the potato chunks in a large pot and cover with cold water. Add a pinch of salt to the water. Bring to a boil over high heat, then reduce heat to medium and simmer until the potatoes are fork-tender, about 15-20 minutes.
- Drain and Mash: Once cooked, thoroughly drain the potatoes. Return them to the hot pot over low heat for 1-2 minutes, shaking occasionally, to dry out any excess moisture. This step is crucial for crispy potato sticks! Remove from heat and mash the potatoes until smooth. A potato ricer will yield the smoothest results, but a traditional masher works well too.
- Combine Ingredients: Transfer the mashed potatoes to a large mixing bowl. Add 1 cup of the shredded Cheddar cheese, all-purpose flour, lightly beaten egg, melted butter, salt, black pepper, garlic powder, onion powder, and smoked paprika (if using). Mix thoroughly with a spatula or your hands until all ingredients are well combined and form a cohesive, slightly sticky dough. Be careful not to overmix, which can make the potatoes gummy.
- Preheat Oven and Prepare Baking Sheet: Preheat your oven to 400°F (200°C). Line a large baking sheet with parchment paper or aluminum foil, then lightly grease it with cooking spray or a thin layer of melted butter.
- Form the Sticks: Lightly flour your hands and a clean work surface. Take a portion of the potato mixture (about 2 tablespoons) and roll it between your palms to form a log, then gently roll it on the floured surface into a stick shape, approximately 4-6 inches long and 1-1.5 inches in diameter. The sticks should be uniform in size for even cooking. Repeat with the remaining potato mixture, placing the formed sticks on the prepared baking sheet, ensuring there is about 1 inch of space between each one to allow for even browning and crisping.
- First Bake: Bake the potato sticks for 15 minutes. This initial bake helps them firm up and start to crisp.
- Add More Cheese and Continue Baking: After 15 minutes, remove the baking sheet from the oven. Carefully sprinkle the remaining 1/2 cup of shredded Cheddar cheese over the tops of the potato sticks. Return the baking sheet to the oven and continue baking for another 15-20 minutes, or until the potato sticks are beautifully golden brown, crispy on the outside, and the cheese is melted, bubbly, and slightly caramelized. For extra crispiness, you can turn on the broiler for the last 1-2 minutes, watching them very carefully to prevent burning.
- Serve Immediately: Remove the Crispy Baked Cheesy Potato Sticks from the oven. Let them cool on the baking sheet for a minute or two before transferring them to a serving platter. Garnish with fresh chopped parsley, if desired. Serve hot with your favorite dipping sauces and enjoy the ultimate crispy, cheesy goodness!
Cooking Tips and Variations
Achieving Maximum Crispiness: The key to truly crispy potato sticks starts with dry potatoes. After mashing, briefly return the drained potatoes to the hot pot over low heat for a minute or two, stirring constantly, to evaporate any residual moisture. This prevents a gummy texture and promotes crispiness. Also, do not overcrowd the baking sheet. Give each stick space to breathe so steam can escape, leading to a crispier exterior. For an extra crisp finish, you can lightly brush the sticks with a little extra melted butter or olive oil before baking, especially if not adding the extra cheese halfway through. A final blast under the broiler for 1-2 minutes (watch carefully!) can also intensify the golden-brown crust.
Perfect Potato Texture: Use starchy potatoes like Russet or Yukon Gold, as they mash up light and fluffy. Avoid waxy potatoes, which can become gluey. Mash the potatoes thoroughly, but be careful not to overmix the dough once the flour and egg are added, as this can activate the gluten in the flour and make the sticks tough.
Preventing Sticking: Always use parchment paper or aluminum foil on your baking sheet. Even then, a light mist of cooking spray or a thin layer of melted butter on the paper/foil will act as an extra layer of protection and contribute to a crispier bottom crust.
Even Browning: For consistently golden-brown sticks, rotate your baking sheet halfway through the baking time. This ensures all sides of the sticks get equal exposure to the oven’s heat.
Flavor Variations:
- Spicy Kick: Add 1/4 teaspoon of cayenne pepper or a pinch of chili flakes to the potato mixture. For a bolder flavor, finely chop a jalapeño (remove seeds for less heat) and mix it in.
- Herby Delight: Incorporate 1-2 tablespoons of finely chopped fresh herbs like chives, rosemary, or thyme into the potato dough. Dried Italian seasoning also works well.
- Gourmet Cheese Blends: Experiment with different cheese combinations. A mix of Gruyere and Parmesan, or Monterey Jack for extra meltiness, can elevate the flavor profile. Smoked gouda would add a wonderful depth.
- Bacon Bits: Mix in 1/4 cup of cooked and crumbled bacon bits into the potato dough for a smoky, savory twist.
- Loaded Potato Style: After baking, top the hot potato sticks with a dollop of sour cream, a sprinkle of fresh green onions, and more bacon bits for a “loaded” experience.
Dipping Sauce Ideas: While delicious on their own, these sticks are fantastic with a variety of dipping sauces. Classic ketchup, creamy ranch, tangy sour cream, spicy sriracha mayo, garlic aioli, marinara sauce, or even a sweet chili sauce are all excellent choices. Get creative and find your favorite pairing!
Storage and Reheating
Storing Leftovers: If you happen to have any Crispy Baked Cheesy Potato Sticks left over (a rare occurrence!), allow them to cool completely to room temperature. Once cooled, transfer them to an airtight container. They can be stored in the refrigerator for up to 3-4 days.
Freezing (Unbaked): For a make-ahead option, you can freeze the potato sticks before baking. After shaping the sticks, arrange them in a single layer on a parchment-lined baking sheet. Place the baking sheet in the freezer for 1-2 hours, or until the sticks are firm. Once frozen, transfer them to a freezer-safe bag or container. They can be stored in the freezer for up to 2-3 months. When ready to bake, place the frozen sticks directly on a prepared baking sheet and bake at 400°F (200°C) for 25-30 minutes, or until golden brown and crispy, adding the extra cheese halfway through as per the original instructions. You may need to add an extra 5-10 minutes to the baking time.
Freezing (Baked): You can also freeze baked potato sticks, though they may lose some crispiness upon reheating. Allow them to cool completely, then freeze them in a single layer on a baking sheet before transferring to an airtight container or freezer bag. Freeze for up to 1 month. Reheat from frozen.
Reheating: The best way to reheat Crispy Baked Cheesy Potato Sticks to restore their crispiness is in an oven or air fryer. Avoid the microwave, as it will make them soft and soggy.
- Oven Reheating: Preheat your oven to 375°F (190°C). Place the potato sticks in a single layer on a baking sheet. Reheat for 10-15 minutes, or until heated through and crispy.
- Air Fryer Reheating: Preheat your air fryer to 350°F (175°C). Place the potato sticks in a single layer in the air fryer basket, being careful not to overcrowd. Reheat for 5-8 minutes, shaking the basket halfway through, until hot and crispy.
Frequently Asked Questions
Can I use pre-shredded cheese?
While convenient, pre-shredded cheese often contains anti-caking agents like cellulose, which can prevent it from melting as smoothly and getting as gooey as freshly shredded cheese. For the best cheesy pull and flavor, we highly recommend shredding your own cheese from a block. However, if convenience is key, pre-shredded will work, but the texture might be slightly different.
My potato sticks aren’t getting crispy, what went wrong?
The most common culprits for non-crispy potato sticks are too much moisture in the potatoes or overcrowding the baking sheet. Ensure your mashed potatoes are as dry as possible after boiling – briefly returning them to the hot pot over low heat for a minute or two helps evaporate excess water. Also, always arrange the sticks with space between them on the baking sheet to allow steam to escape and promote even browning. If they’re still not crisping up, try increasing the oven temperature slightly for the last few minutes or finishing them under the broiler (watching carefully to prevent burning).
Can I make these gluten-free?
Yes, you can! Simply substitute the all-purpose flour with a gluten-free all-purpose flour blend (one that contains xanthan gum works best for structure) or a fine rice flour. The taste and texture should remain very similar, allowing those with gluten sensitivities to enjoy these delicious potato sticks.
What kind of potatoes are best for this recipe?
Russet potatoes (also known as baking potatoes) are ideal for this recipe because of their high starch content and low moisture. They mash up light, fluffy, and dry, which is perfect for achieving crispy exteriors. Yukon Gold potatoes are also a good choice, offering a slightly creamier texture and a naturally buttery flavor, though they may require a bit more drying time after mashing.