Introduction
There’s something undeniably magical about a casserole – that glorious, bubbling dish of comfort food that promises warmth, satisfaction, and often, an incredible cheese pull. And when it comes to the pinnacle of cozy, hearty goodness, our Hobo Hash Brown Casserole reigns supreme. Imagine this: a golden-brown, impossibly crispy topping giving way to a creamy, savory interior packed with tender hash browns, aromatic goodness, and an abundance of melty, stretchy cheese that practically begs you to grab a fork. This isn’t just a side dish; it’s a main event, a culinary hug, and the kind of meal that brings smiles to every face around the table.
The “Hobo” in Hobo Hash Brown Casserole speaks to its humble yet incredibly satisfying nature. It’s a dish born from simple, readily available ingredients transformed into something extraordinary. This recipe takes the classic hash brown casserole to new heights with its irresistible crispy cornflake topping and a cheese factor that will have you reaching for seconds (and maybe even thirds!). Whether you’re looking for the ultimate brunch centerpiece, a comforting dinner solution, or a show-stopping potluck contribution, this casserole delivers on all fronts. It’s easy to prepare, incredibly versatile, and guarantees a rich, savory experience with every single bite.
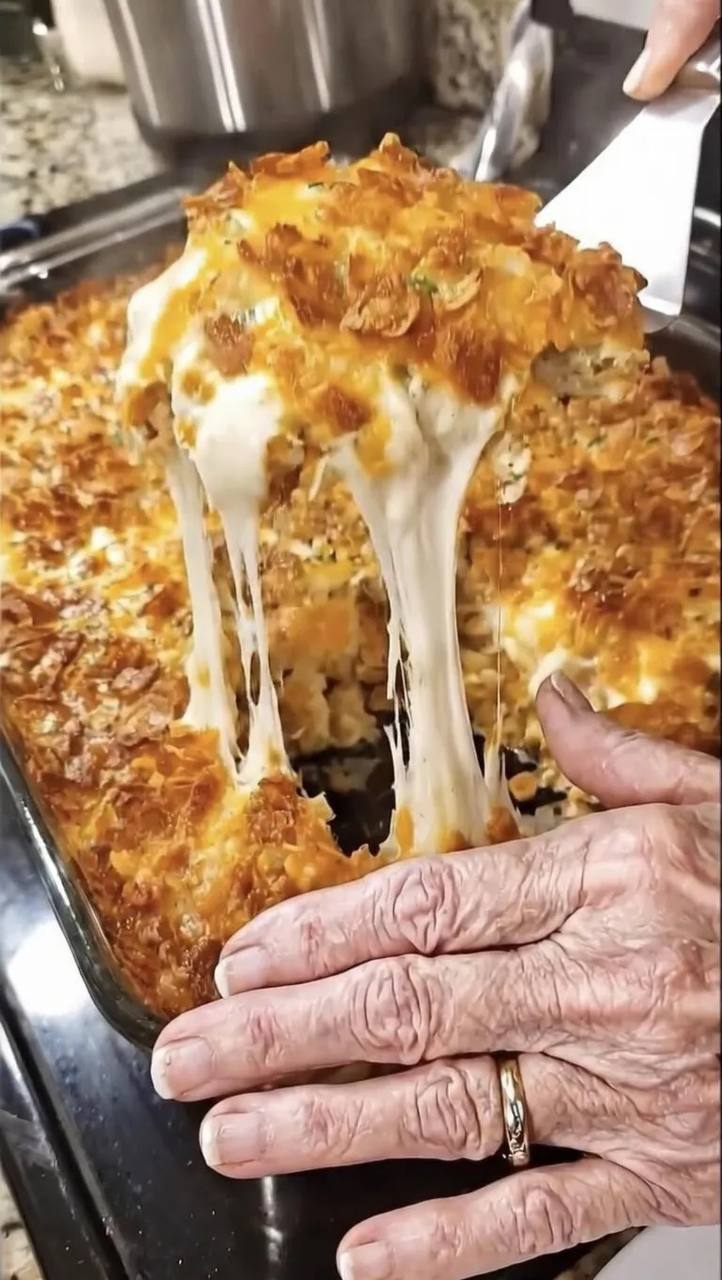
What makes our Hobo Hash Brown Casserole truly special is the perfect symphony of textures and flavors. We’re talking about that incredible moment when you scoop out a portion, and the cheese stretches for what feels like miles – a visual testament to the gooey, melty goodness within. The golden-brown, buttery cornflake topping provides a delightful crunch that contrasts beautifully with the soft, creamy hash brown base. Infused with savory seasonings and a hint of fresh herbs, this casserole isn’t just filling; it’s bursting with flavor. Get ready to fall in love with your new favorite comfort food masterpiece!
Nutritional Information
Per serving (approximate values):
- Calories: 480
- Protein: 18g
- Carbohydrates: 35g
- Fat: 30g
- Fiber: 3g
- Sodium: 850mg
Ingredients
- 30 ounces frozen shredded hash browns, thawed and drained well
- 1/2 cup unsalted butter, melted, divided
- 1 large yellow onion, finely diced
- 1 (10.5 ounce) can cream of chicken soup (or cream of mushroom for vegetarian)
- 1 cup sour cream
- 1/2 cup whole milk
- 1 teaspoon garlic powder
- 1/2 teaspoon onion powder
- 1/2 teaspoon black pepper
- 1/4 teaspoon salt (or to taste, depending on soup and cheese sodium)
- 2 cups shredded sharp cheddar cheese, divided
- 2 cups shredded Monterey Jack cheese, divided
- 1/4 cup fresh parsley, chopped (plus more for garnish)
- 2 cups crushed cornflakes
Instructions
- Preheat your oven to 375°F (190°C). Lightly grease a 9×13 inch baking dish with butter or cooking spray.
- Ensure your frozen hash browns are completely thawed. This is crucial for even cooking and preventing a watery casserole. Once thawed, spread them out on a clean kitchen towel or several layers of paper towels and press firmly to remove as much excess moisture as possible. This step helps achieve a crispy texture and prevents sogginess.
- In a large skillet, melt 2 tablespoons of the unsalted butter over medium heat. Add the finely diced yellow onion and sauté for 5-7 minutes, or until the onion is softened and translucent. Be careful not to brown it. Remove from heat and set aside.
- In a very large mixing bowl, combine the drained hash browns, sautéed onion, cream of chicken soup, sour cream, whole milk, garlic powder, onion powder, black pepper, and salt. Mix thoroughly until all ingredients are well combined.
- Add 1 cup of the shredded sharp cheddar cheese and 1 cup of the shredded Monterey Jack cheese to the hash brown mixture. Stir gently until the cheese is evenly distributed throughout the mixture.
- Pour the hash brown mixture into the prepared 9×13 inch baking dish, spreading it evenly with a spatula.
- Sprinkle the remaining 1 cup of sharp cheddar cheese and 1 cup of Monterey Jack cheese evenly over the top of the hash brown mixture. This layer of cheese will contribute significantly to that incredible cheese pull.
- In a medium bowl, combine the crushed cornflakes with the remaining 6 tablespoons of melted butter. Stir until the cornflakes are evenly coated.
- Evenly sprinkle the buttered cornflake mixture over the top of the cheese layer in the baking dish. This will form your signature golden, crispy topping.
- Bake the casserole in the preheated oven for 45-55 minutes, or until the casserole is bubbling around the edges and the cornflake topping is deeply golden brown and crispy. If the topping starts to brown too quickly, you can loosely tent the casserole with aluminum foil for the last 10-15 minutes of baking.
- Once baked, carefully remove the casserole from the oven. Let it rest for 10-15 minutes before serving. This resting period allows the casserole to set slightly, making it easier to scoop and ensuring that beautiful cheese pull holds its dramatic stretch.
- Garnish with extra fresh chopped parsley before serving, if desired. Serve warm and enjoy your ultimate comfort food!
Cooking Tips and Variations
Achieving the perfect Hobo Hash Brown Casserole is all about nailing those key elements: the crispy topping, the creamy interior, and that glorious cheese pull. Here are some pro tips and exciting variations to make your casserole truly shine.
Tips for Success:
- Thaw and Drain Hash Browns Thoroughly: This is arguably the most critical step. Excess moisture in frozen hash browns will lead to a watery, soggy casserole. After thawing, spread them on paper towels or a clean kitchen towel and press firmly to extract as much liquid as possible. You might be surprised how much comes out!
- Don’t Skimp on the Butter for the Topping: The melted butter mixed with the crushed cornflakes is what gives the topping its incredible golden color and irresistible crunch. Ensure the cornflakes are well coated for the best results.
- Cheese Blend for the Ultimate Pull: While cheddar is essential for flavor, cheeses like Monterey Jack, mozzarella, or Colby Jack are fantastic for their superior melt and stretch. Using a blend ensures both flavor and that dramatic cheese pull.
- Resting is Key: Just like a perfectly cooked steak, a casserole benefits from a short rest after baking. This allows the internal components to set, making it easier to scoop and preventing it from falling apart. It also helps the cheese maintain its gooey, stretchy texture.
- Seasoning Matters: Don’t rely solely on the cream soup for flavor. Garlic powder, onion powder, salt, and pepper are crucial for enhancing the overall taste. Taste the hash brown mixture before adding the final cheese layer and adjust seasonings if needed.
- Preventing Over-Browning: If your cornflake topping is browning too quickly before the casserole is fully heated through and bubbling, loosely tent the dish with aluminum foil. This will protect the topping while allowing the interior to finish cooking.
Customization Ideas and Variations:
- Add Protein:
- Breakfast Sausage: Brown 1 pound of breakfast sausage, drain the fat, and stir it into the hash brown mixture. This makes it a fantastic full-meal breakfast or brunch option.
- Ham: Add 1-2 cups of diced cooked ham for a savory, smoky flavor. Perfect for using up holiday ham leftovers.
- Bacon: Cook 8-10 slices of bacon until crispy, crumble, and stir half into the hash brown mixture and sprinkle the other half over the top with the cornflakes.
- Chicken: Shredded cooked chicken (about 2 cups) can be added for a heartier dinner casserole.
- Vegetable Boost:
- Bell Peppers: Sauté 1/2 cup of finely diced red or green bell peppers with the onion for added color and flavor.
- Mushrooms: Sauté sliced mushrooms until tender and add them to the hash brown mixture.
- Green Chiles: A small can of diced green chiles (drained) can add a mild, zesty kick.
- Spinach: Wilted and well-drained spinach can be folded into the hash brown base for extra nutrients.
- Cheese Swaps:
- Experiment with different cheese blends like Colby Jack, Provolone, or even a spicy pepper jack for a kick.
- A sprinkle of Parmesan cheese on top with the cornflakes can add a salty, umami depth.
- Topping Alternatives:
- Crushed Crackers: Ritz crackers or butter crackers can be crushed and mixed with melted butter for a savory, rich topping.
- Breadcrumbs: Panko breadcrumbs mixed with melted butter and a pinch of garlic powder create a crispier, lighter topping.
- Fried Onions: A layer of crispy fried onions (like the kind used for green bean casserole) can be added during the last 15-20 minutes of baking for a unique flavor and crunch.
- Spice It Up:
- Add a pinch of cayenne pepper or a dash of hot sauce to the hash brown mixture for a bit of heat.
- Include a teaspoon of smoked paprika for a deeper, smoky flavor.
- Herb Garden:
- Beyond parsley, consider fresh chives or finely chopped green onions for a fresh, oniony note.
- Creamy Base Alternatives:
- For an even richer base, substitute half of the sour cream with cream cheese, softened.
- A homemade white sauce (béchamel) can replace the canned soup for a from-scratch version.
Storage and Reheating
This Hobo Hash Brown Casserole is fantastic for meal prep or enjoying leftovers. Proper storage and reheating will ensure it remains delicious.
Storage:
- Cool Completely: Before storing, allow the casserole to cool completely to room temperature. This prevents condensation and helps maintain texture.
- Airtight Container: Transfer any leftover casserole into an airtight container. If you have a serving left in the original baking dish, you can cover it tightly with plastic wrap and then aluminum foil.
- Refrigeration: Store the casserole in the refrigerator for up to 3-4 days.
- Freezing (Baked): If you want to freeze baked leftovers, wrap individual portions tightly in plastic wrap, then aluminum foil, or place them in freezer-safe airtight containers. It can be frozen for up to 2-3 months. The topping might lose some of its crispness upon thawing and reheating, but the flavor will still be excellent.
- Freezing (Unbaked – Make Ahead): You can assemble the casserole (without the cornflake topping) in a freezer-safe baking dish. Cover tightly with plastic wrap, then foil. Freeze for up to 1 month. When ready to bake, thaw overnight in the refrigerator, then add the cornflake topping and bake as directed, possibly adding an extra 10-15 minutes to the baking time to ensure it’s heated through.
Reheating:
- Oven (Recommended for best texture):
- From Refrigerator: Preheat oven to 350°F (175°C). Place the casserole (covered with foil to prevent drying out) in the oven and bake for 20-30 minutes, or until heated through. For a crispier topping, remove the foil for the last 5-10 minutes.
- From Freezer (Thawed): Thaw overnight in the refrigerator. Reheat as directed above for refrigerated casserole.
- From Freezer (Frozen): This is possible but will take longer. Cover the frozen casserole tightly with foil and bake at 325°F (160°C) for 1 hour to 1 hour 30 minutes, or until heated through. Remove foil for the last 15-20 minutes to re-crisp the topping.
- Microwave (Quickest, but topping won’t be crispy):
- For individual portions, place on a microwave-safe plate. Heat on high for 1-2 minutes, stirring halfway through, until heated through. The topping will soften in the microwave, but it’s a convenient option for a quick reheat.
- Air Fryer (For individual portions/crispy topping):
- If you have an air fryer, this is a great way to re-crisp individual slices. Place a slice in the air fryer basket at 350°F (175°C) for 5-8 minutes, or until heated through and the topping is crispy again.
Frequently Asked Questions
What kind of hash browns are best for this casserole?
Shredded hash browns are ideal for this casserole as they create a cohesive, tender base. You can find them in the frozen section of most grocery stores. Make sure they are completely thawed and thoroughly drained of excess moisture before mixing, as this is crucial for preventing a watery casserole.
Can I make this casserole ahead of time?
Absolutely! This casserole is an excellent make-ahead dish. You can assemble the entire casserole, excluding the cornflake topping, and refrigerate it overnight (up to 24 hours). When you’re ready to bake, add the buttered cornflake topping and bake as directed, possibly adding an extra 10-15 minutes to the baking time since it will be going into the oven cold. This makes it perfect for stress-free entertaining or busy mornings.
What if I don’t have cream of chicken soup?
No problem! You can easily substitute cream of mushroom soup for a similar creamy base, which also makes the casserole vegetarian-friendly. Alternatively, you can make a homemade white sauce (béchamel) by melting 1/4 cup butter, whisking in 1/4 cup flour, and then gradually whisking in 2 cups of milk until thickened. Season with salt, pepper, and a pinch of nutmeg or garlic powder.
How do I get that perfect crispy topping?
The secret to the golden, crispy topping lies in two key steps: crushing the cornflakes well and thoroughly coating them in melted butter. Ensure the cornflakes are broken into smaller pieces (not powder, but not whole flakes) so they form an even layer. Mixing them with plenty of melted butter ensures they toast beautifully in the oven, creating that irresistible crunch. Baking until deeply golden brown and bubbling also contributes to the crispness.